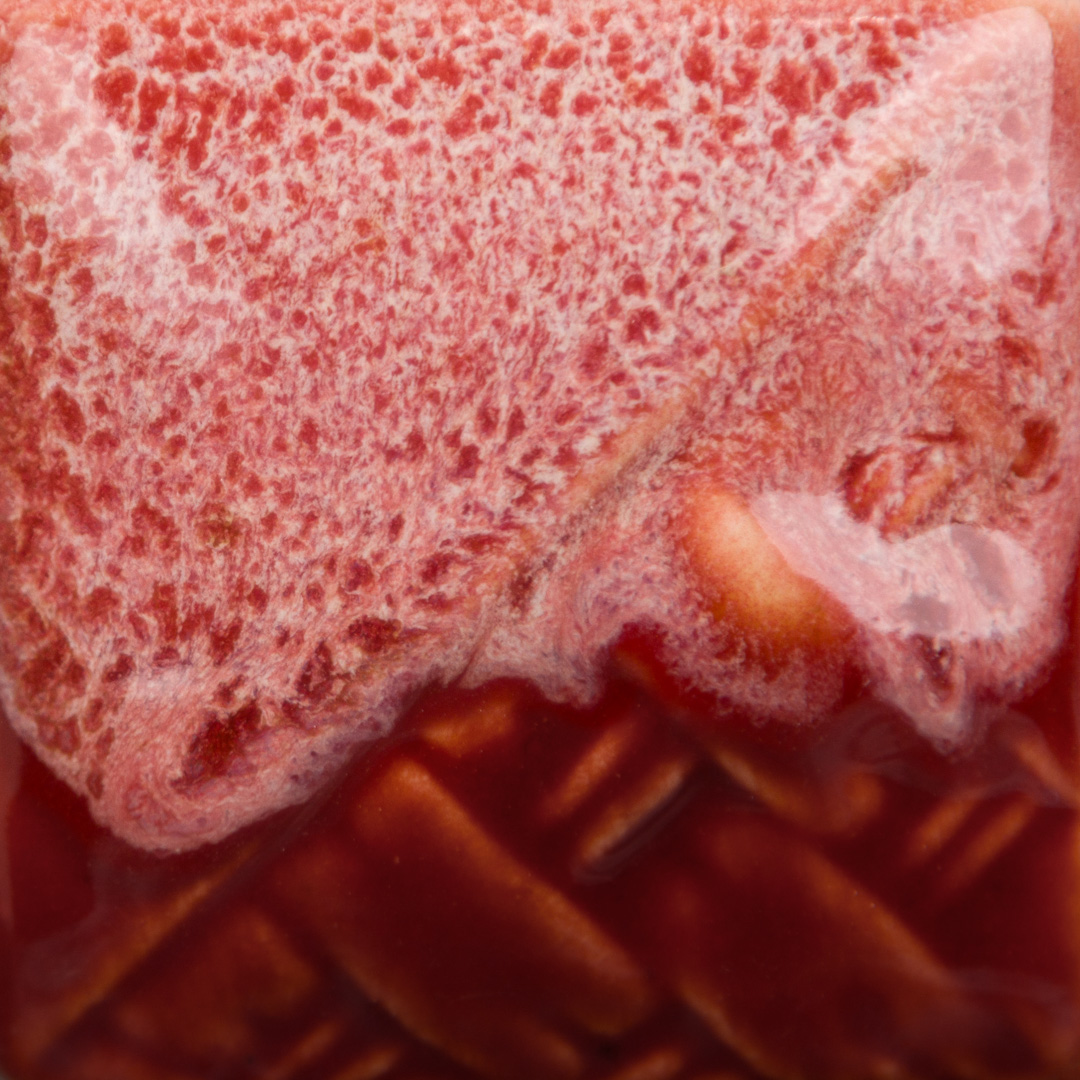
A glossy, transparent white glaze that breaks over texture. Contains green specks. Stable glaze.


White Clay, Cone 6 Oxidation
Wheat Clay, Cone 6 Oxidation

Speckled Clay, Cone 6 Oxidation

Red Clay, Cone 6 Oxidation
Dark Brown Clay, Cone 6 Oxidation
Black Clay, Cone 6 Oxidation
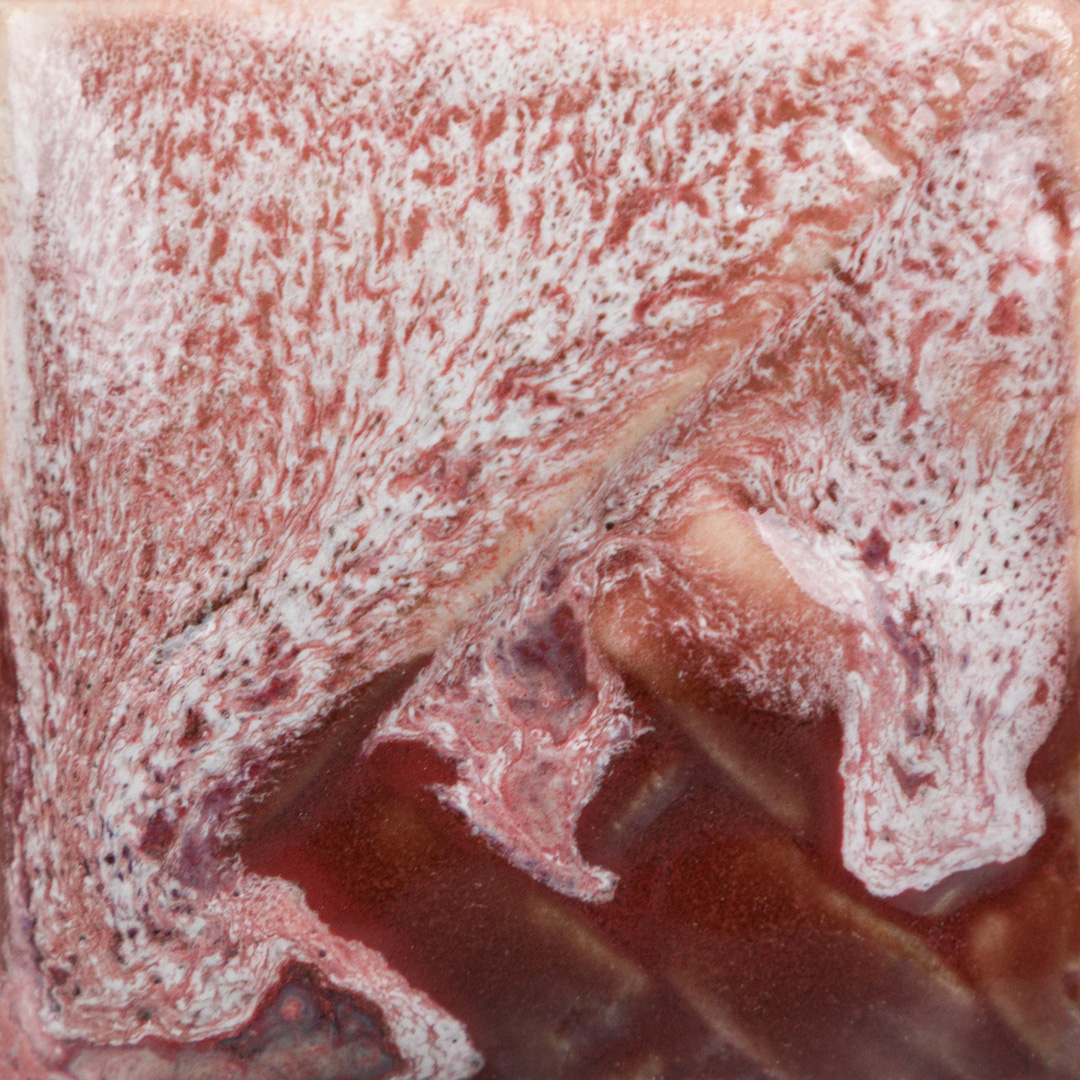
A glossy, transparent white glaze that breaks over texture. Contains green specks. Stable glaze.
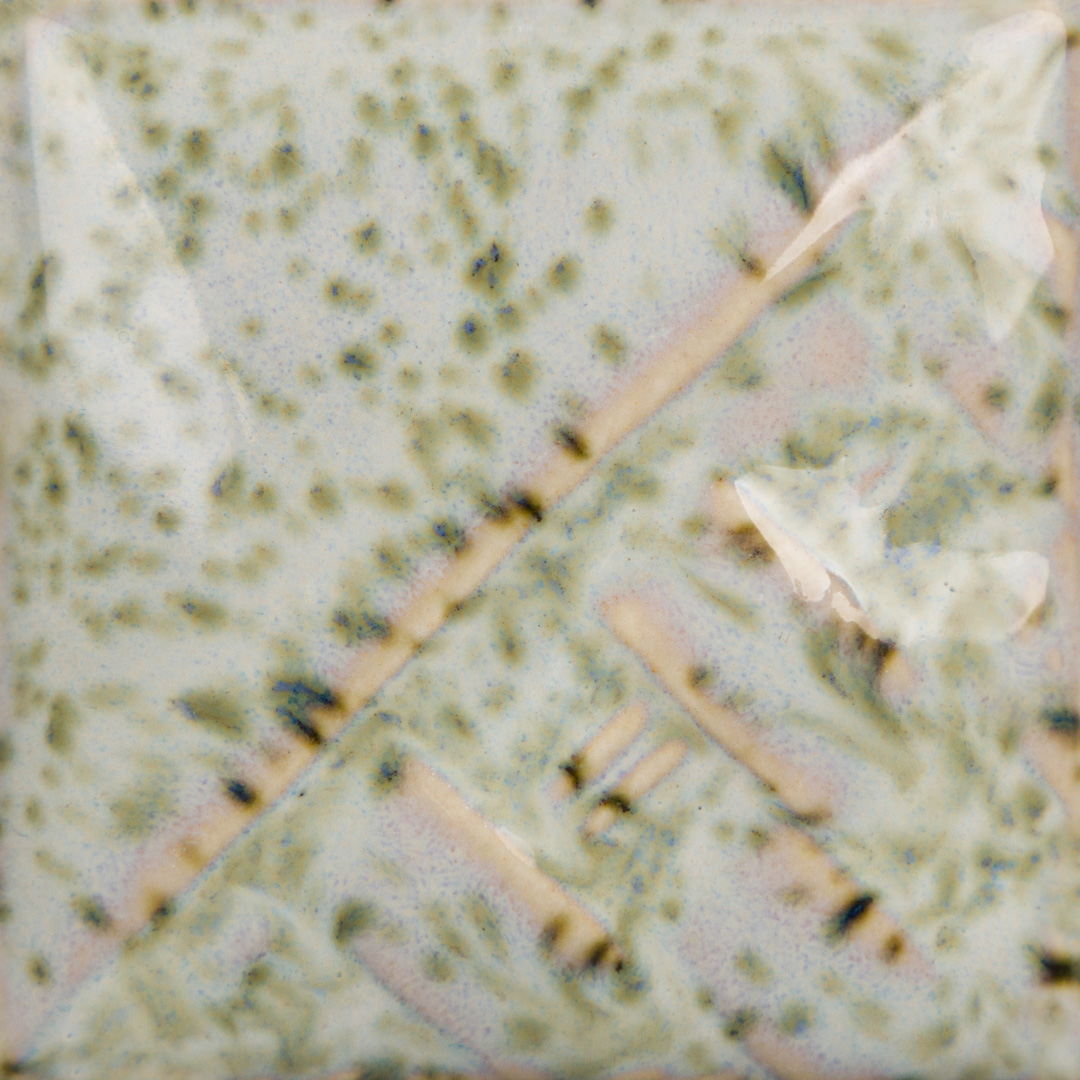
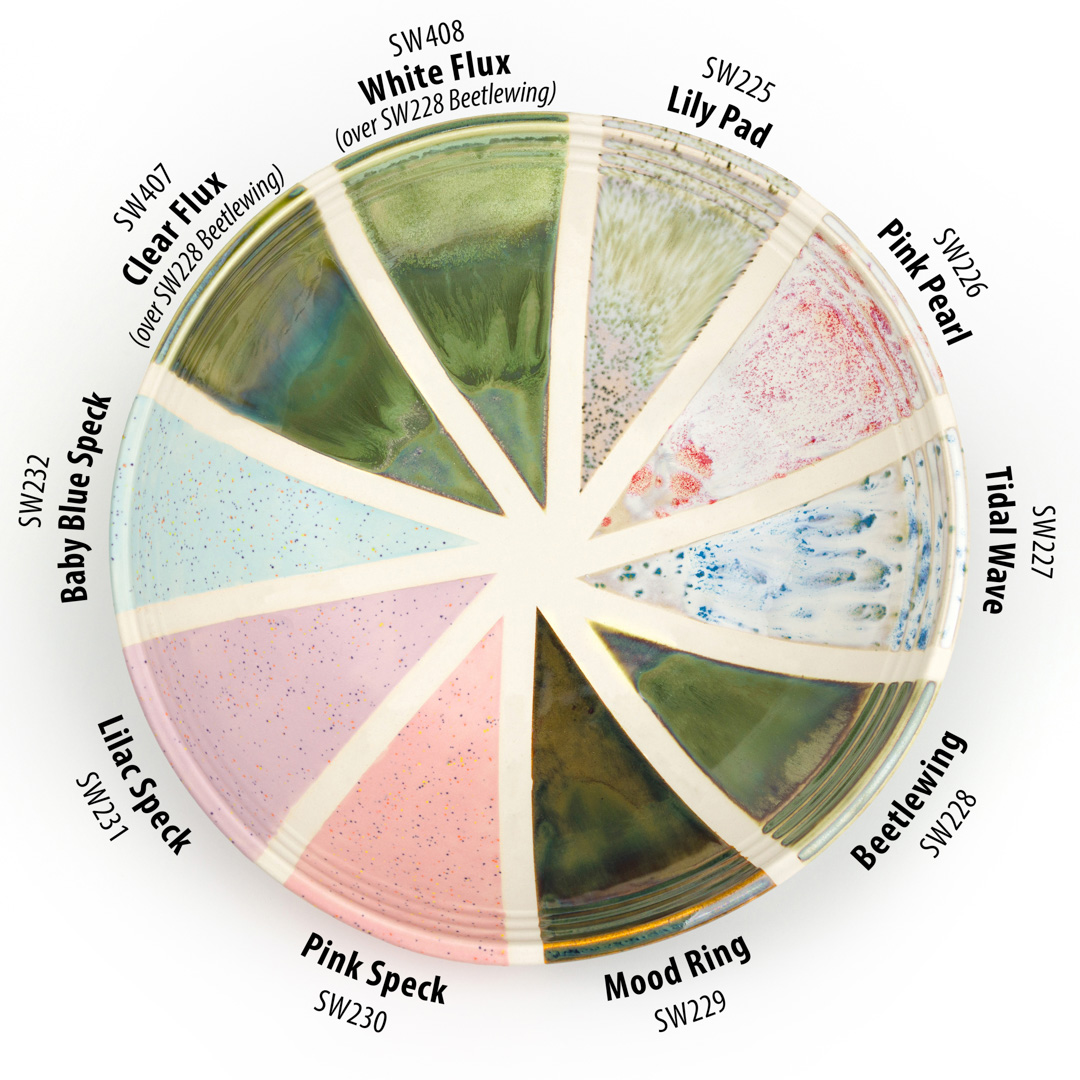
Cone 6 Oxidation
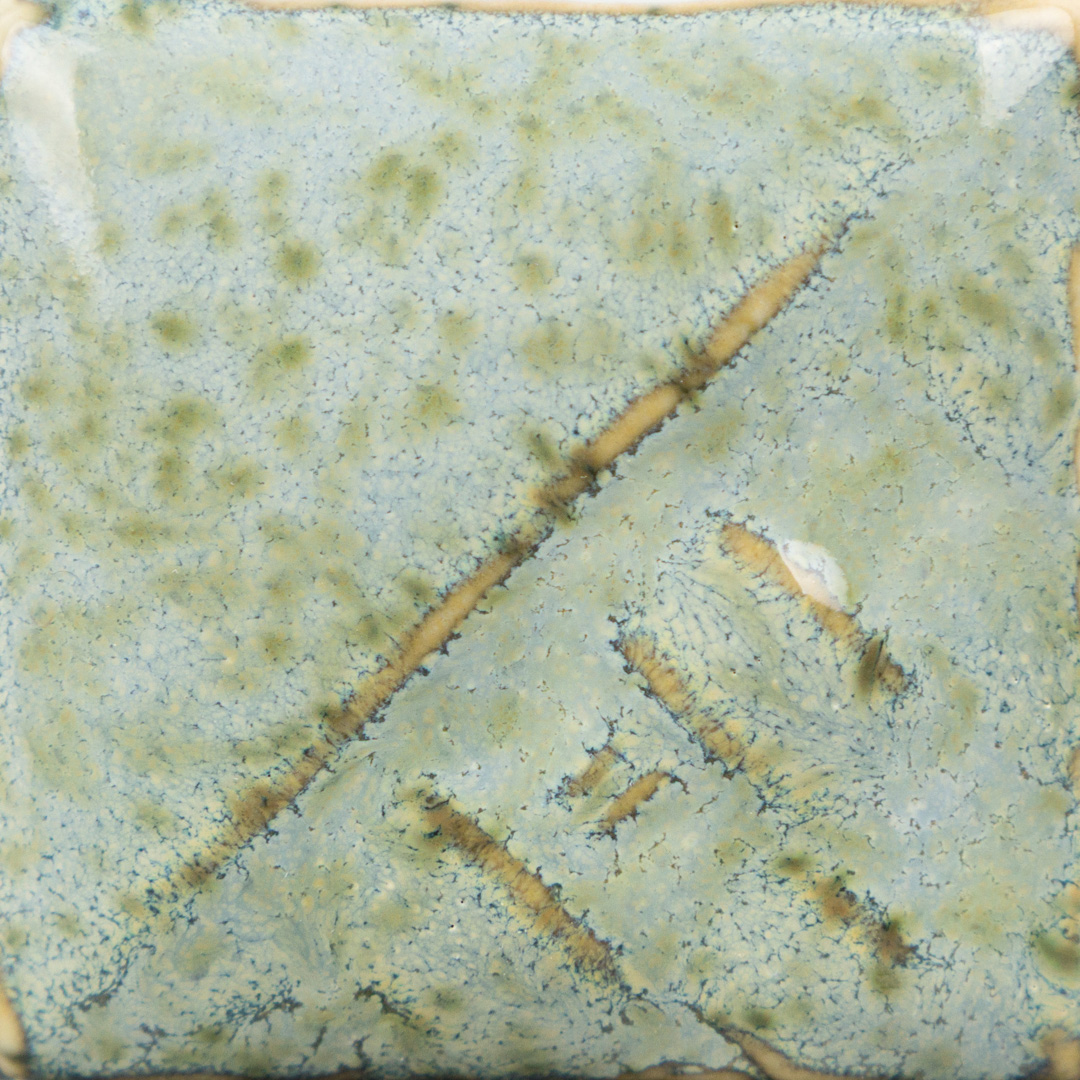
Cone 10 Reduction
1, 2, 3 Coats, Cone 5 Oxidation
1, 2, 3 Coats, Cone 6 Oxidation

1, 2, 3 Coats, Cone 10 reduction
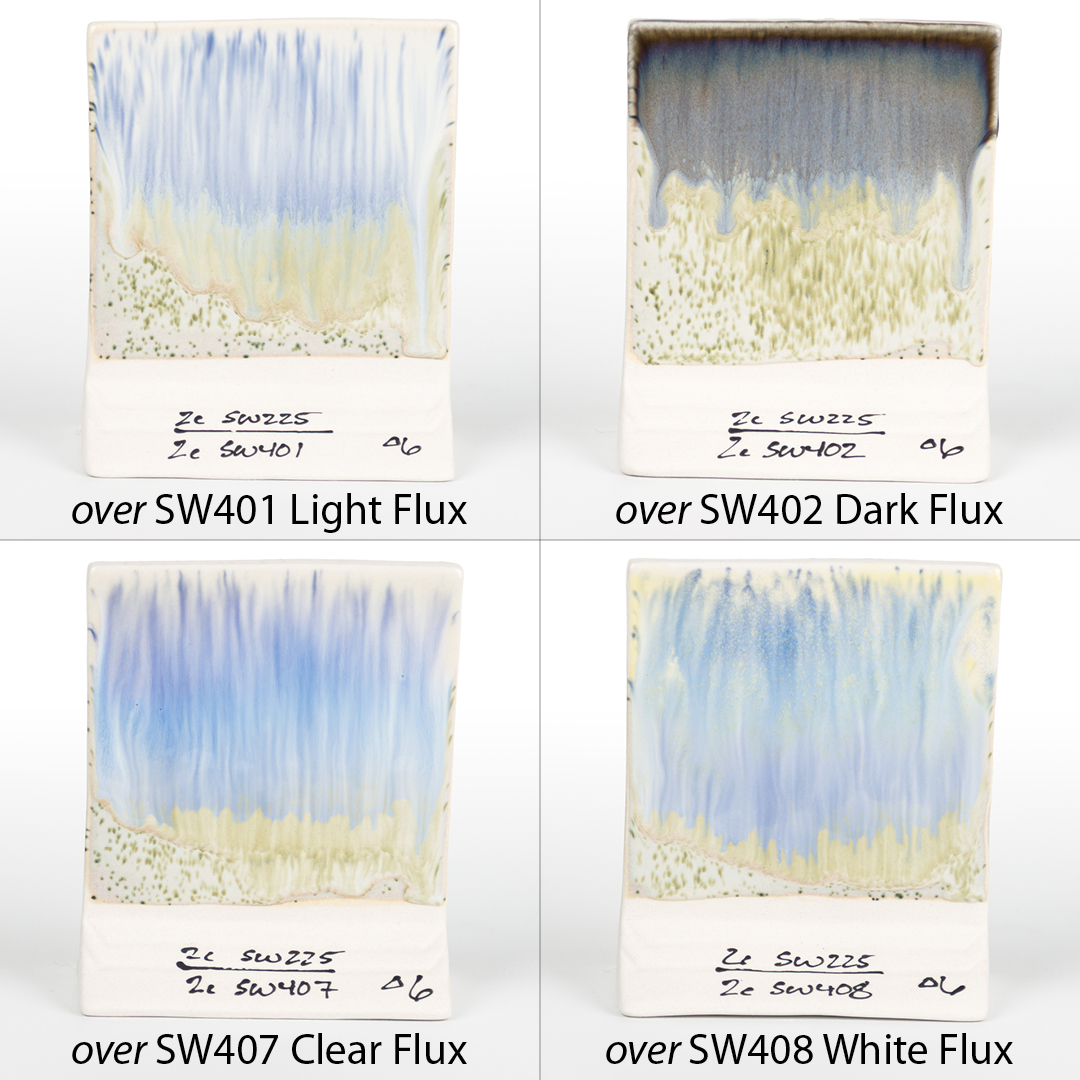
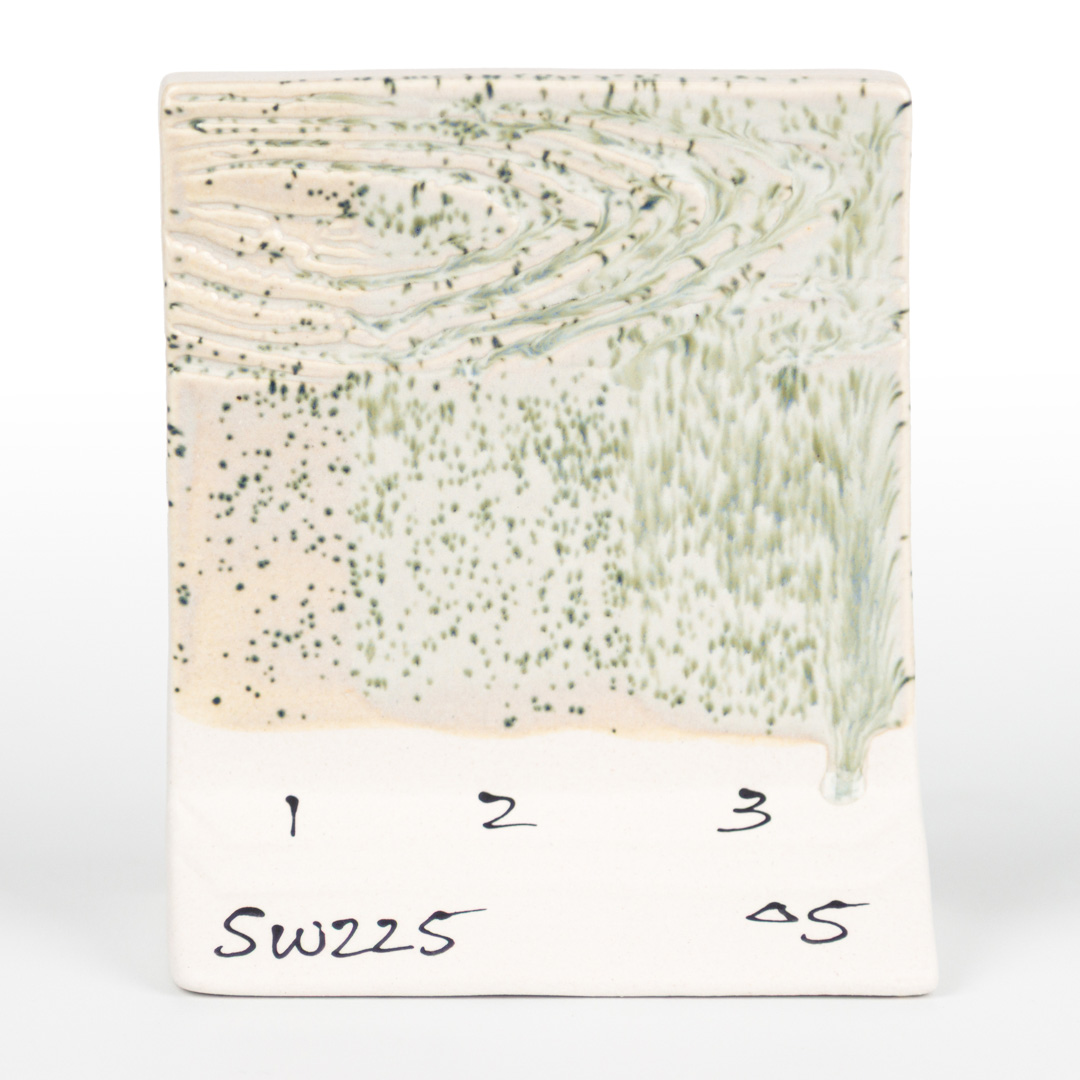
SW225 Lily Pad over Flux, Cone 6 Oxidation
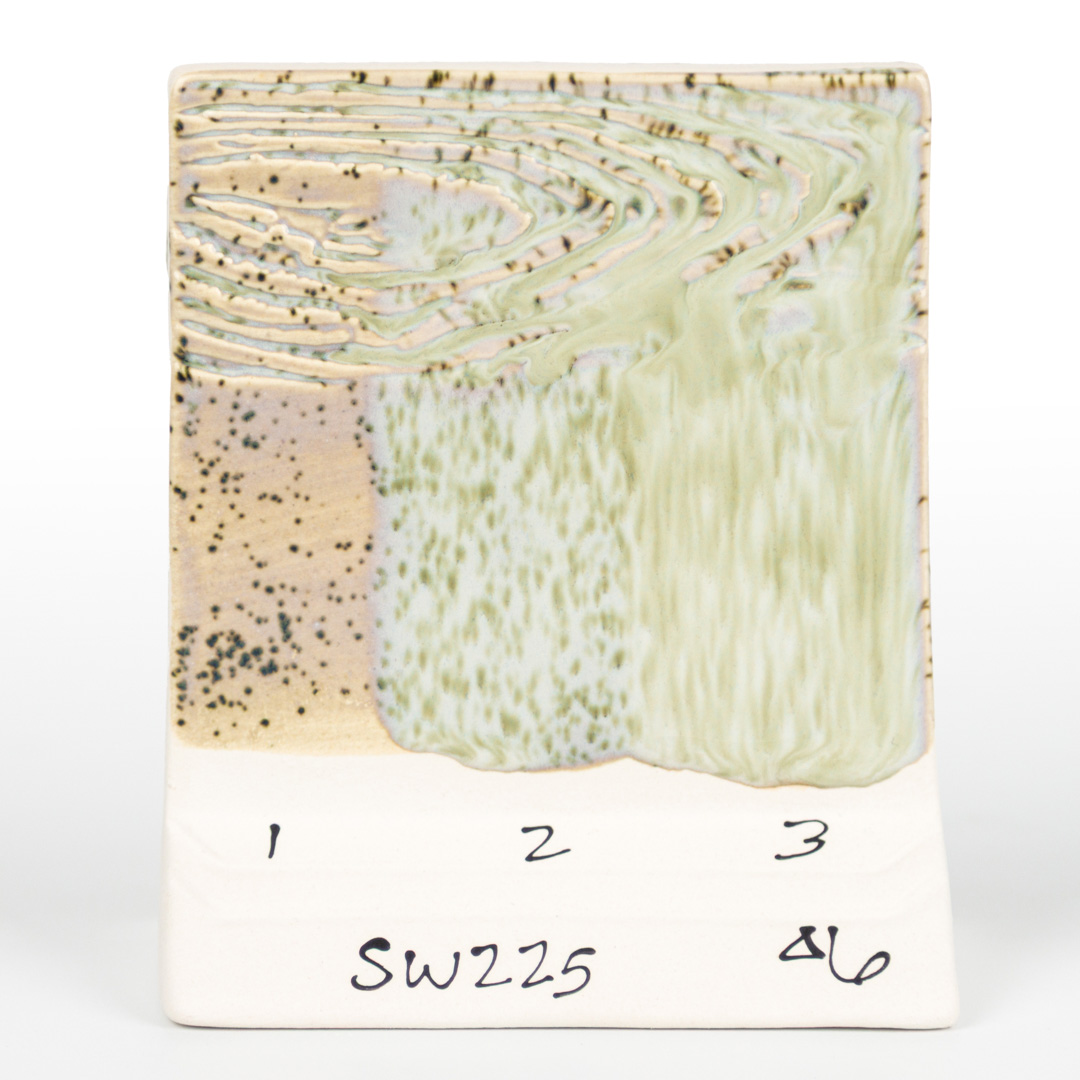
SW225 Lily Pad over Flux, Cone 10 Reduction
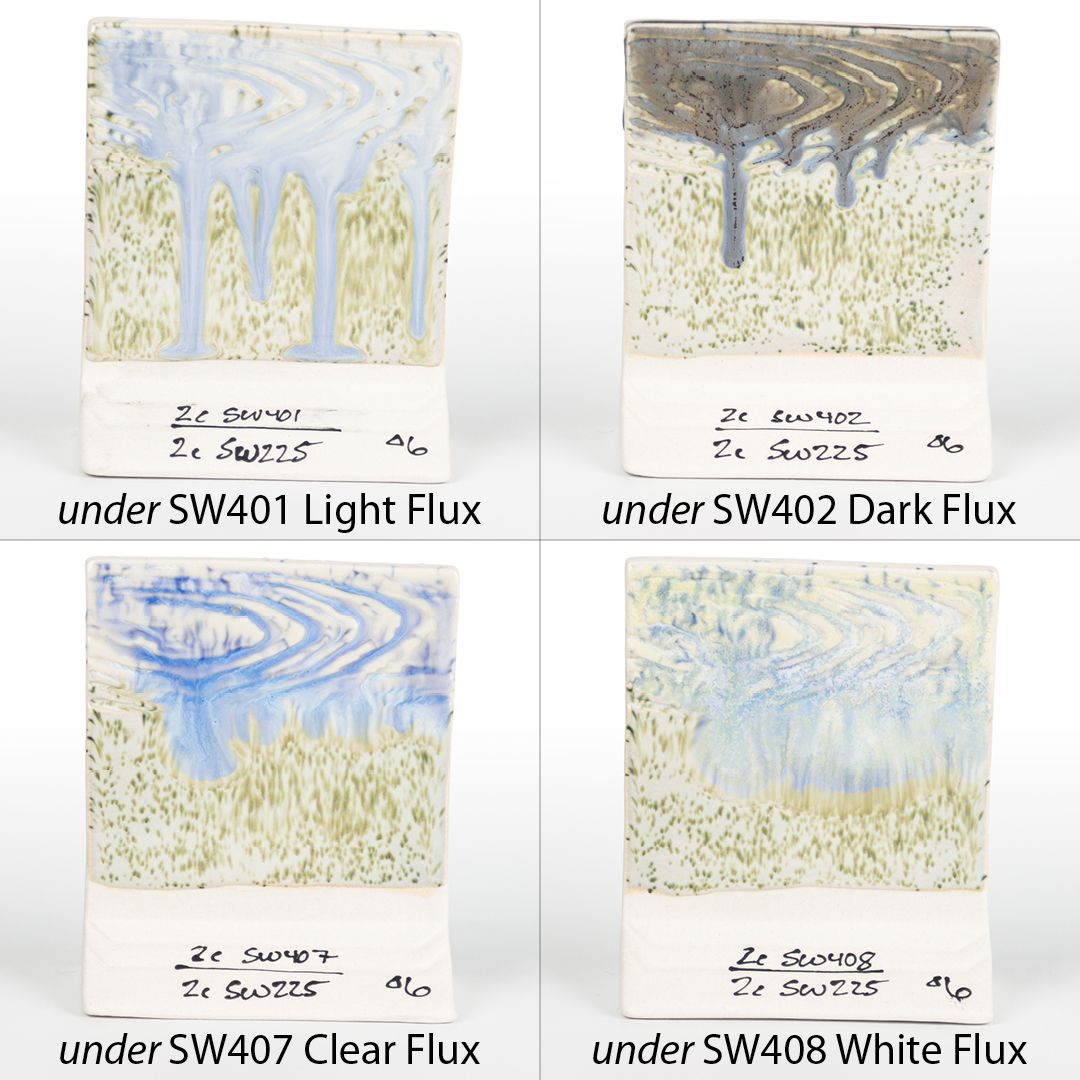
SW225 Lily Pad under Flux, Cone 6 Oxidation
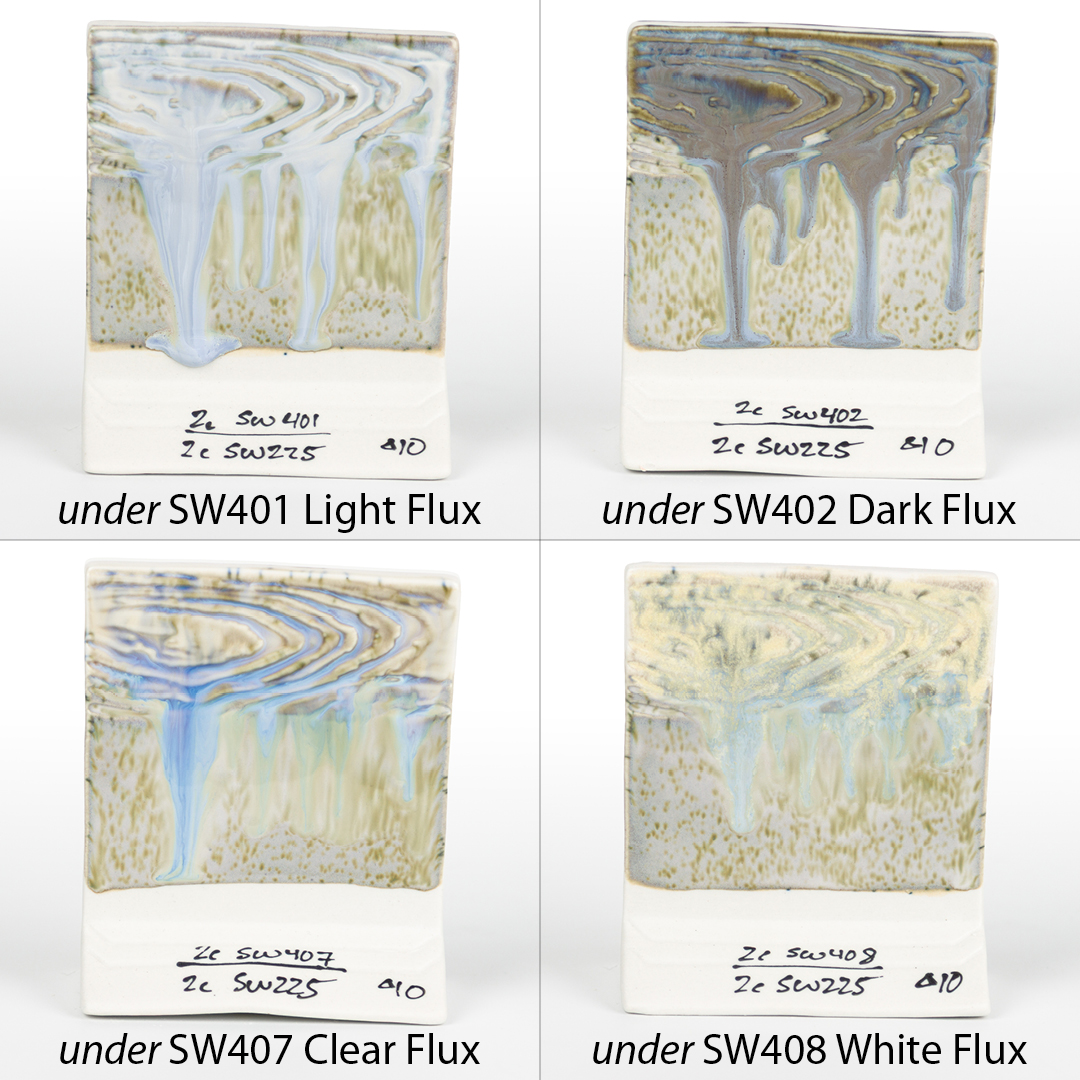
SW225 Lily Pad under Flux, Cone 10 Reduction
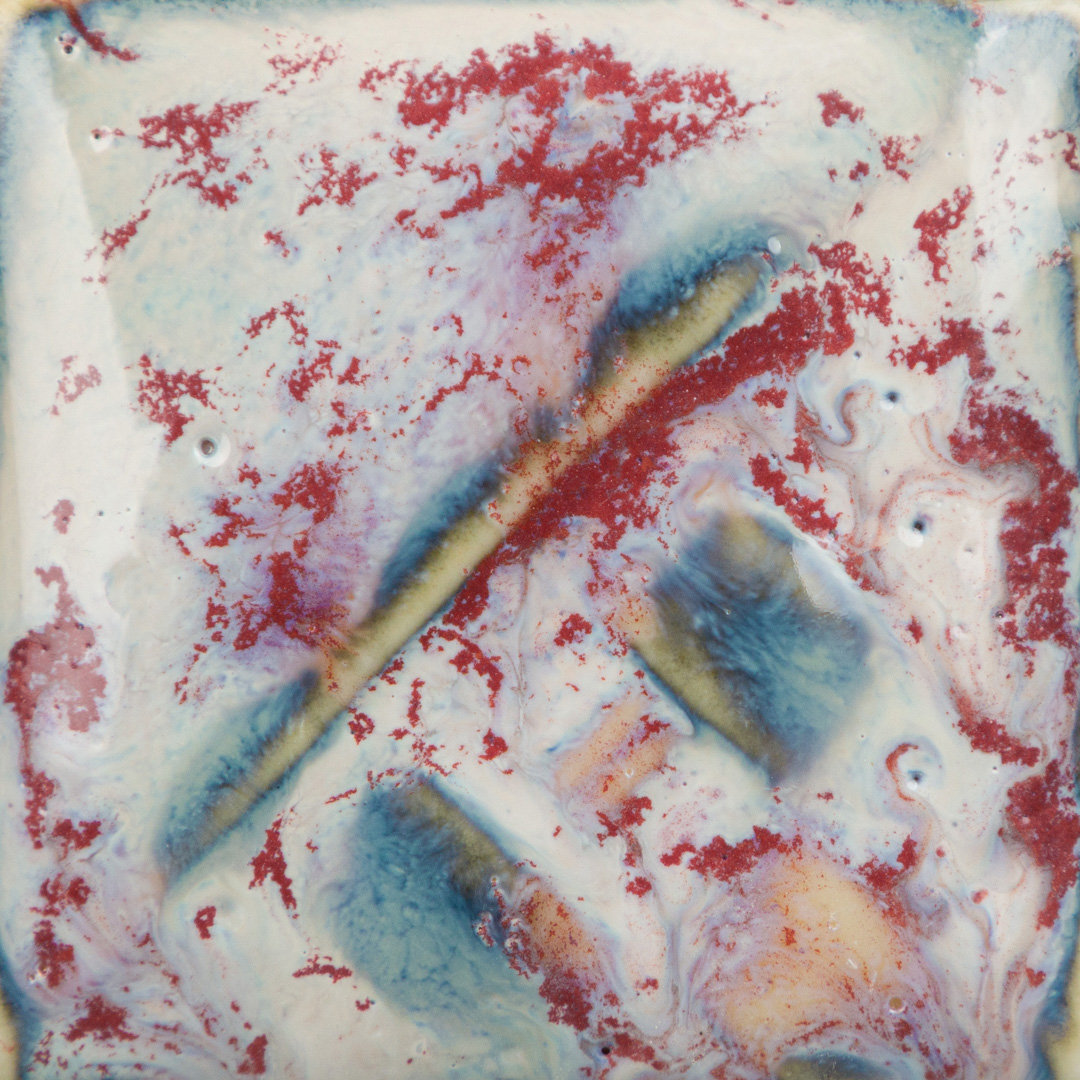
Glossy, transparent white glaze that breaks over texture. Contains pink crystals. Base color is stable, crystals can create movement.
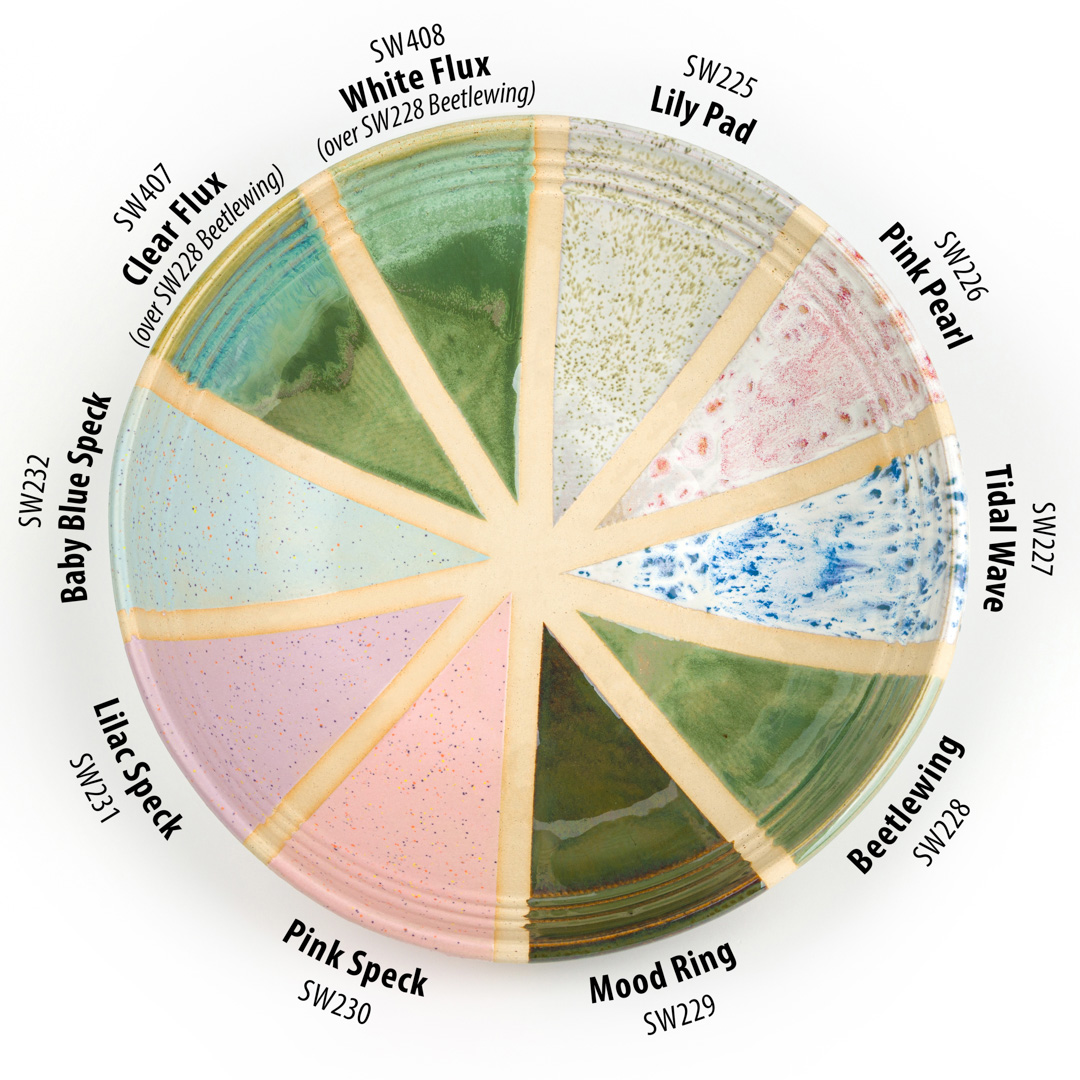
Cone 6 Oxidation
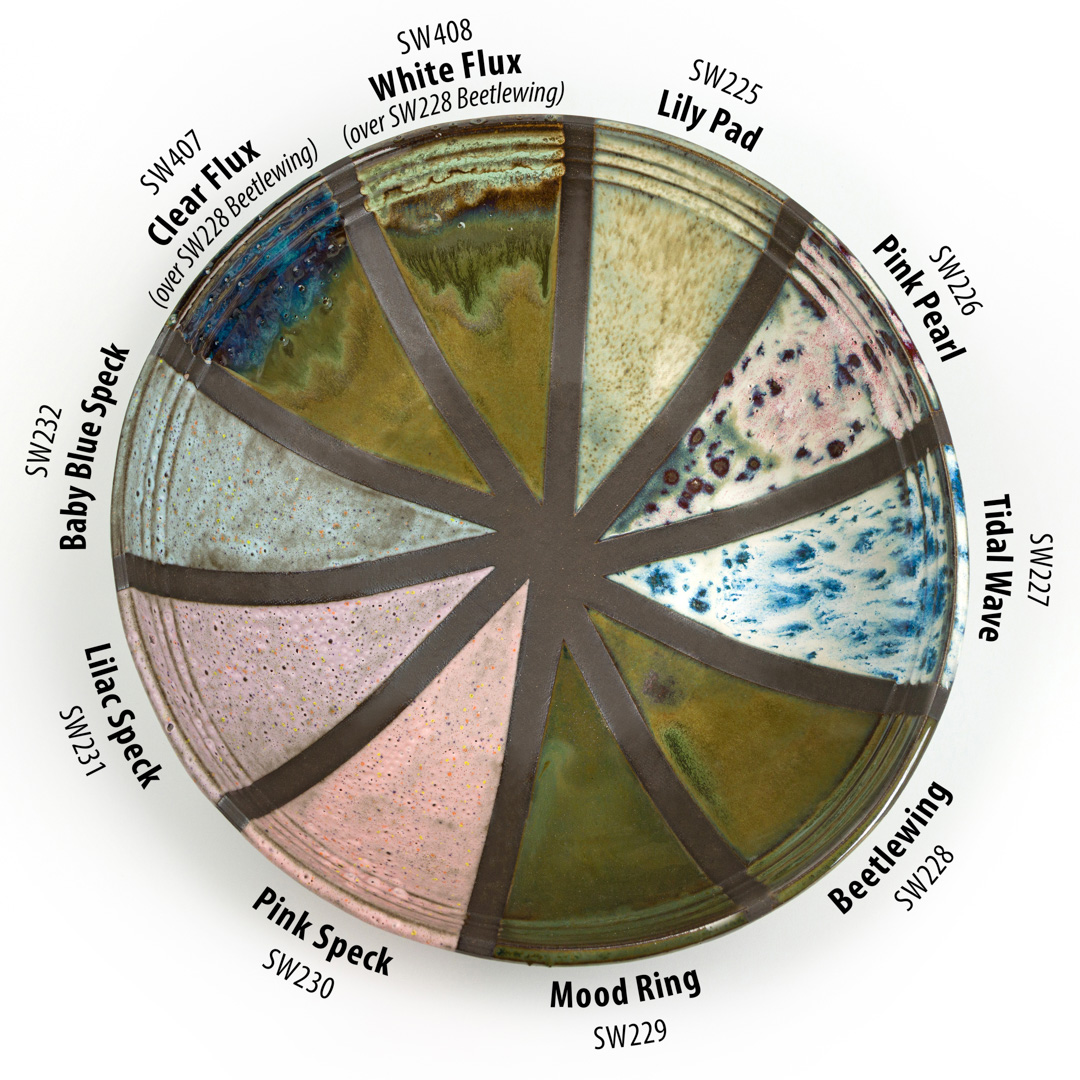
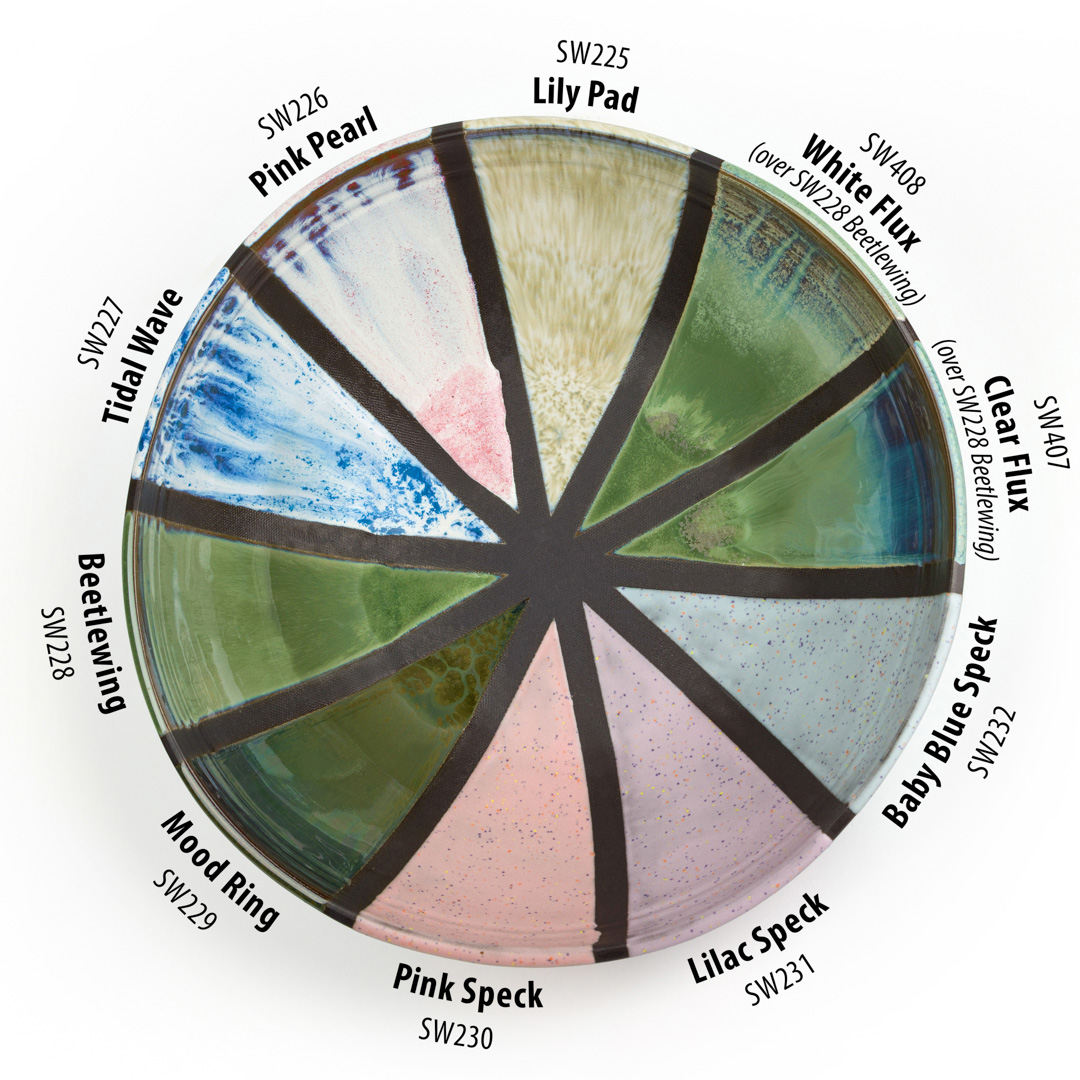
Cone 10 Reduction
1, 2, 3 Coats, Cone 5 Oxidation
1, 2, 3 Coats, Cone 6 Oxidation
1, 2, 3 Coats, Cone 10 Reduction
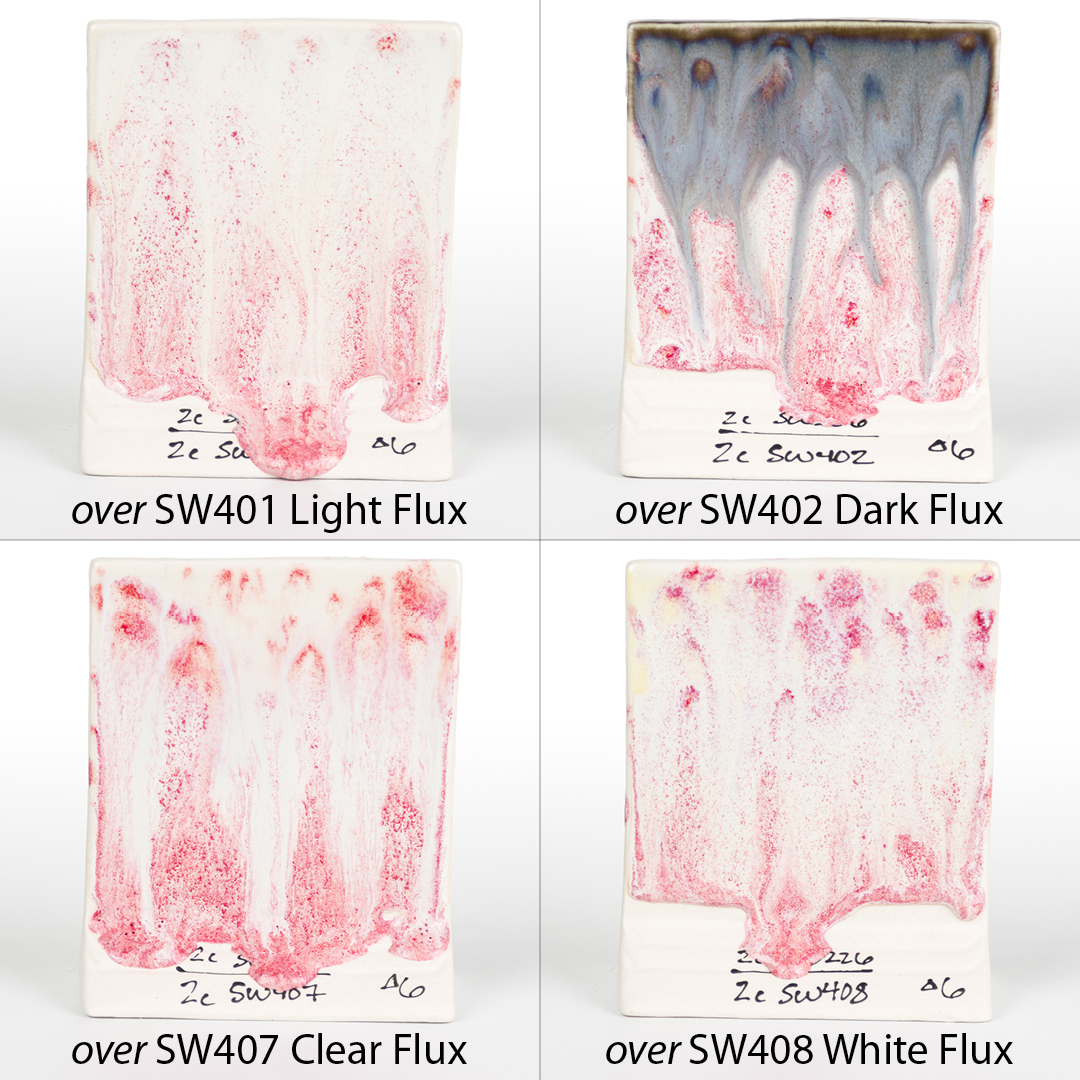
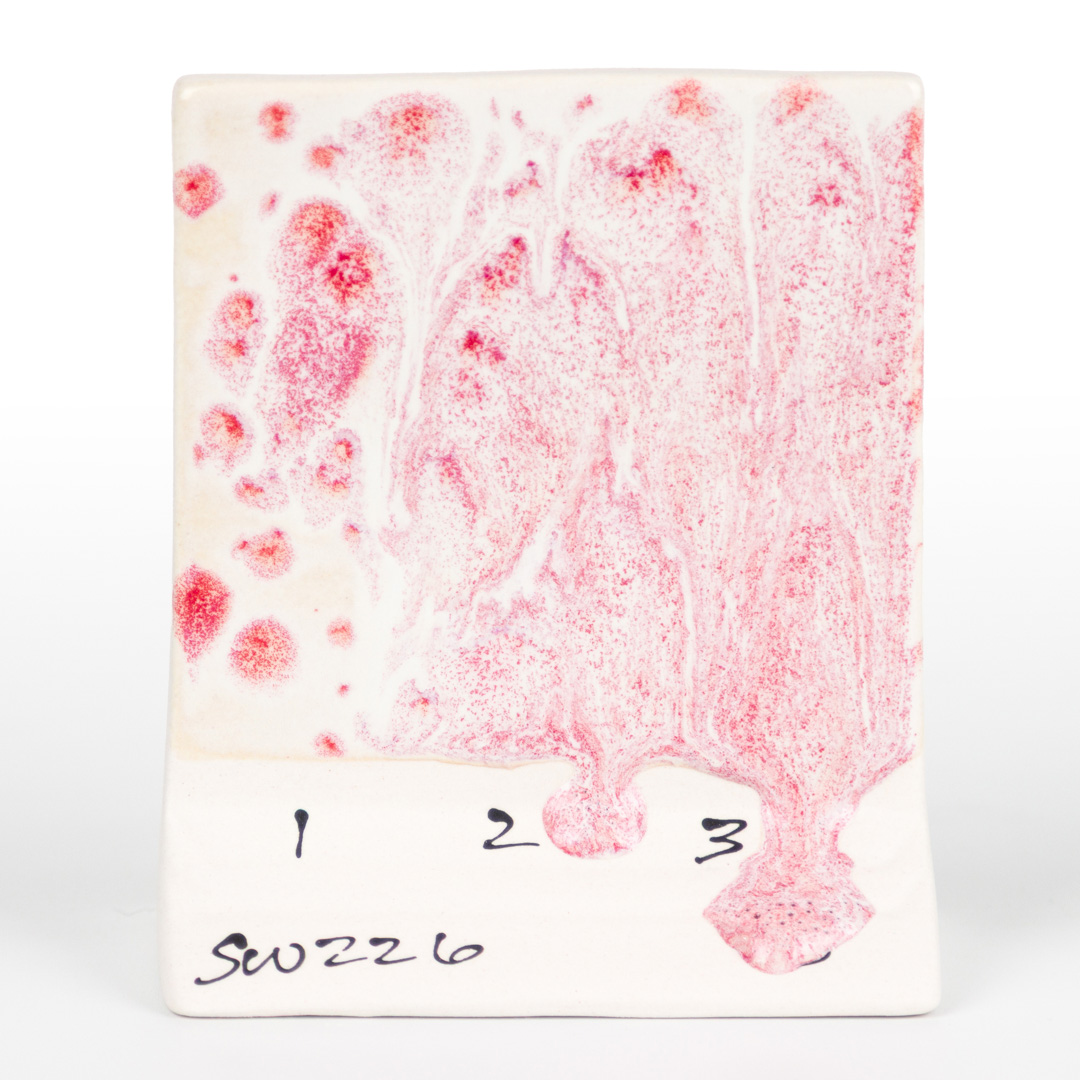
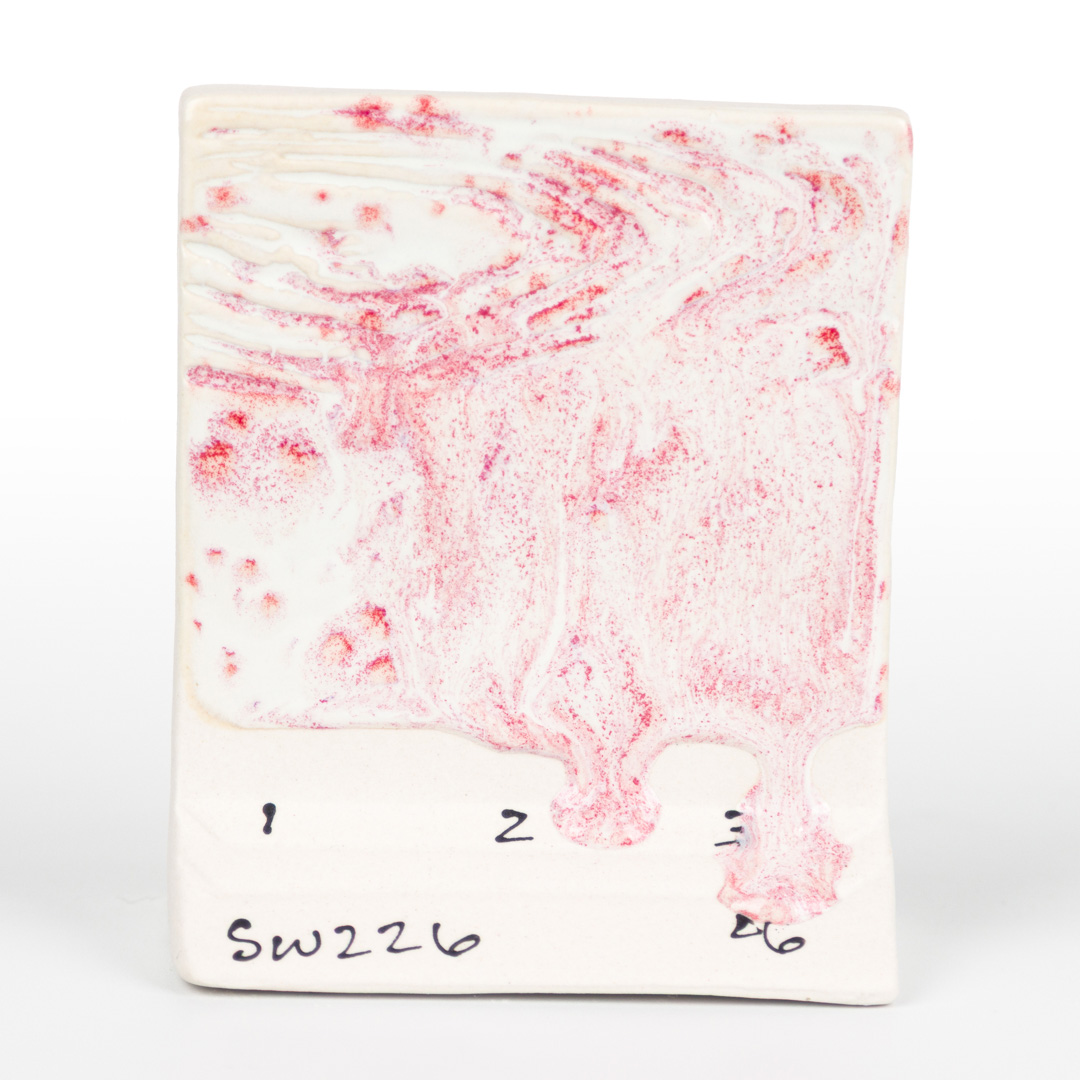
SW226 Pink Pearl over Flux, Cone 6 Oxidation
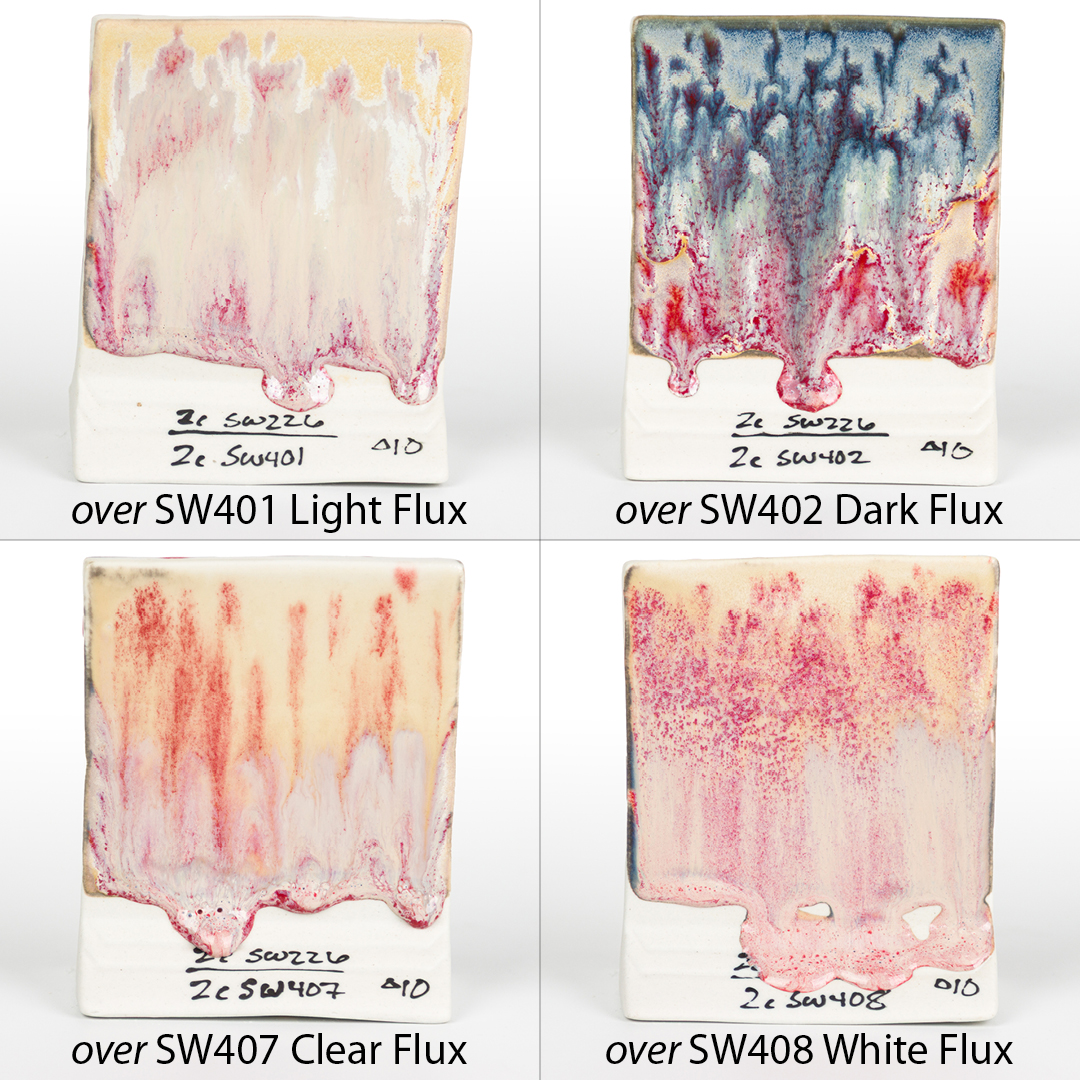
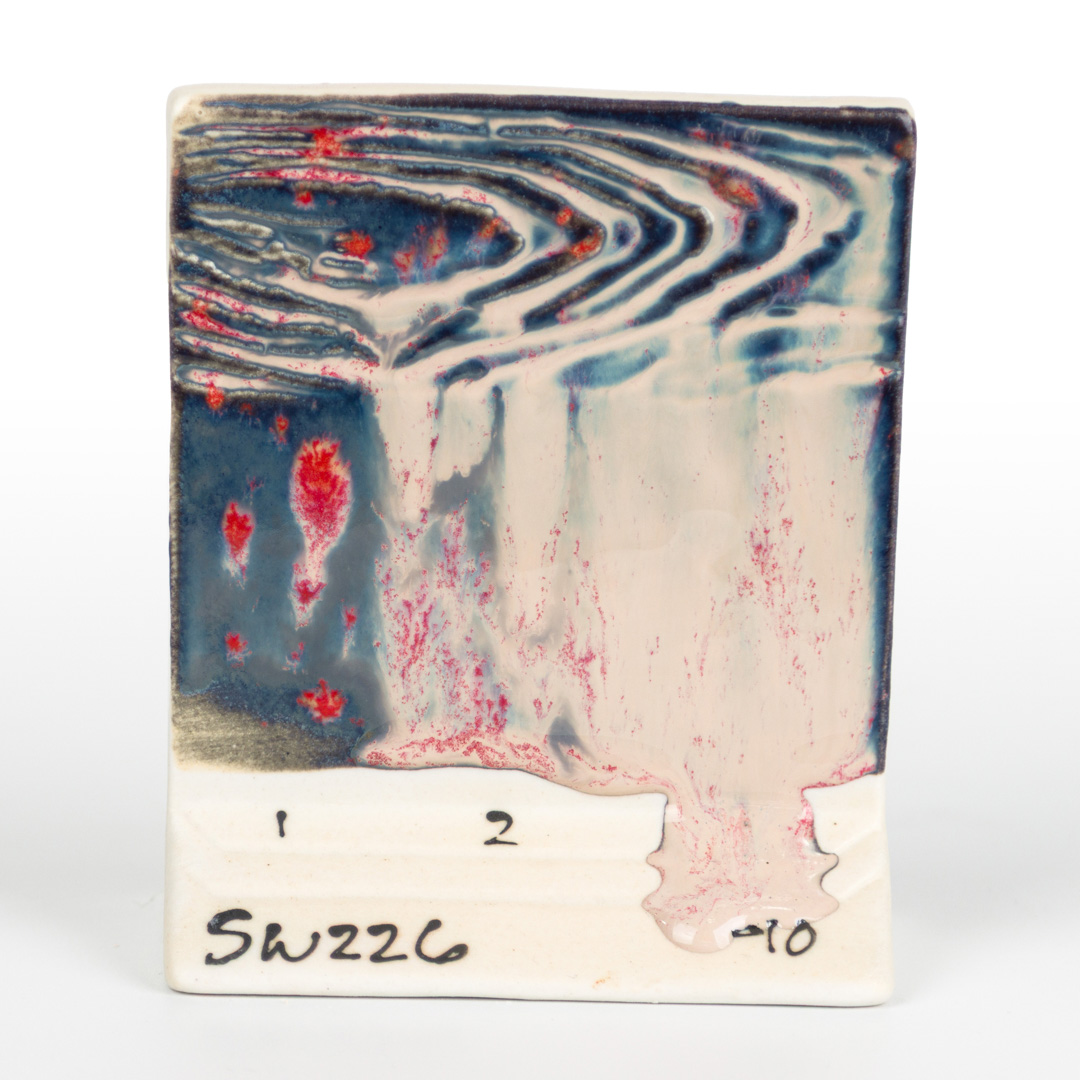
SW226 Pink Pearl over Flux, Cone 10 Reduction
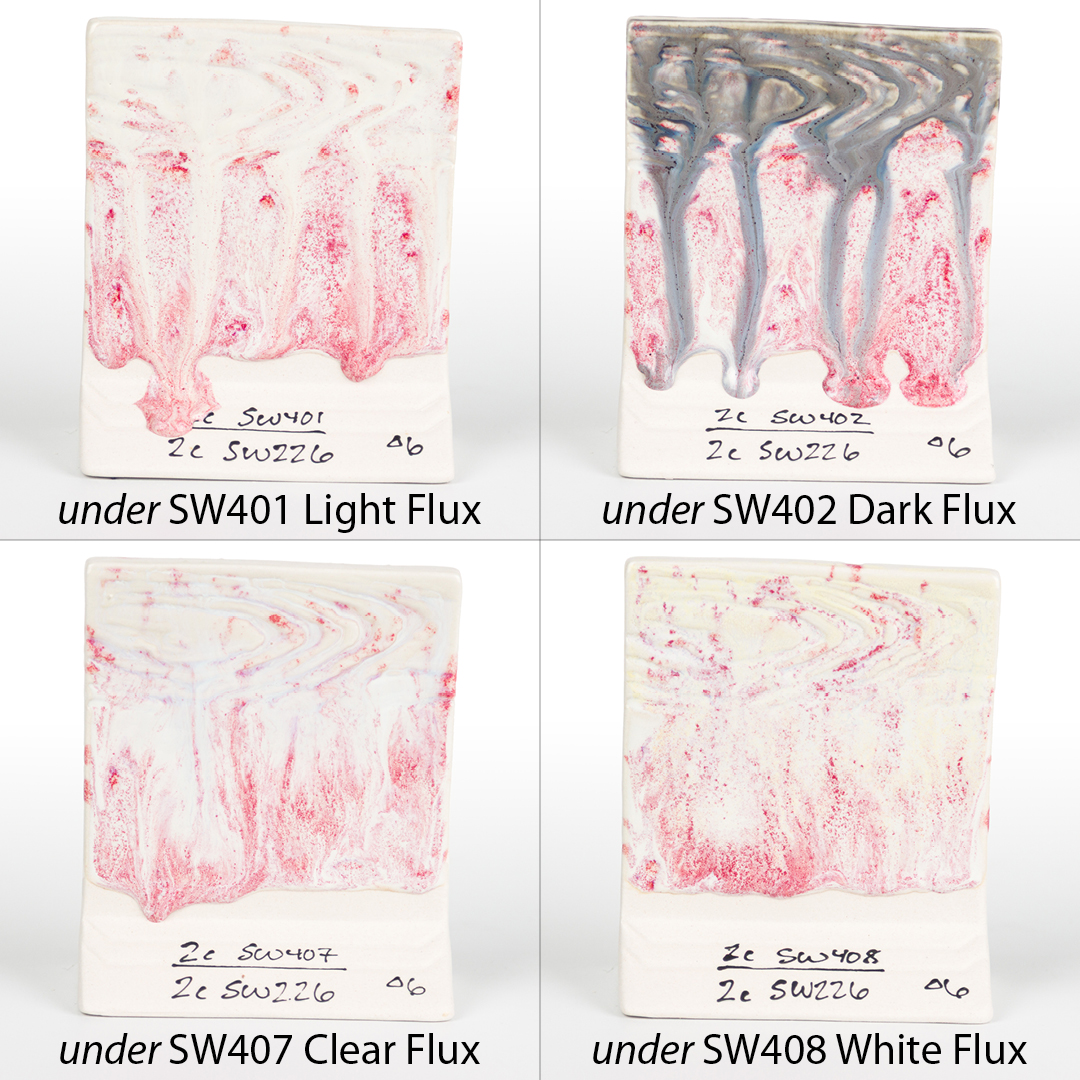
SW226 Pink Pearl under Flux, Cone 6 Oxidation
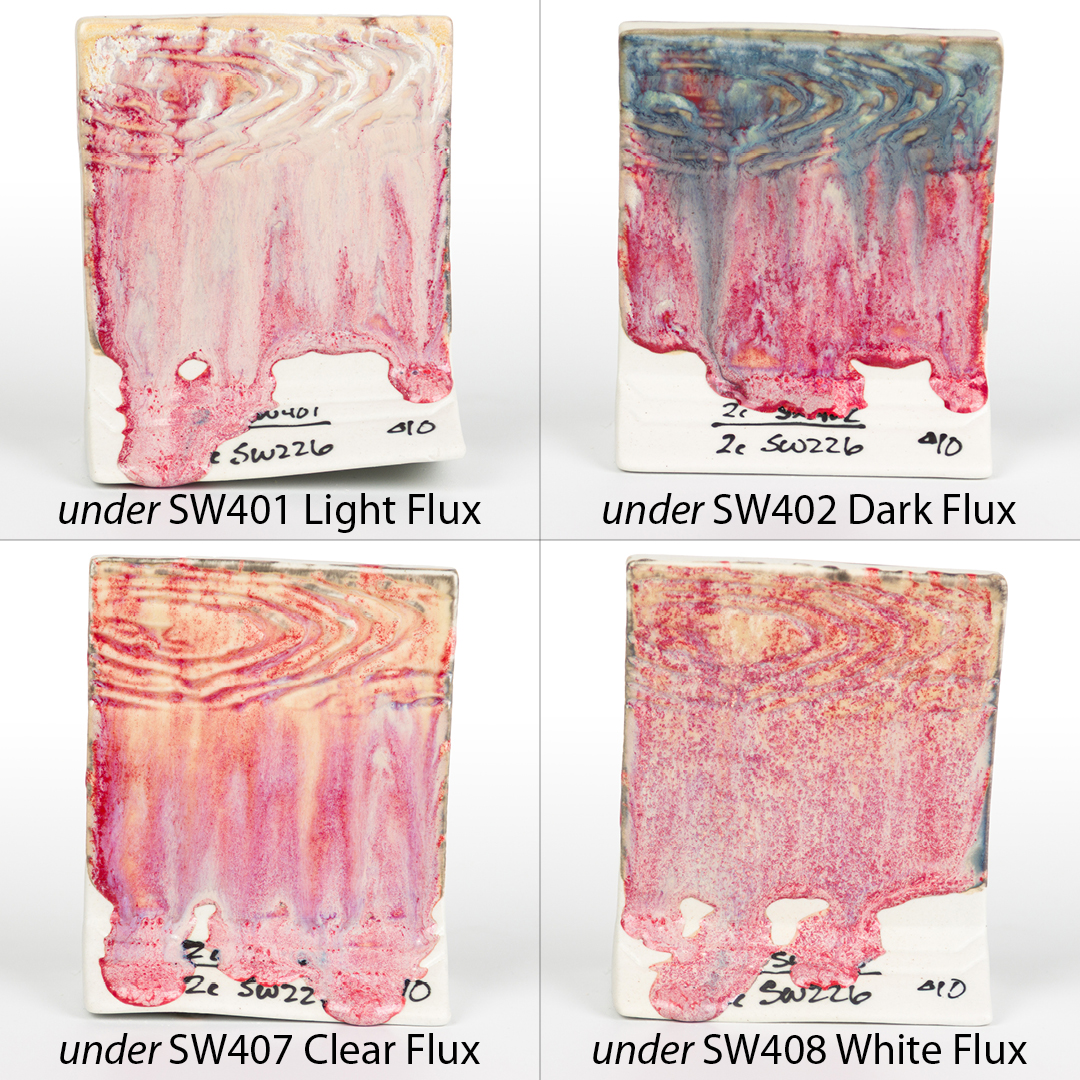
SW226 Pink Pearl under Flux, Cone 10 Reduction
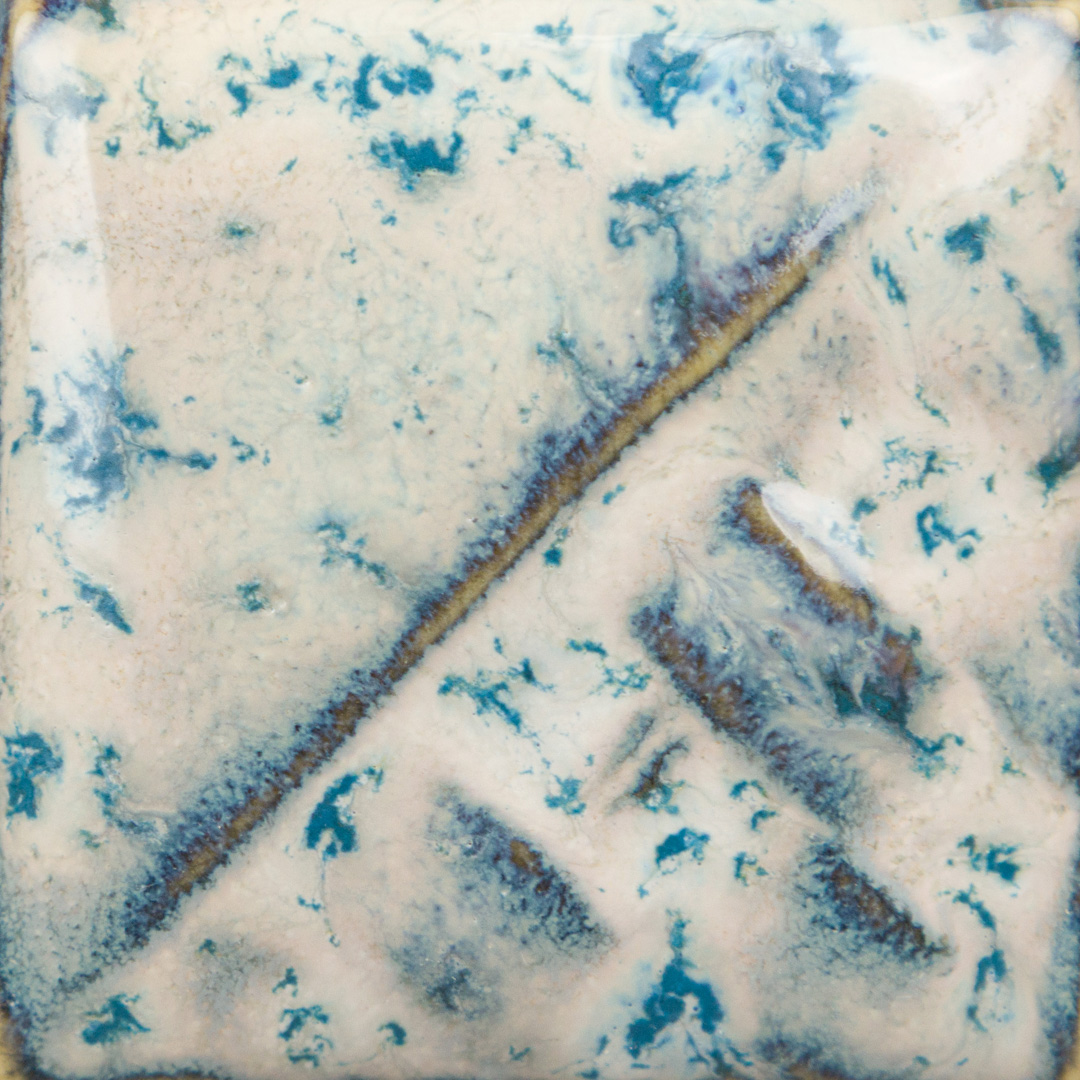
A glossy, transparent white glaze that breaks over texture. Contains blue crystals. Base color is stable, crystals can create movement.

Cone 6 Oxidation
Cone 10 Reduction
1, 2, 3 Coats, Cone 5 Oxidation
1, 2, 3 Coats, Cone 6 Oxidation
1, 2, 3 Coats, Cone 10 Reduction
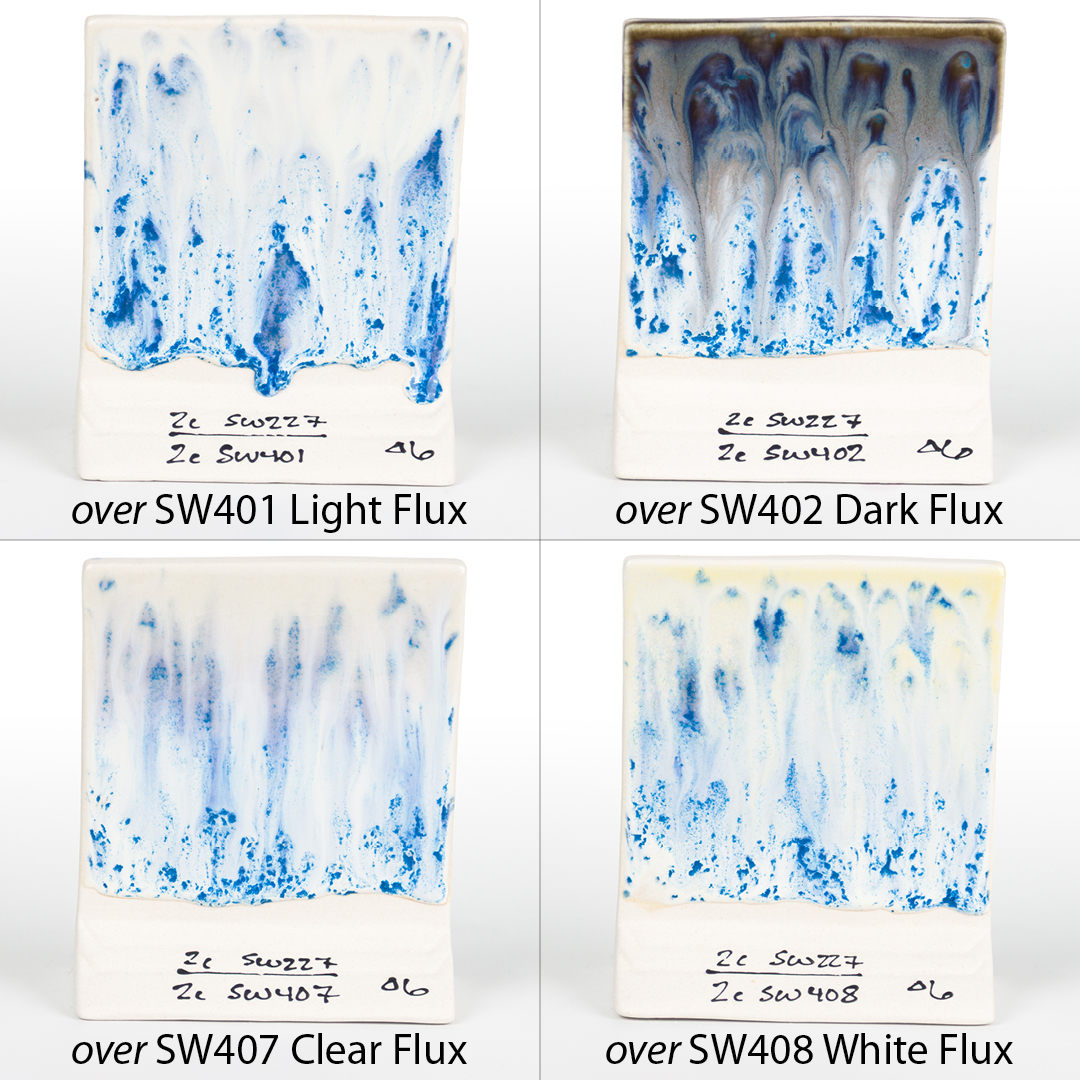
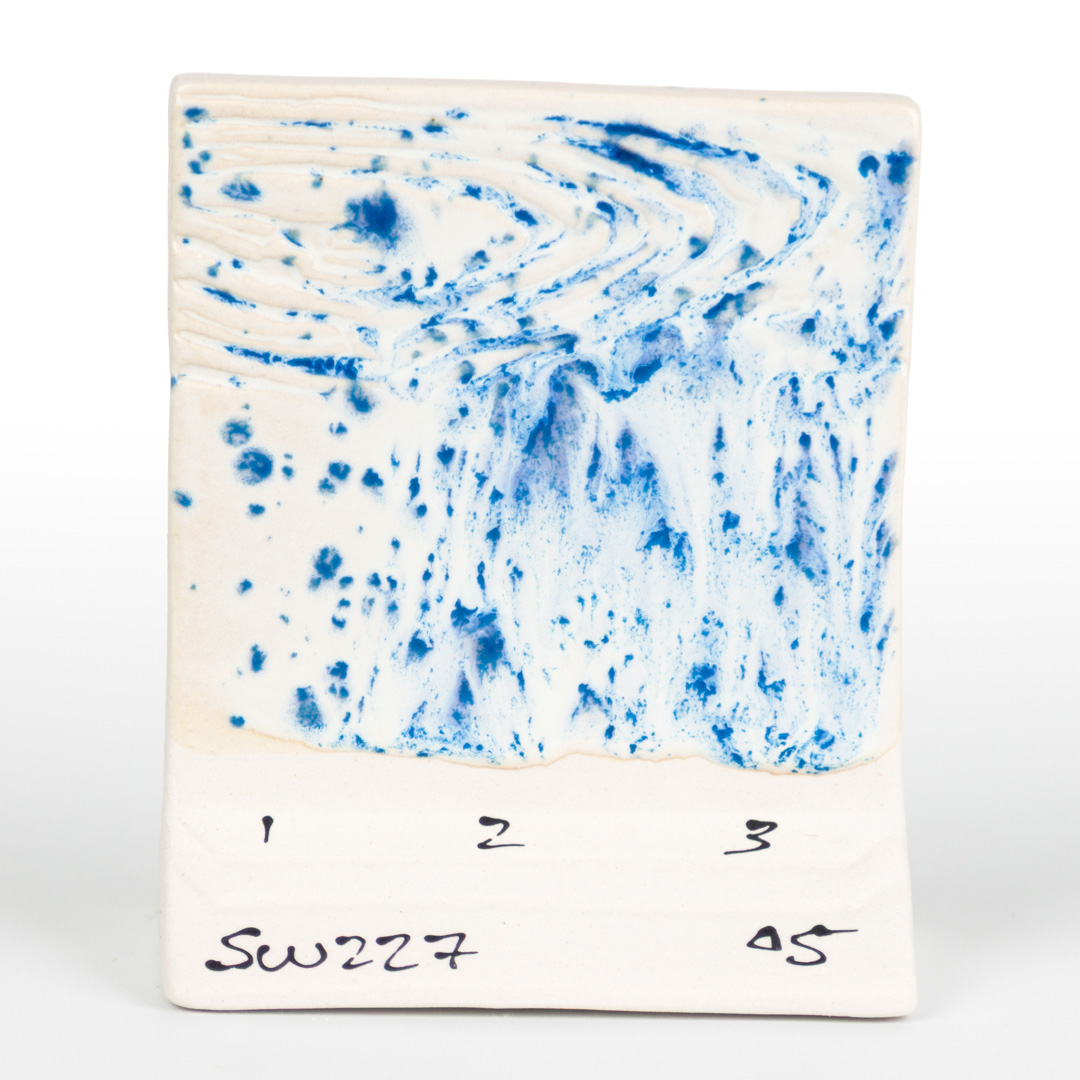
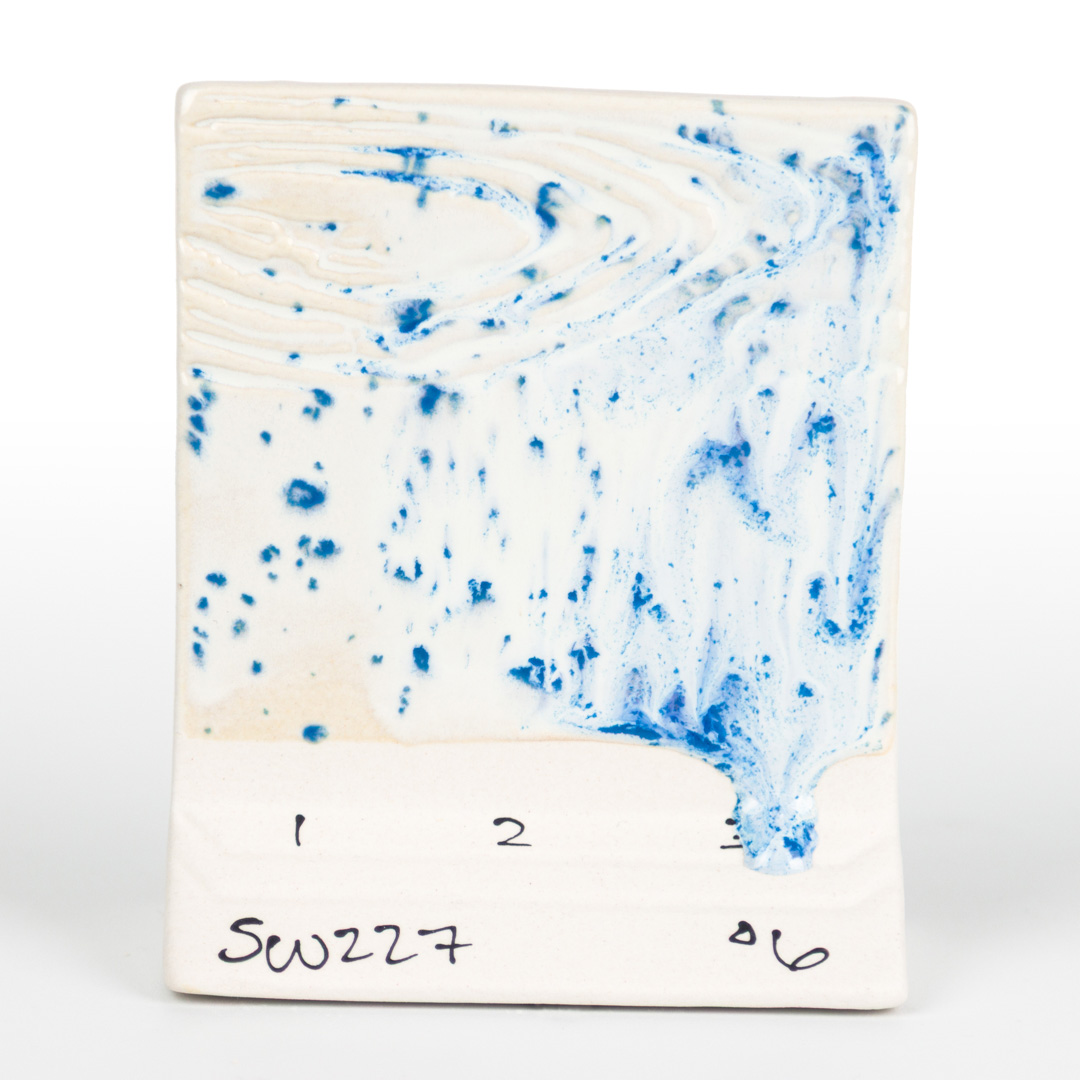
SW227 Tidal Wave over Flux, Cone 6 Oxidation
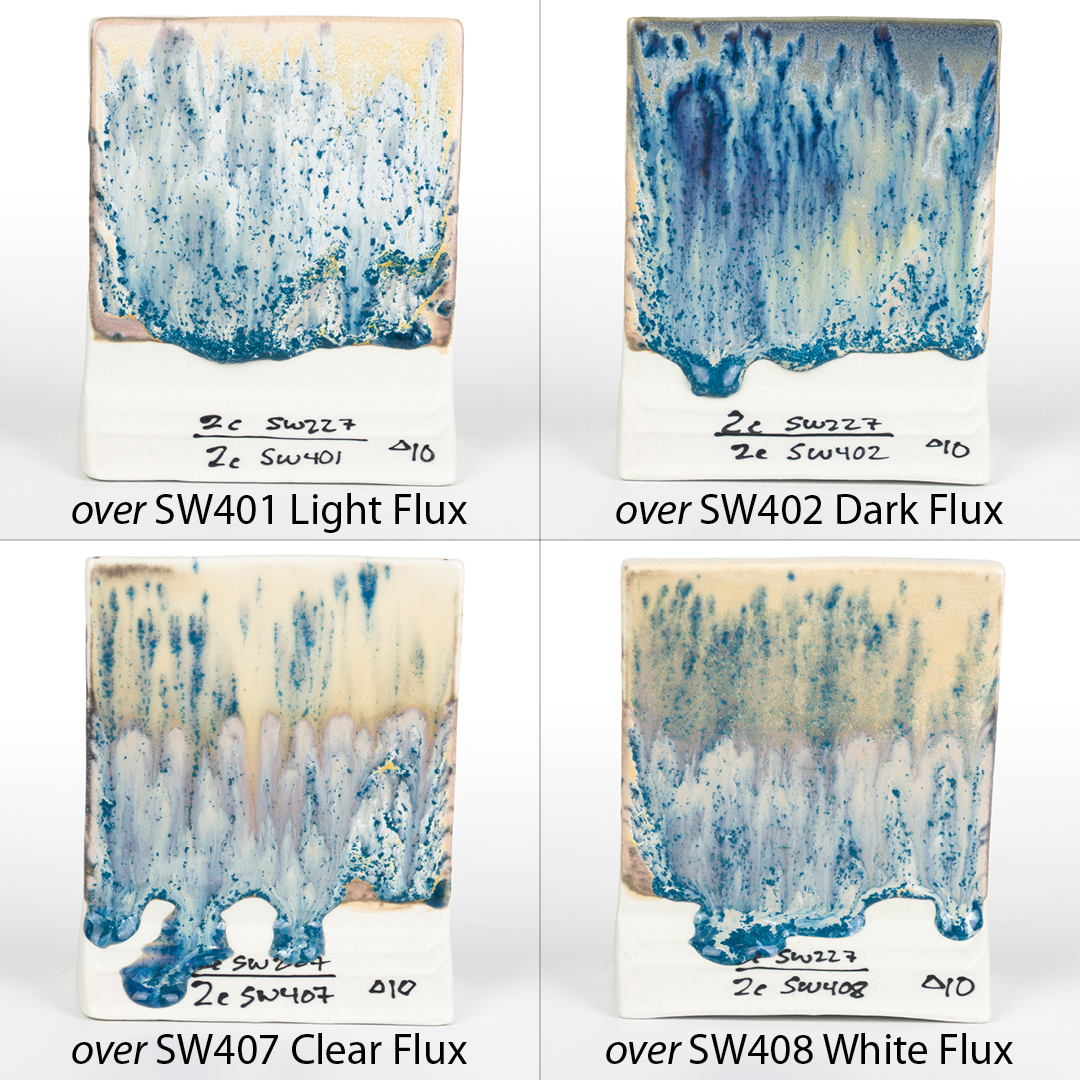
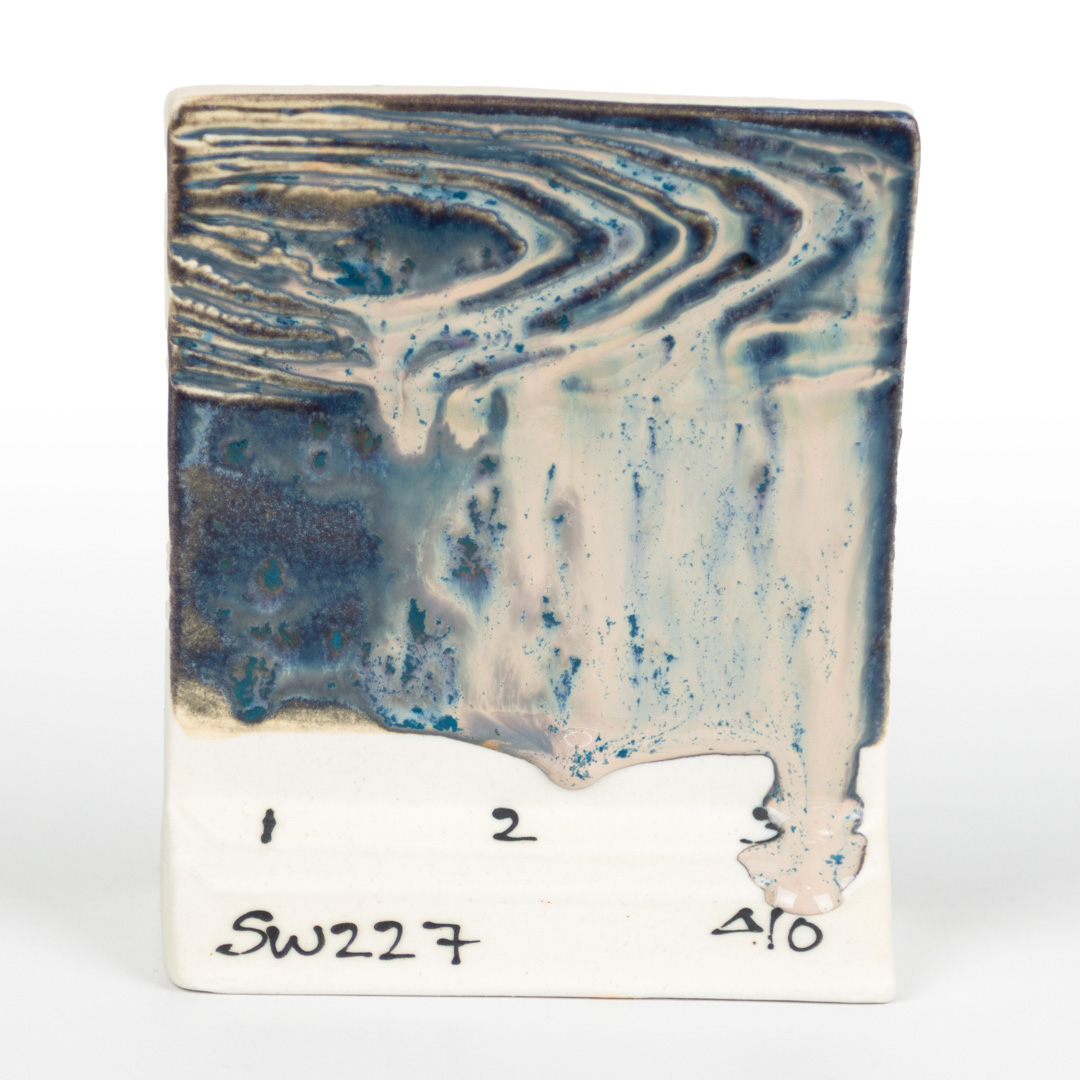
SW227 Tidal Wave over Flux, Cone 10 Reduction
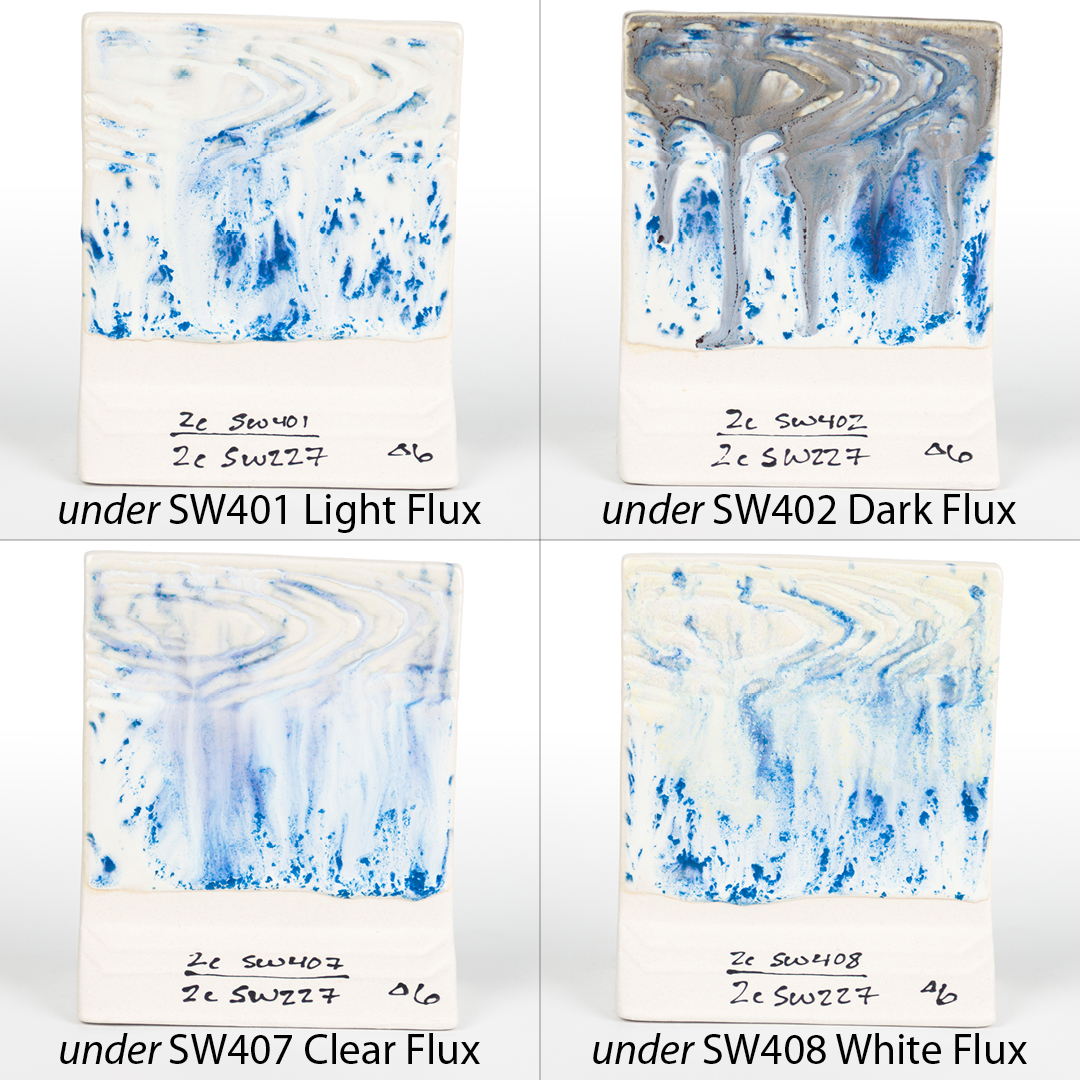
SW227 Tidal Wave under Flux, Cone 6 Oxidation
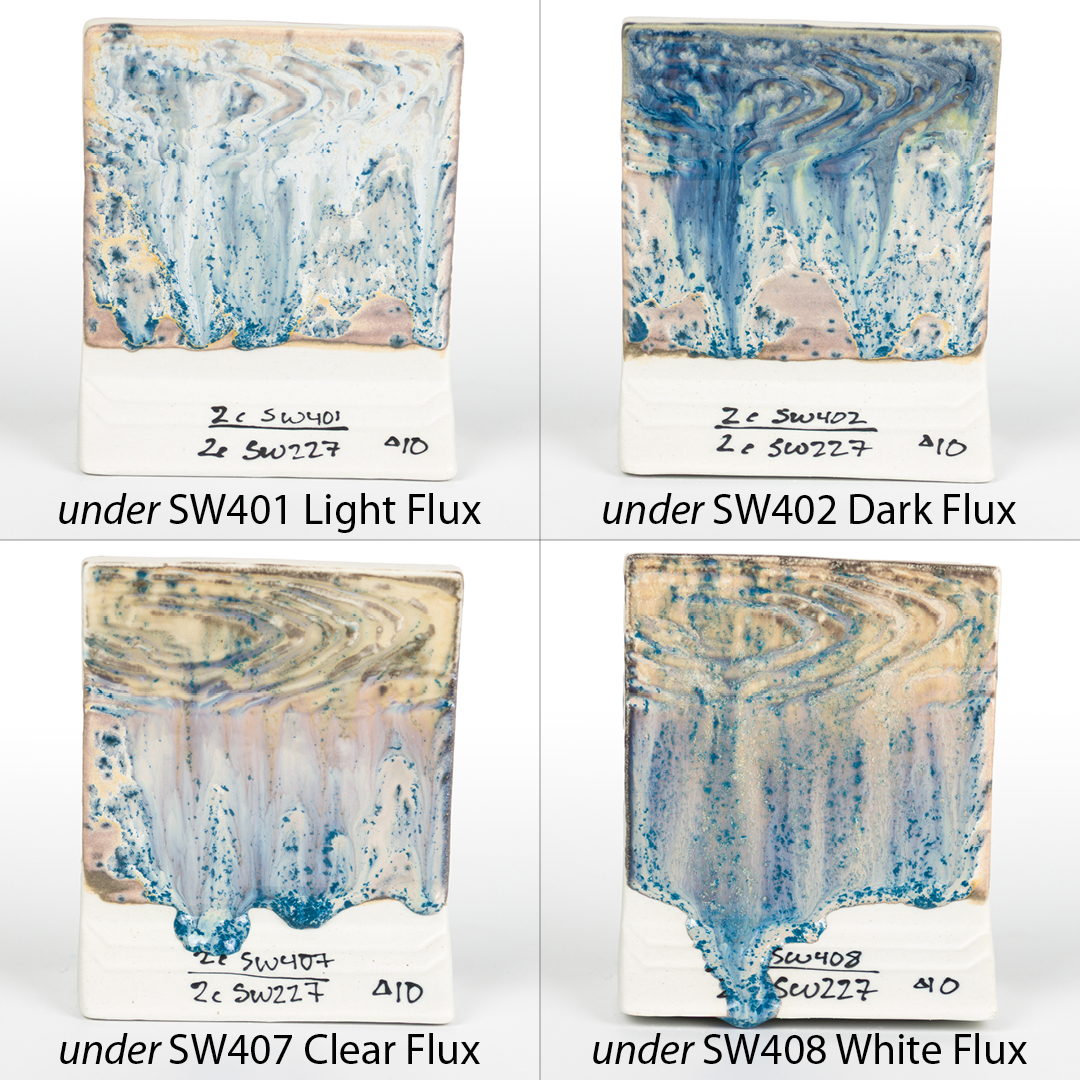
SW227 Tidal Wave under Flux, Cone 10 Reduction
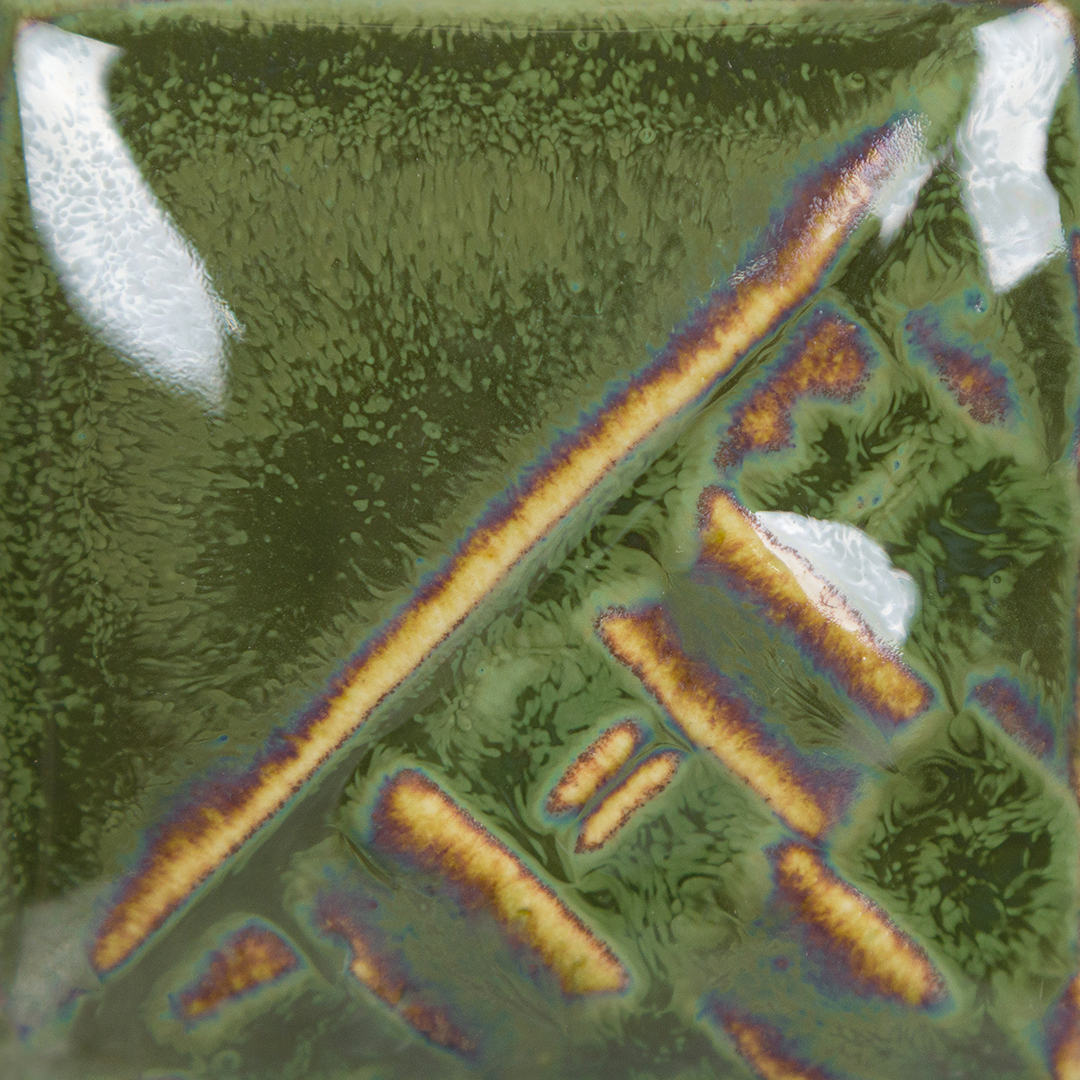
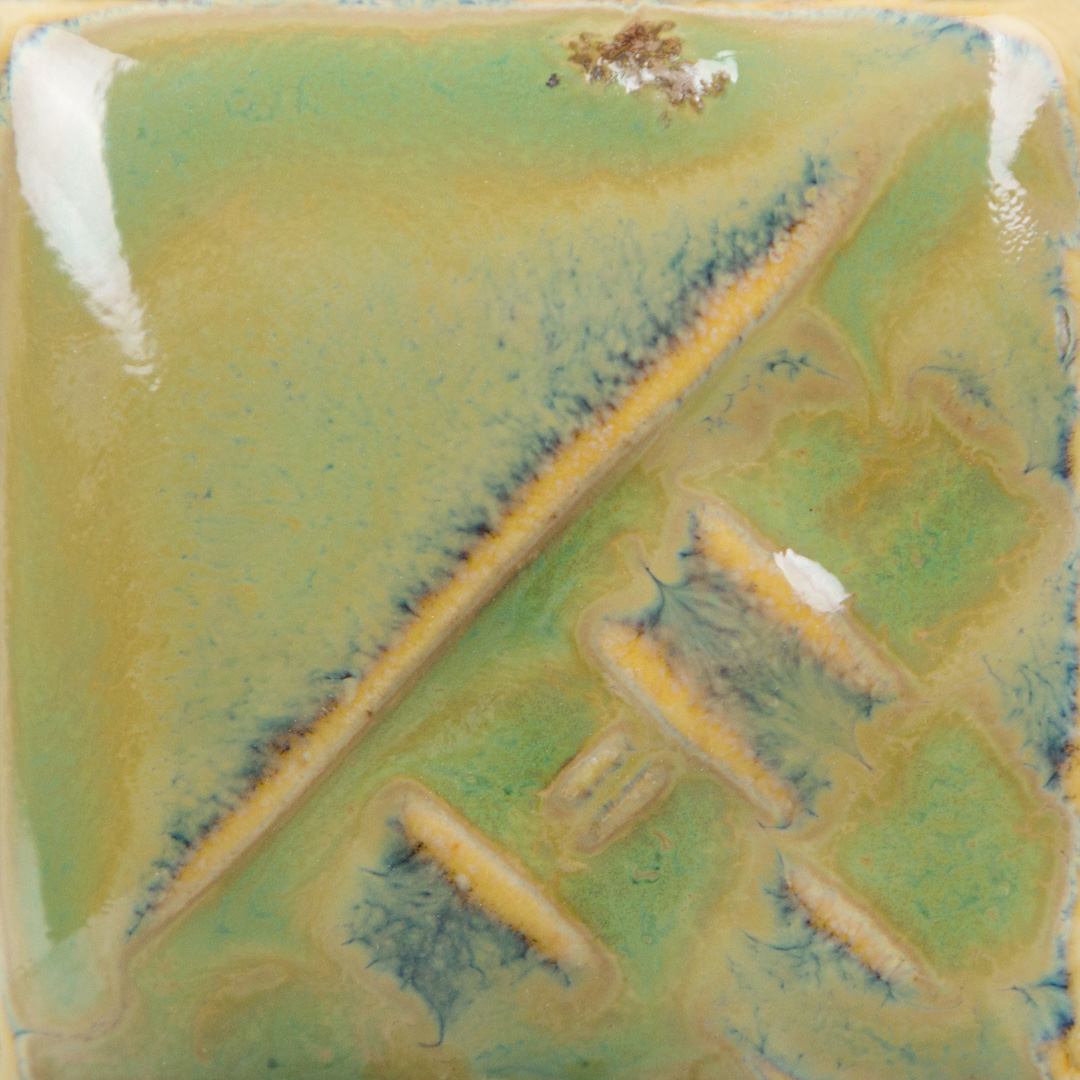
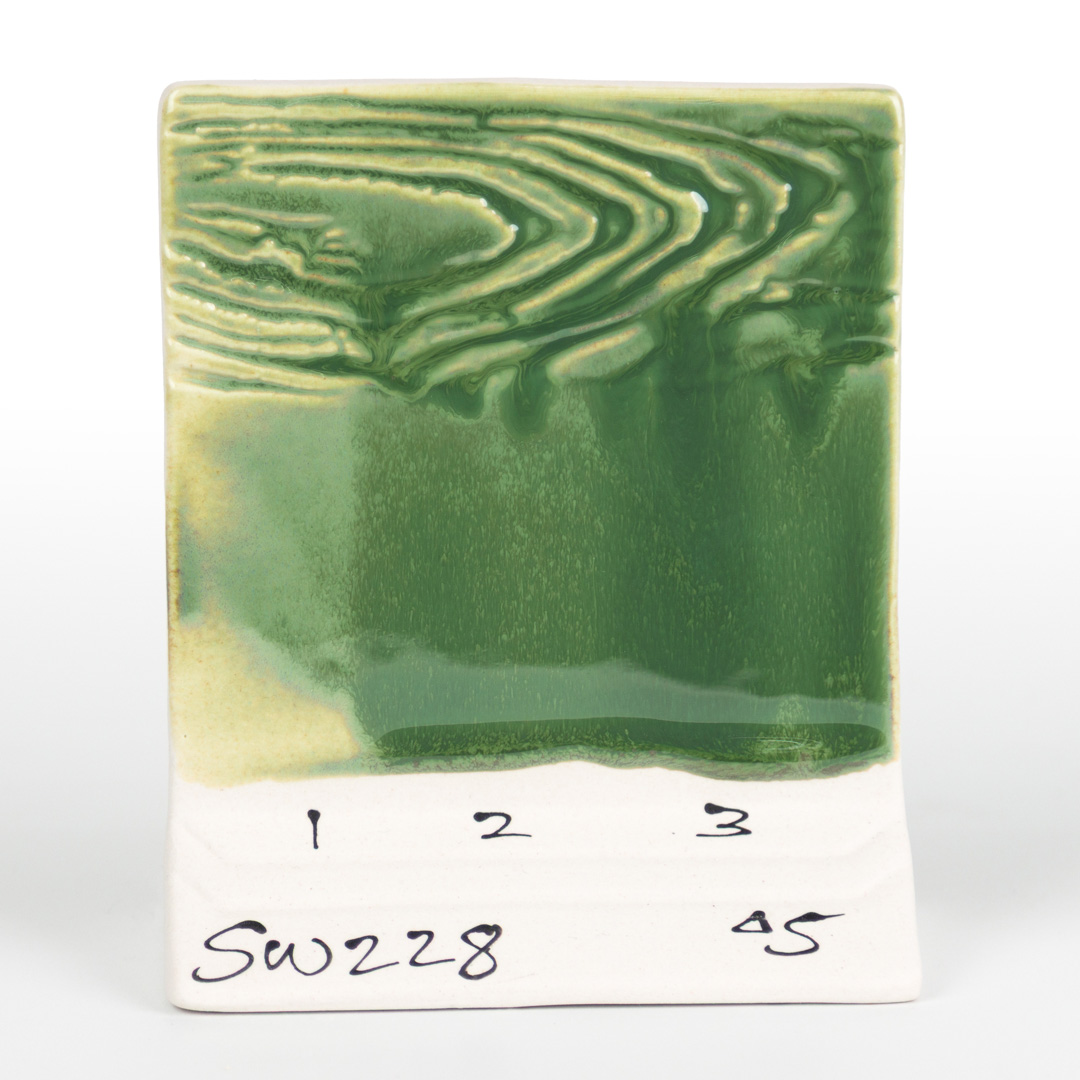
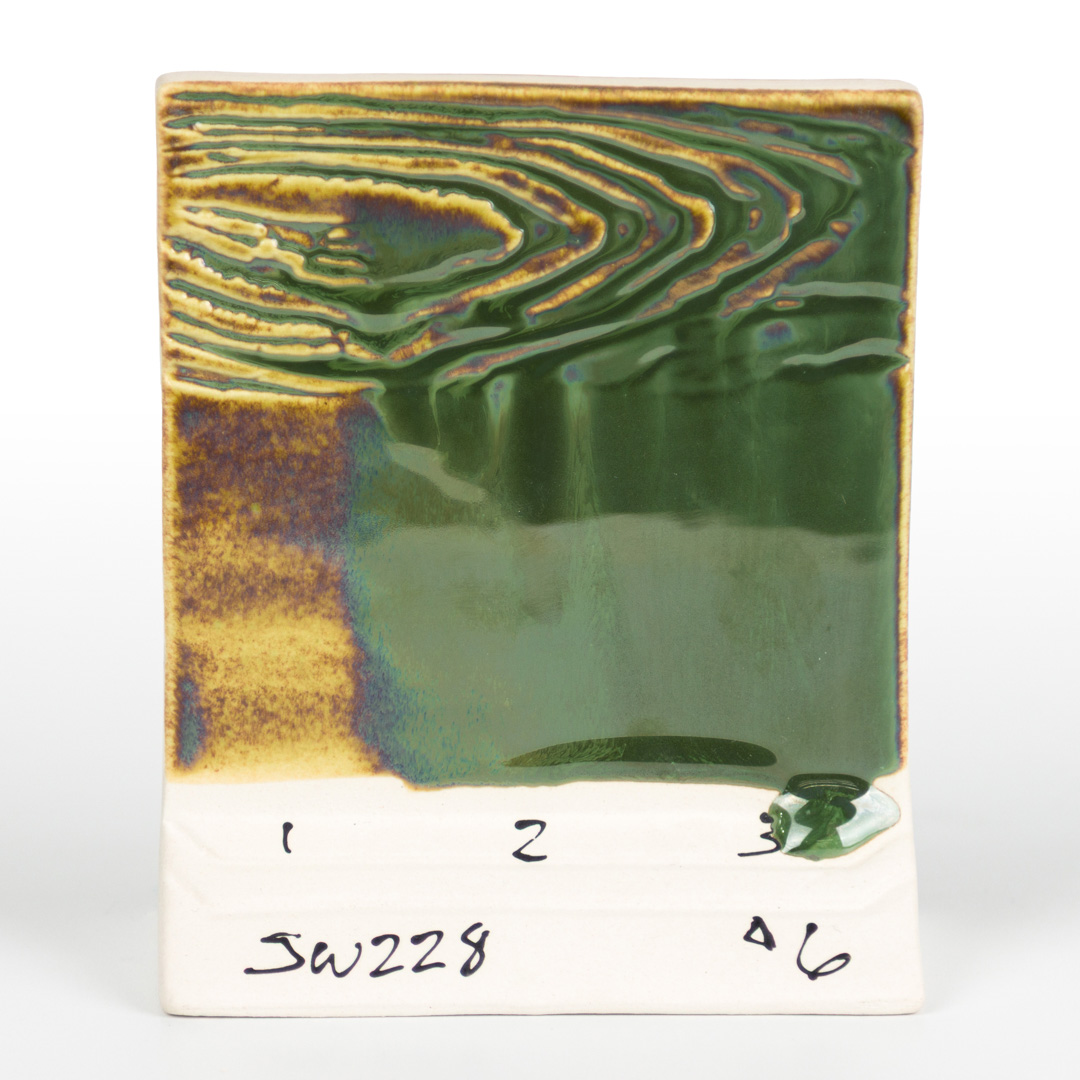
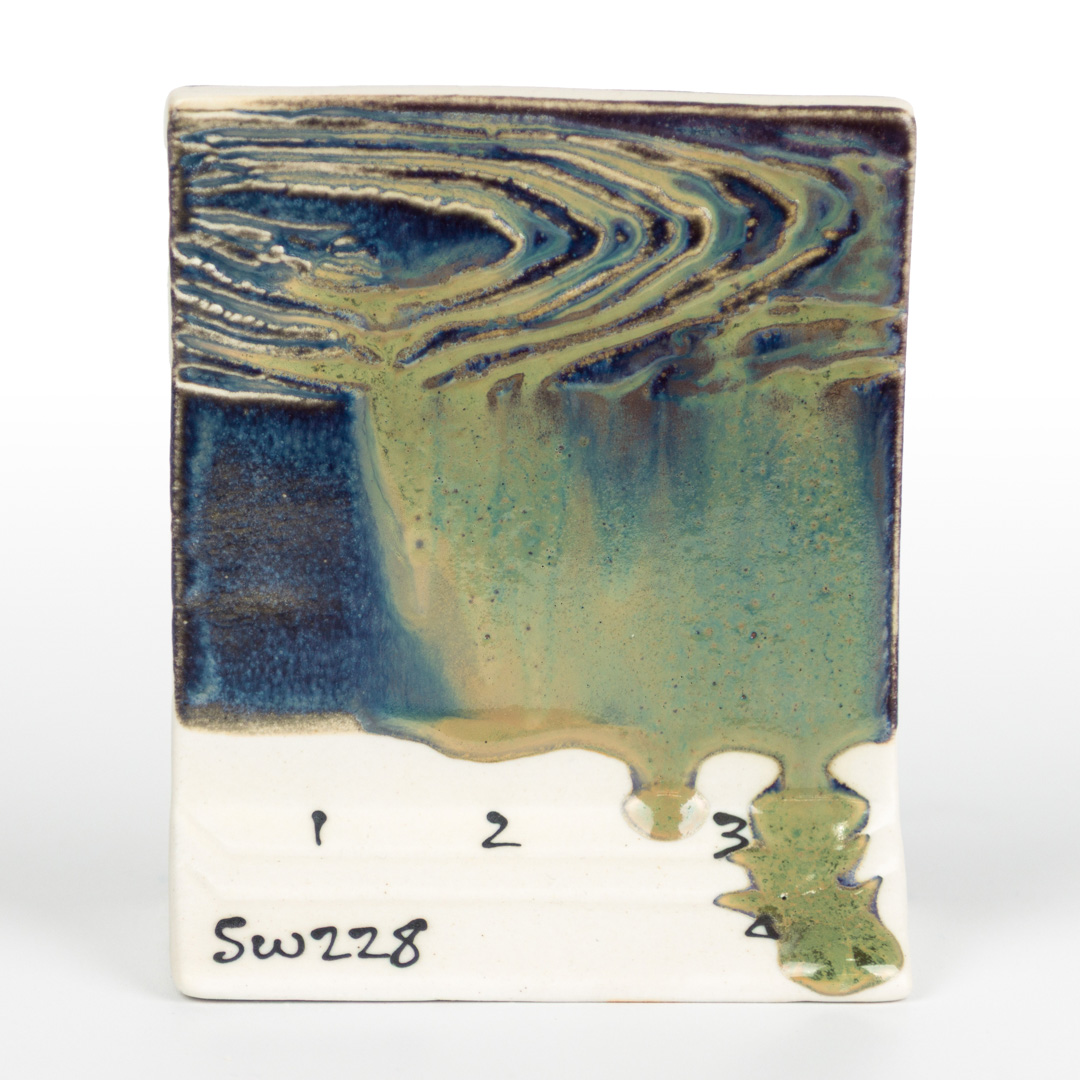
A glossy, opaque green glaze that breaks over texture and has an iridescent sheen. Semi-fluid at 3 coats.

Cone 6 Oxidation
Cone 10 Reduction
1, 2, 3 Coats, Cone 5 Oxidation
1, 2, 3 Coats, Cone 6 Oxidation
1, 2, 3 Coats, Cone 10 Reduction
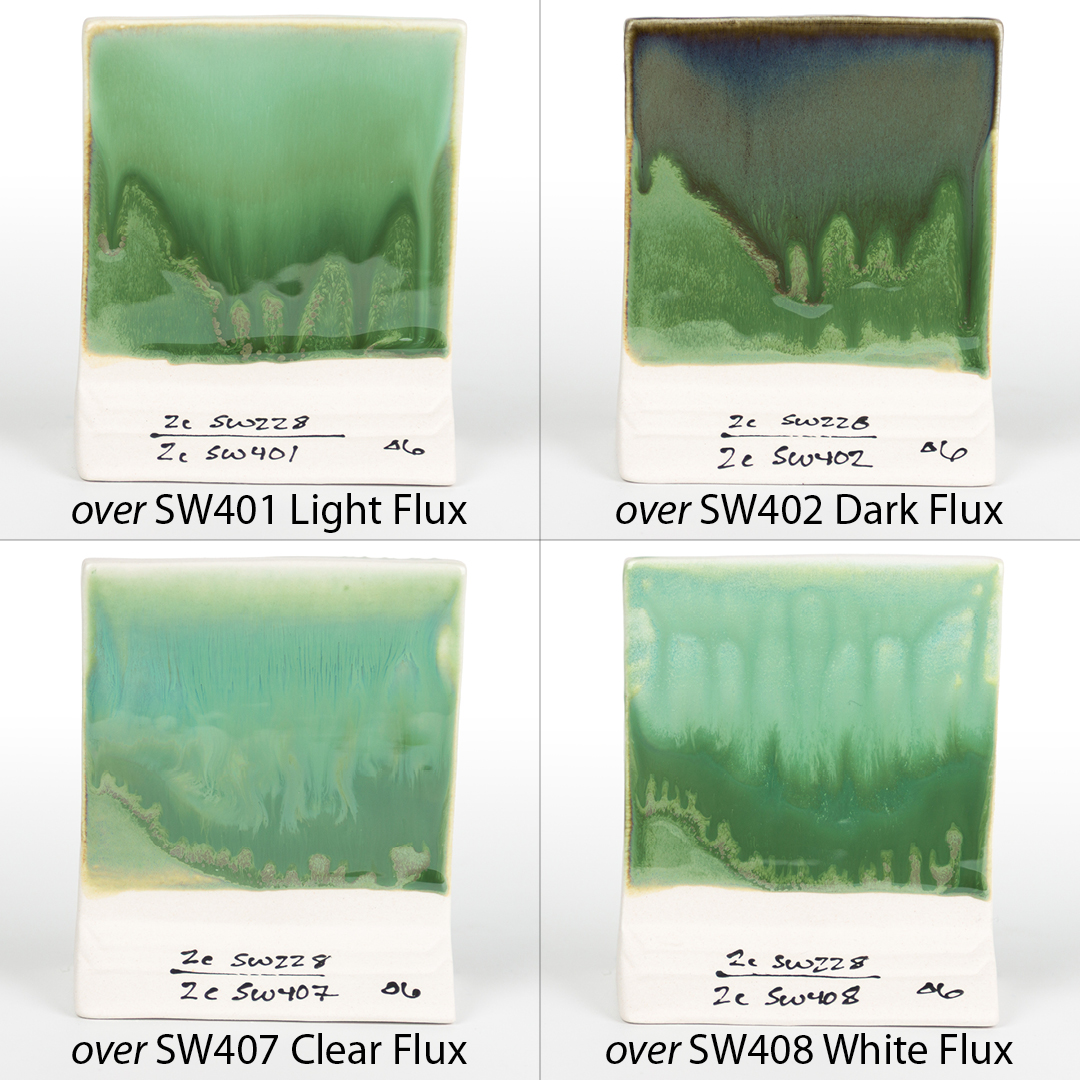
SW228 Beetlewing over Flux, Cone 6 Oxidation
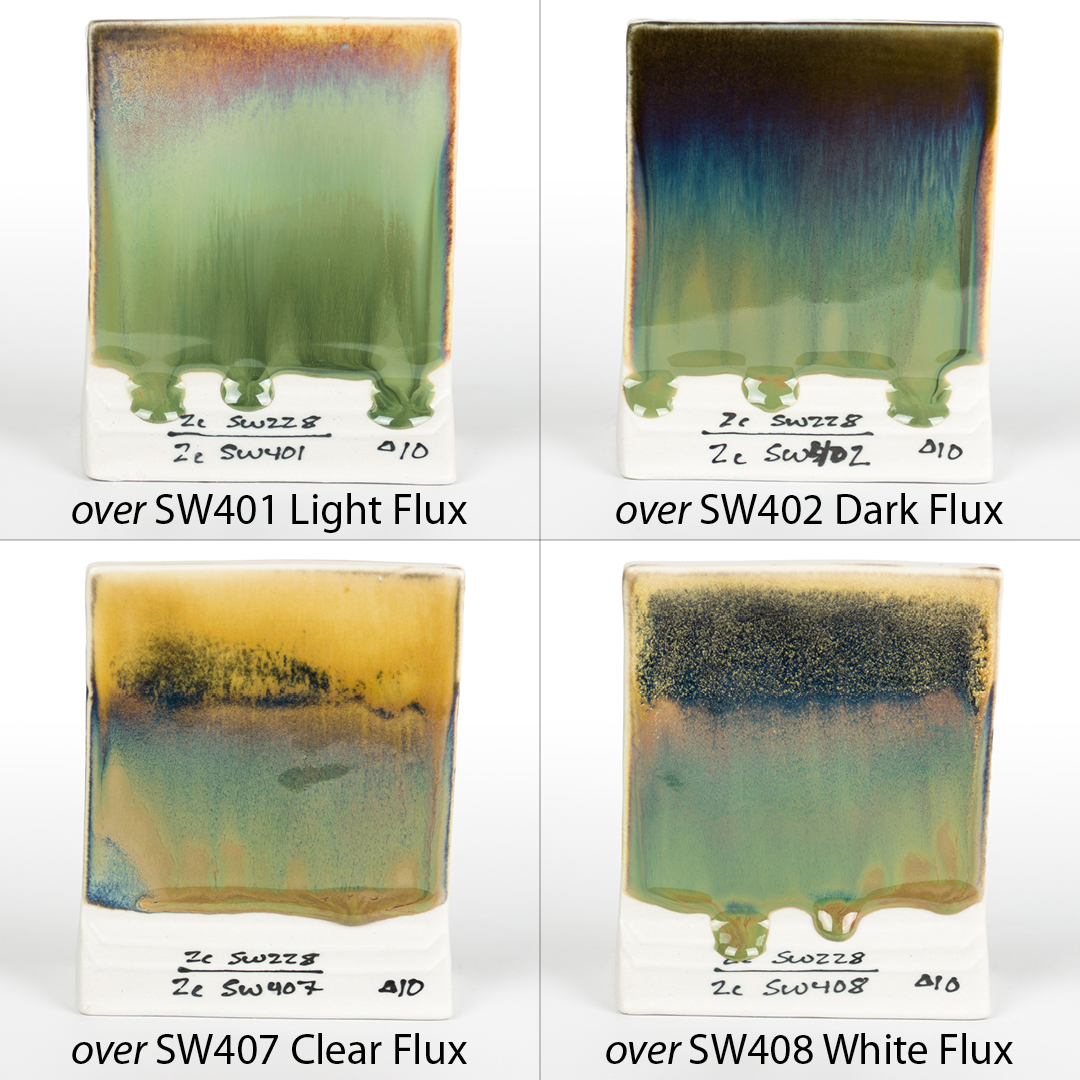
SW228 Beetlewing over Flux, Cone 10 Reduction
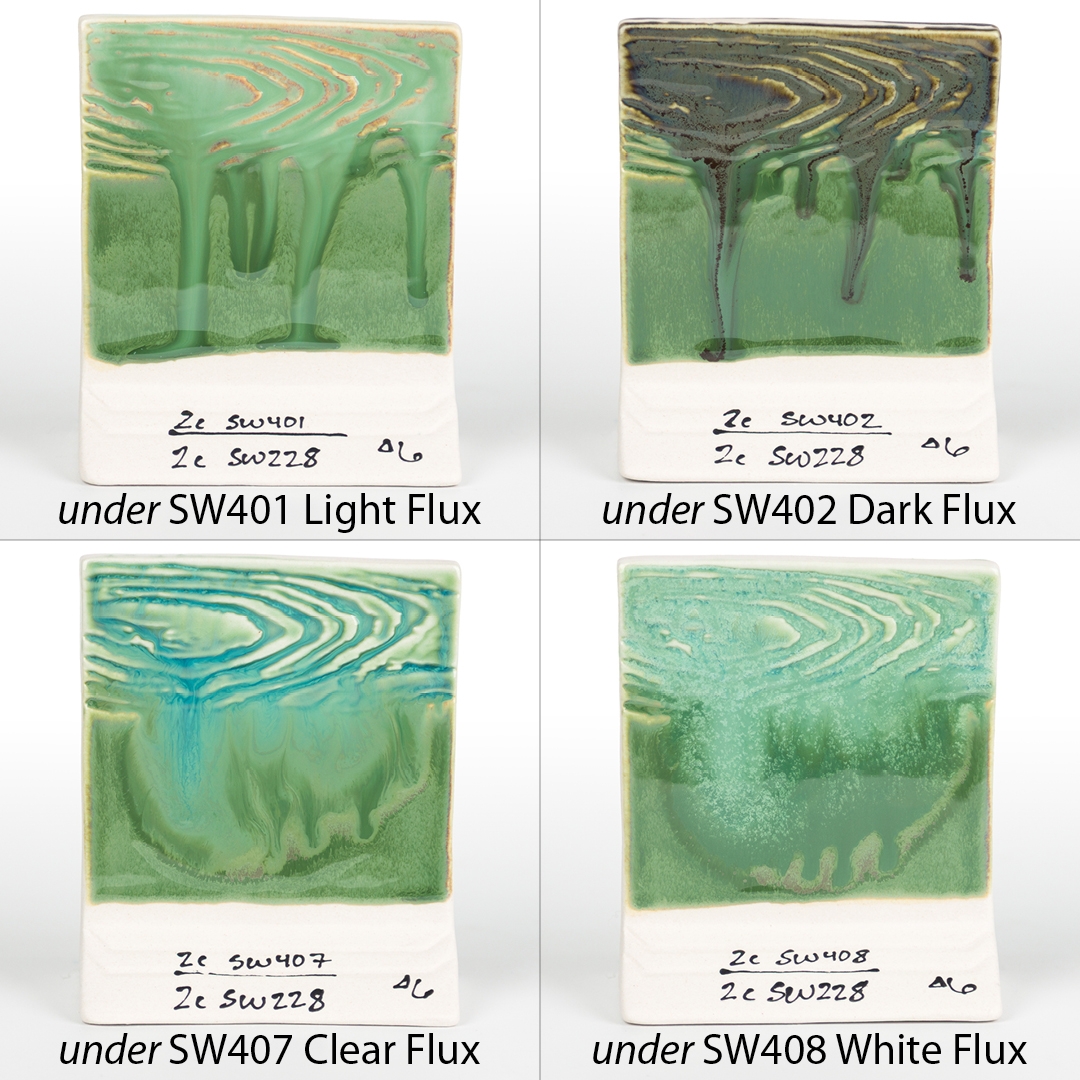
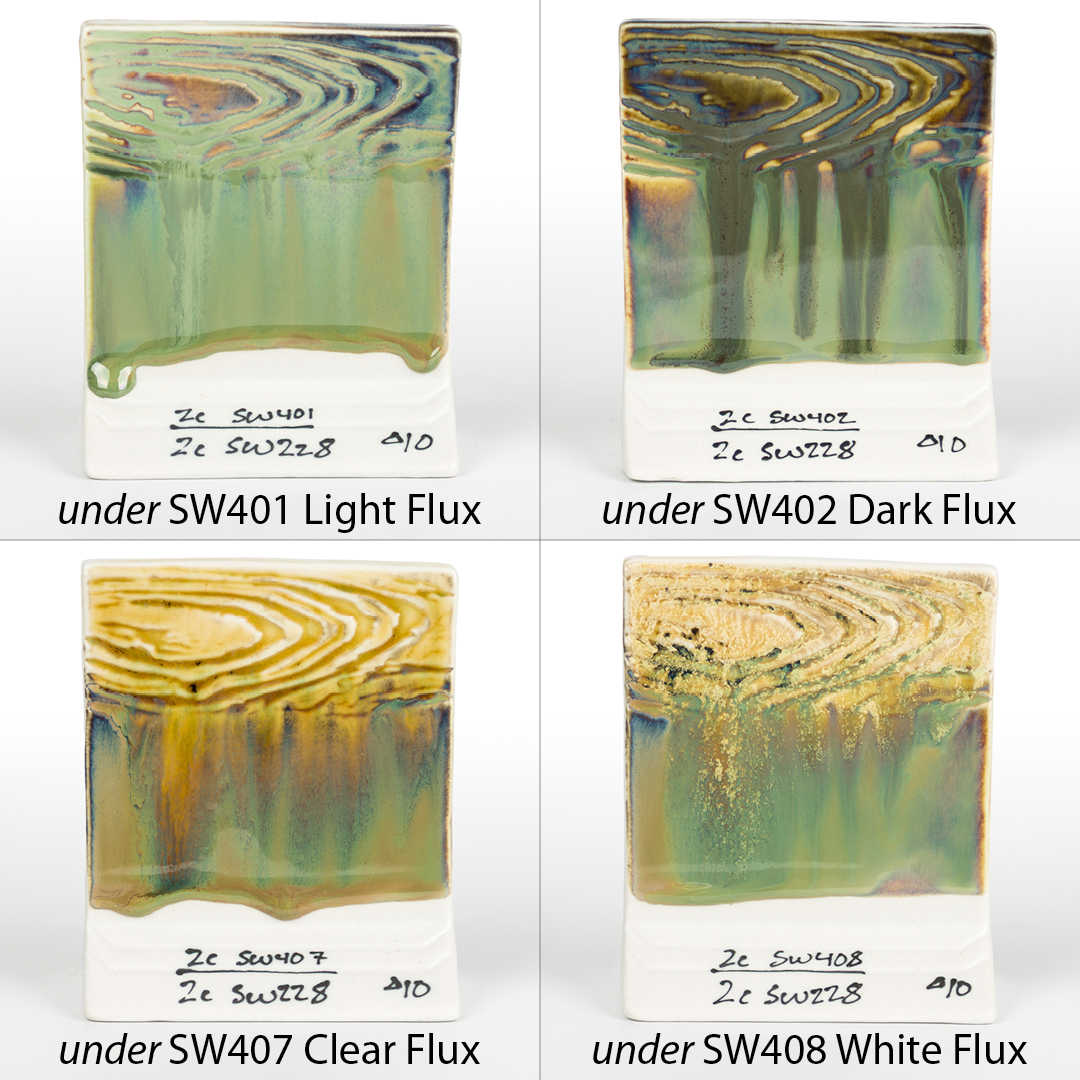
SW228 Beetlewing under Flux, Cone 6 Oxidation
SW228 Beetlewing under Flux, Cone 10 Reduction
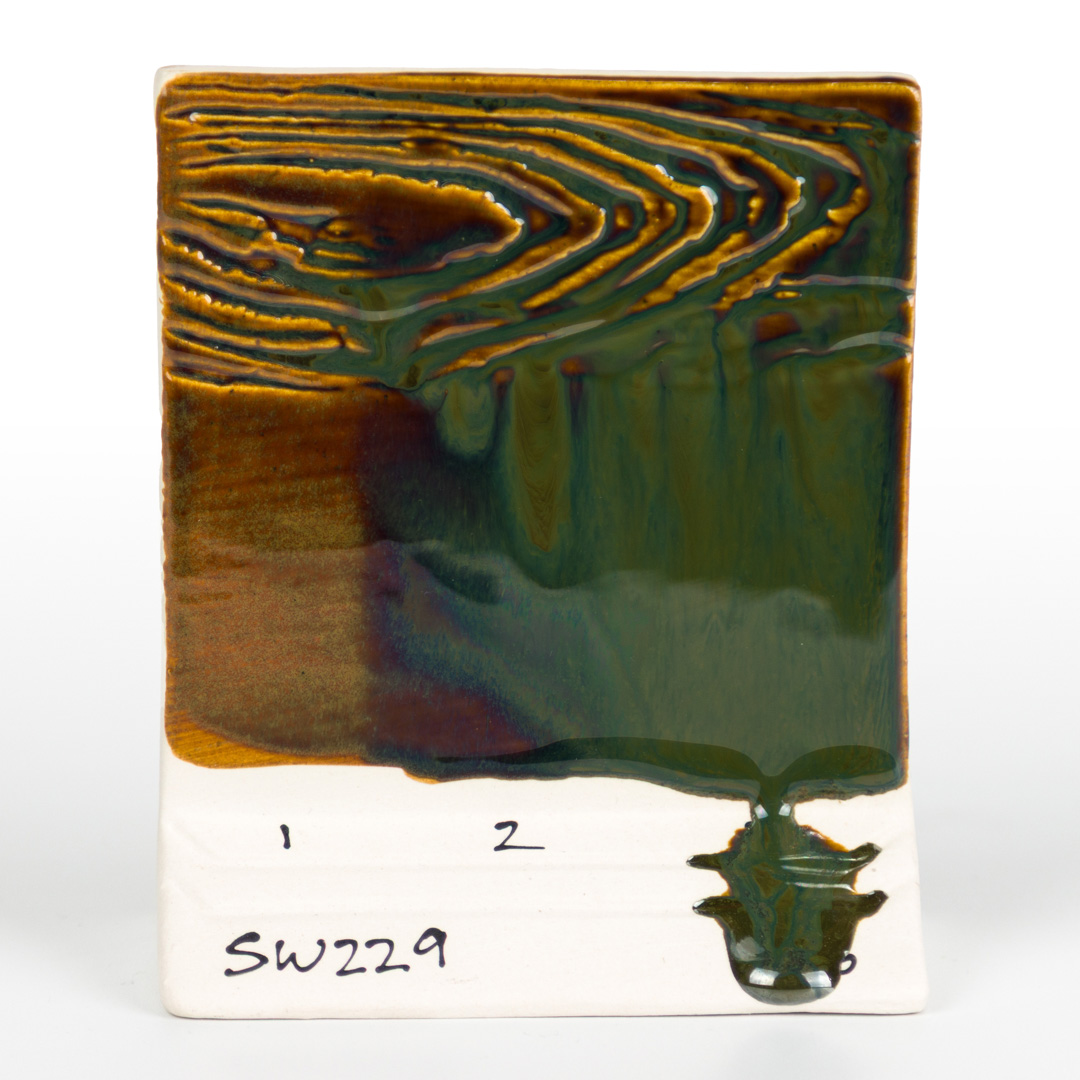
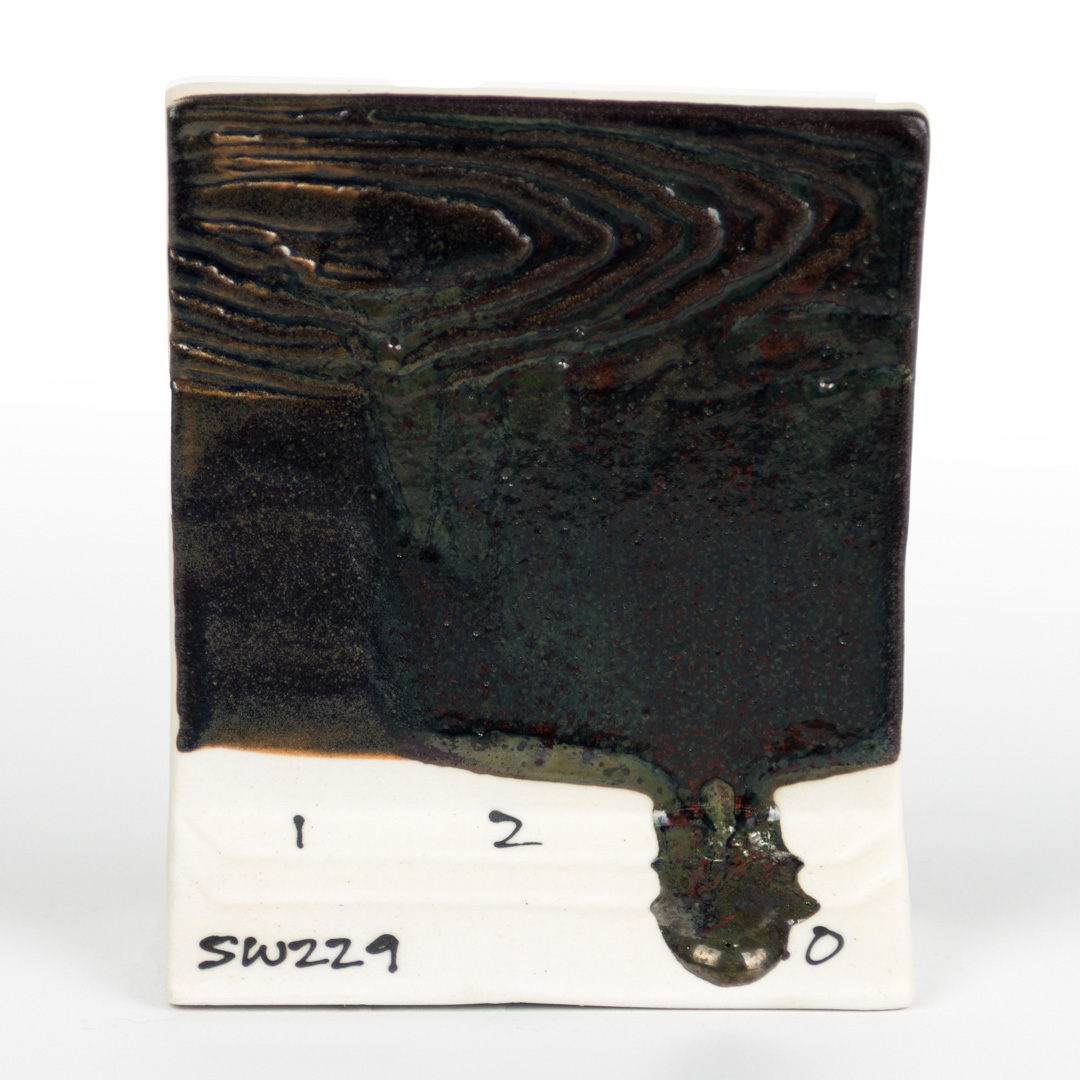
A glossy, opaque dark green glaze that breaks brown over texture and has an iridescent sheen. Semi-fluid at 3 coats.
Cone 6 Oxidation
Cone 10 Reduction
1, 2, 3 coats, Cone 5 Oxidation
1, 2, 3 Coats, Cone 6 Oxidation
1, 2, 3 Coats, Cone 10 Reduction
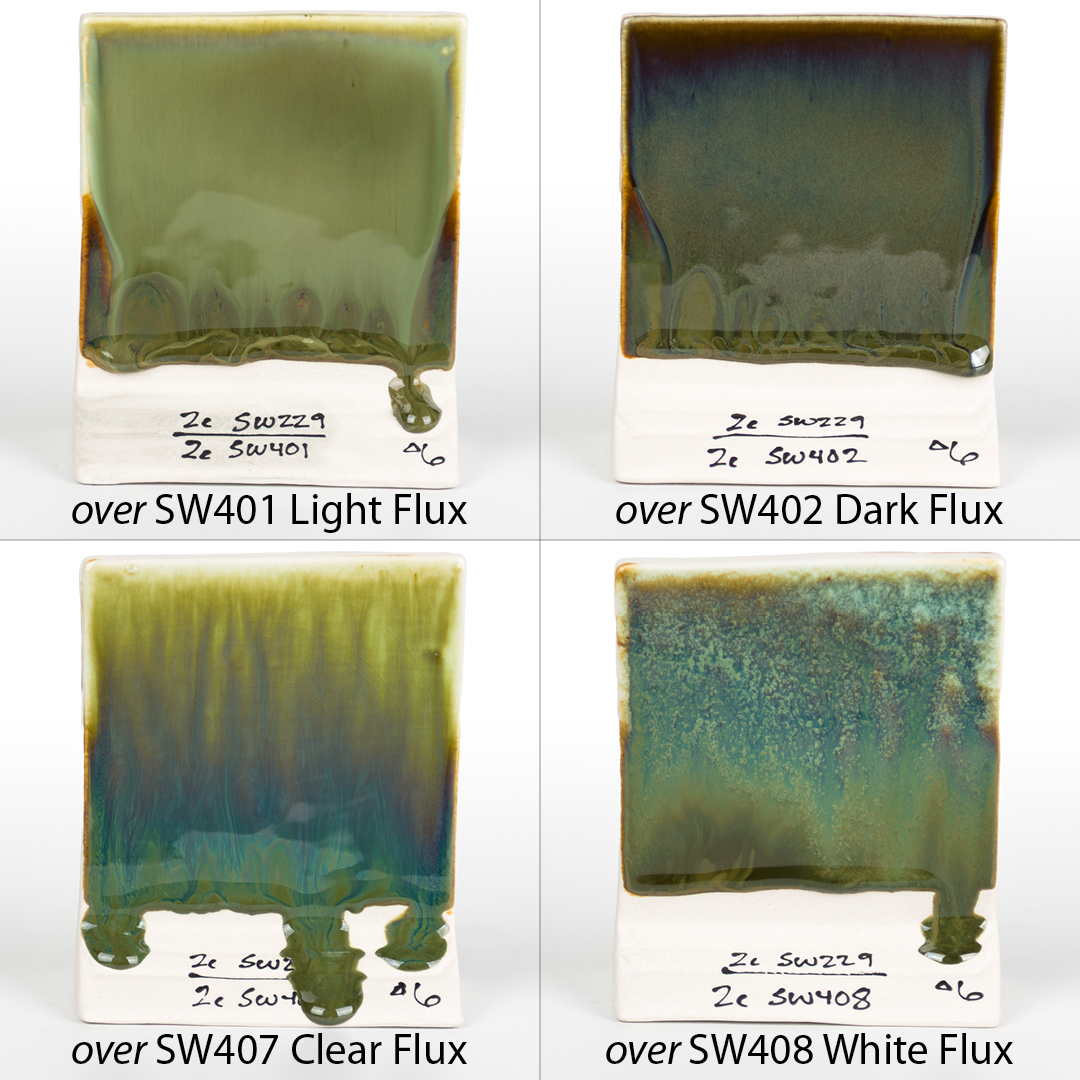
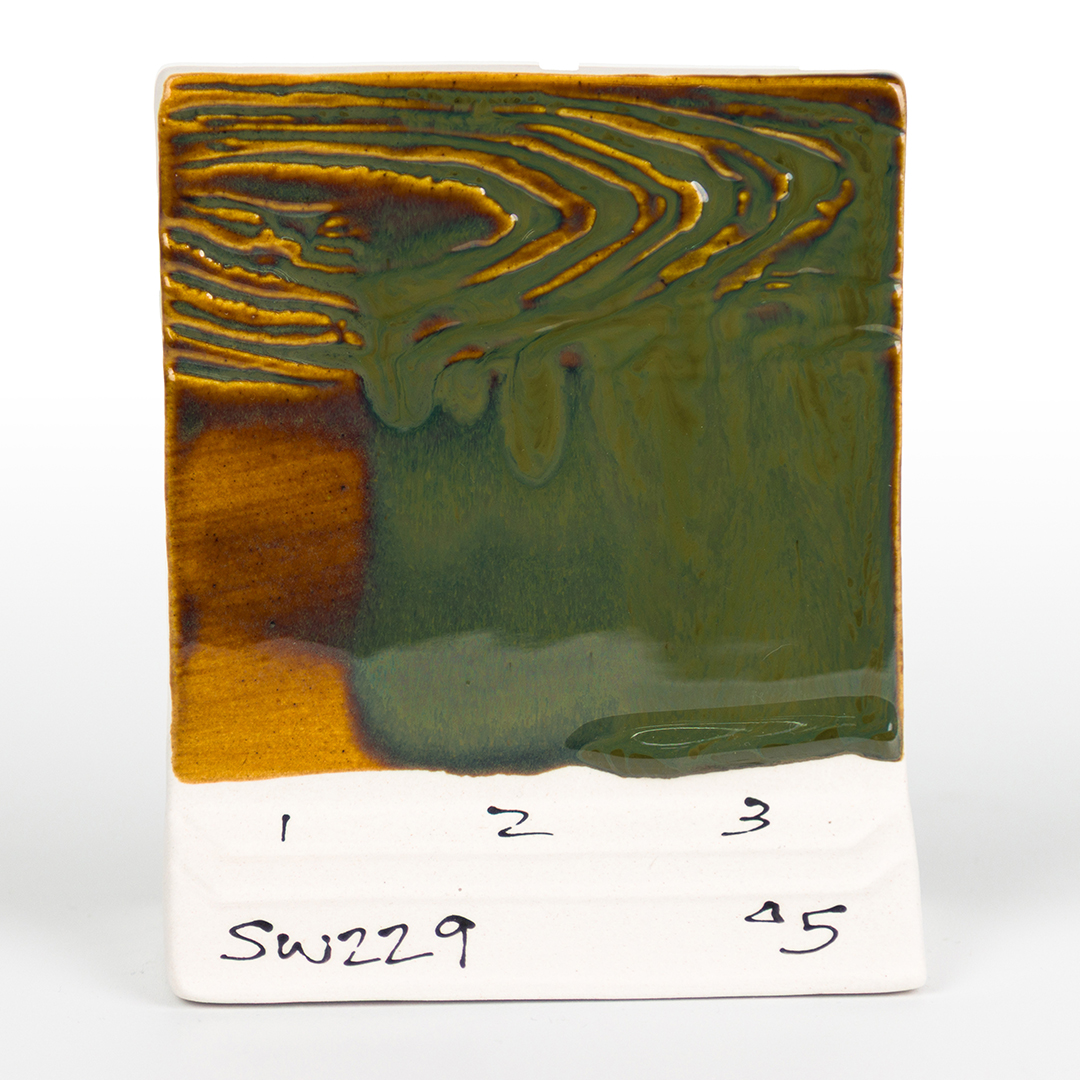
SW229 Mood Ring over Flux, Cone 6 Oxidation
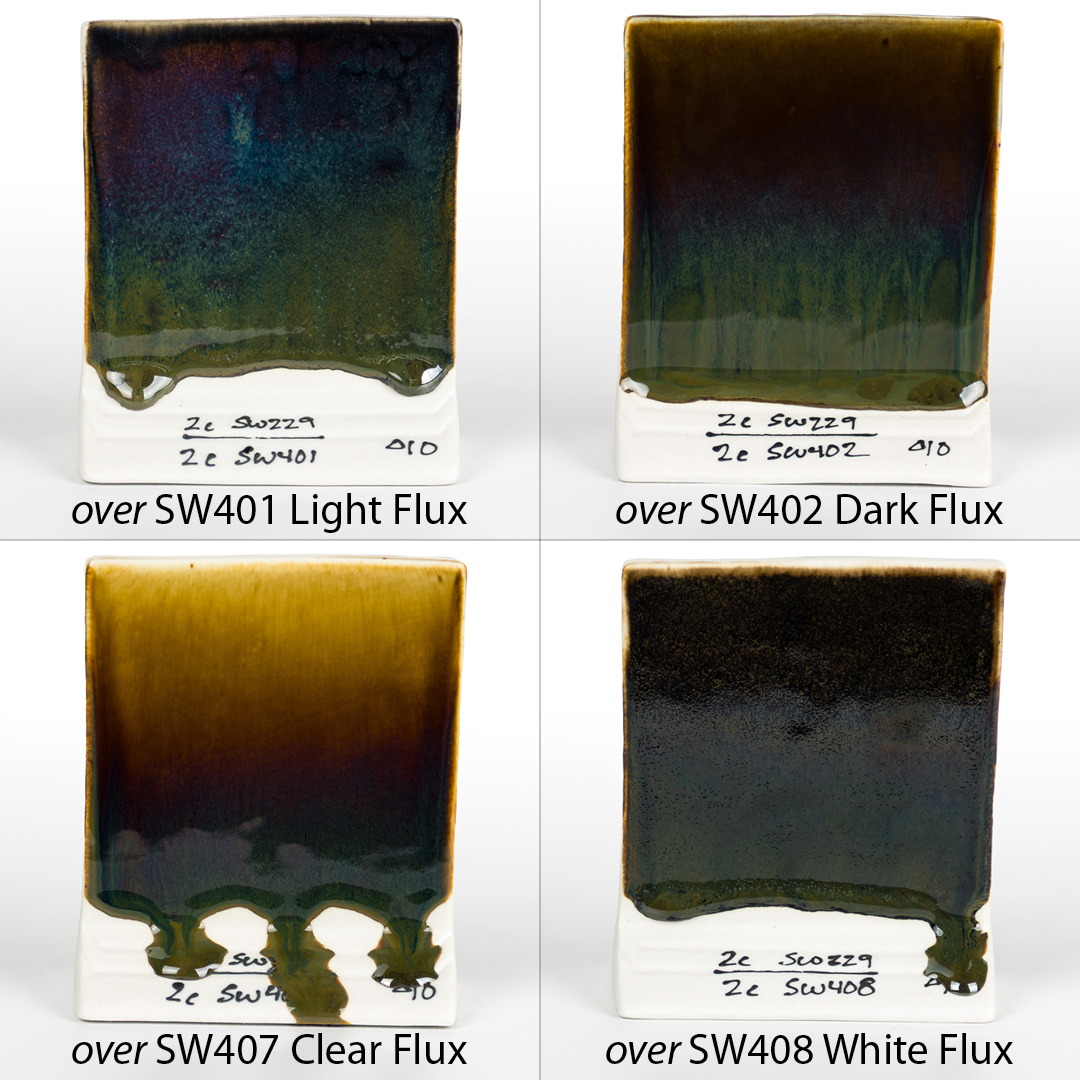
SW229 Mood Ring over Flux, Cone 10 Reduction
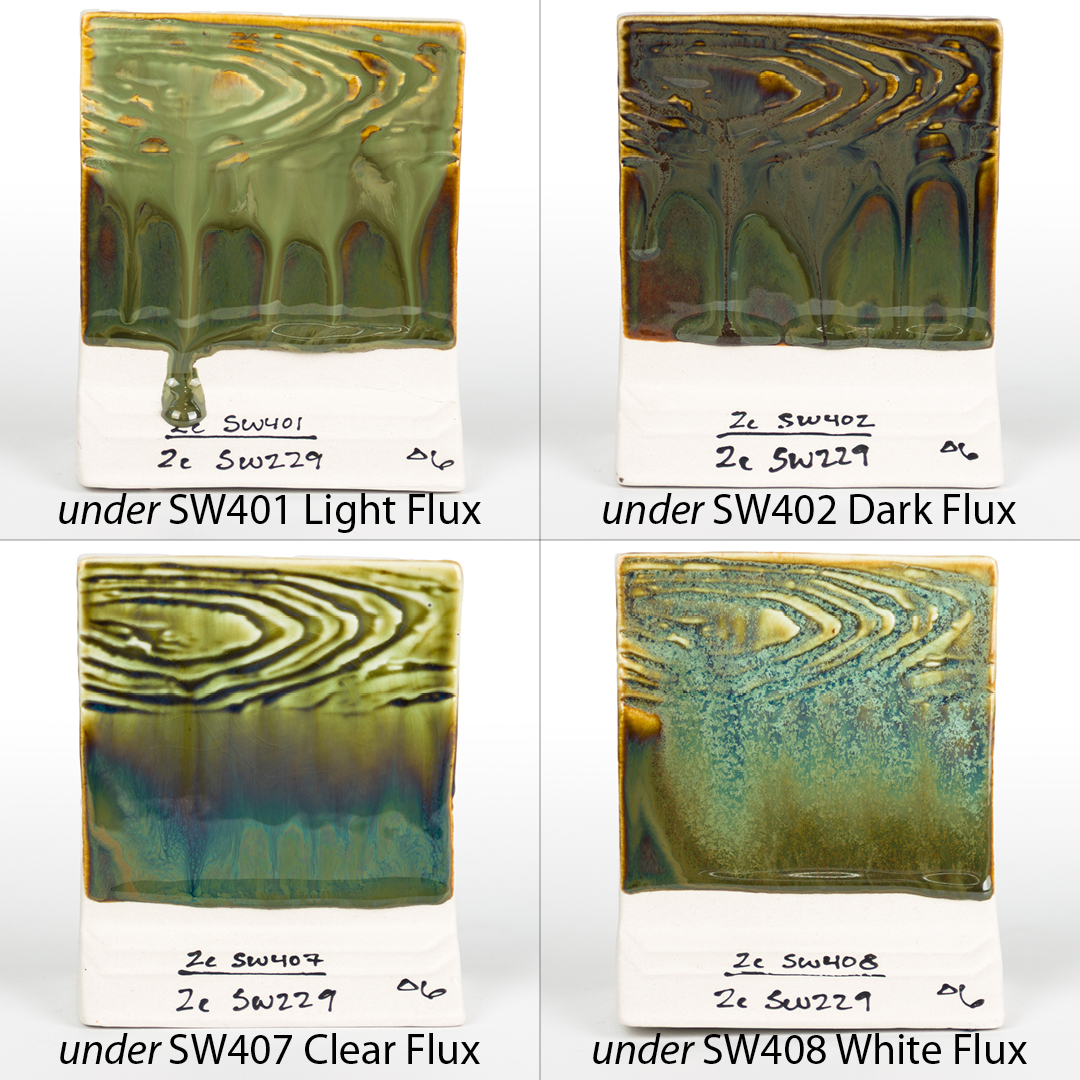
SW229 Mood Ring under Flux, Cone 6 Oxidation
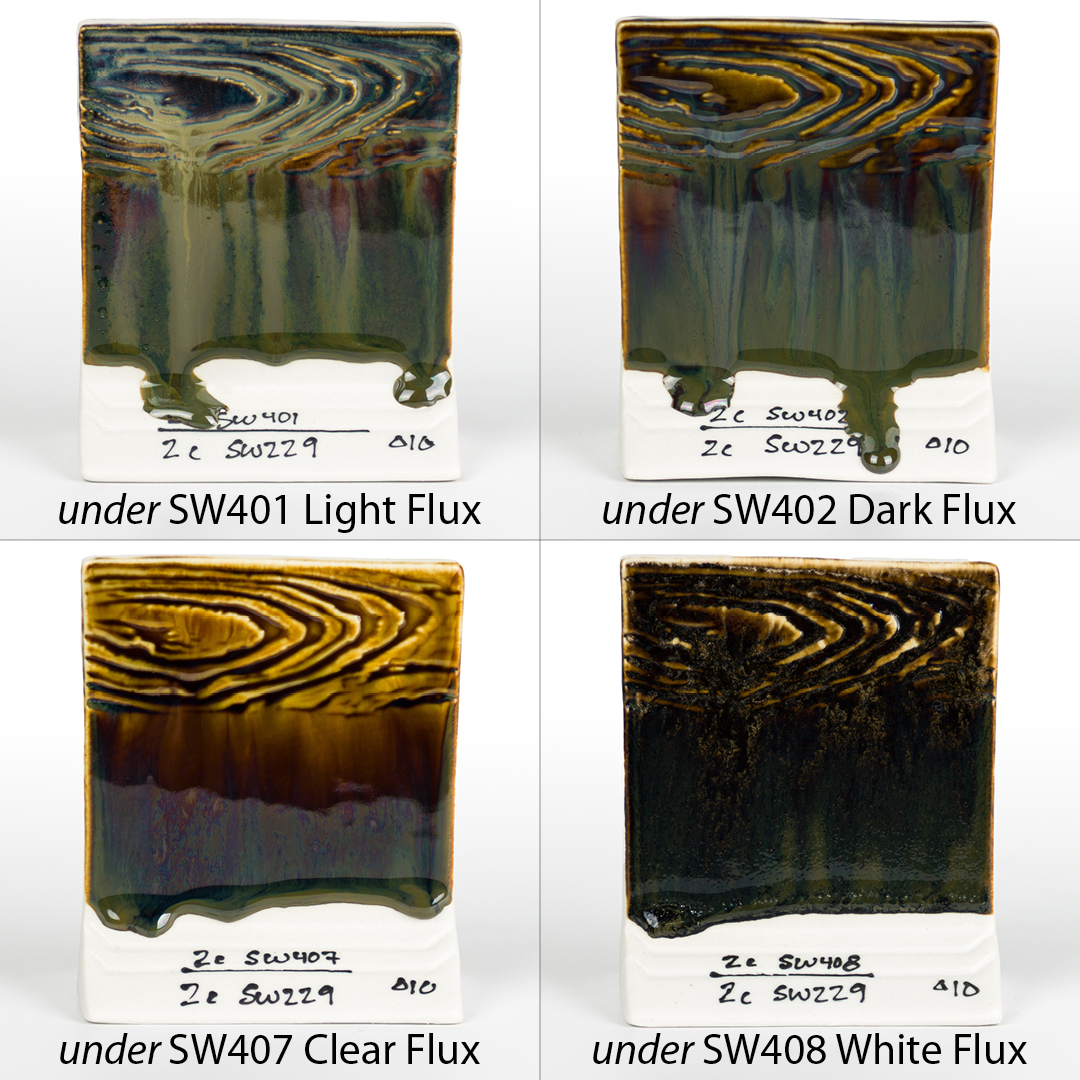
SW229 Mood Ring under Flux, Cone 10 Reduction
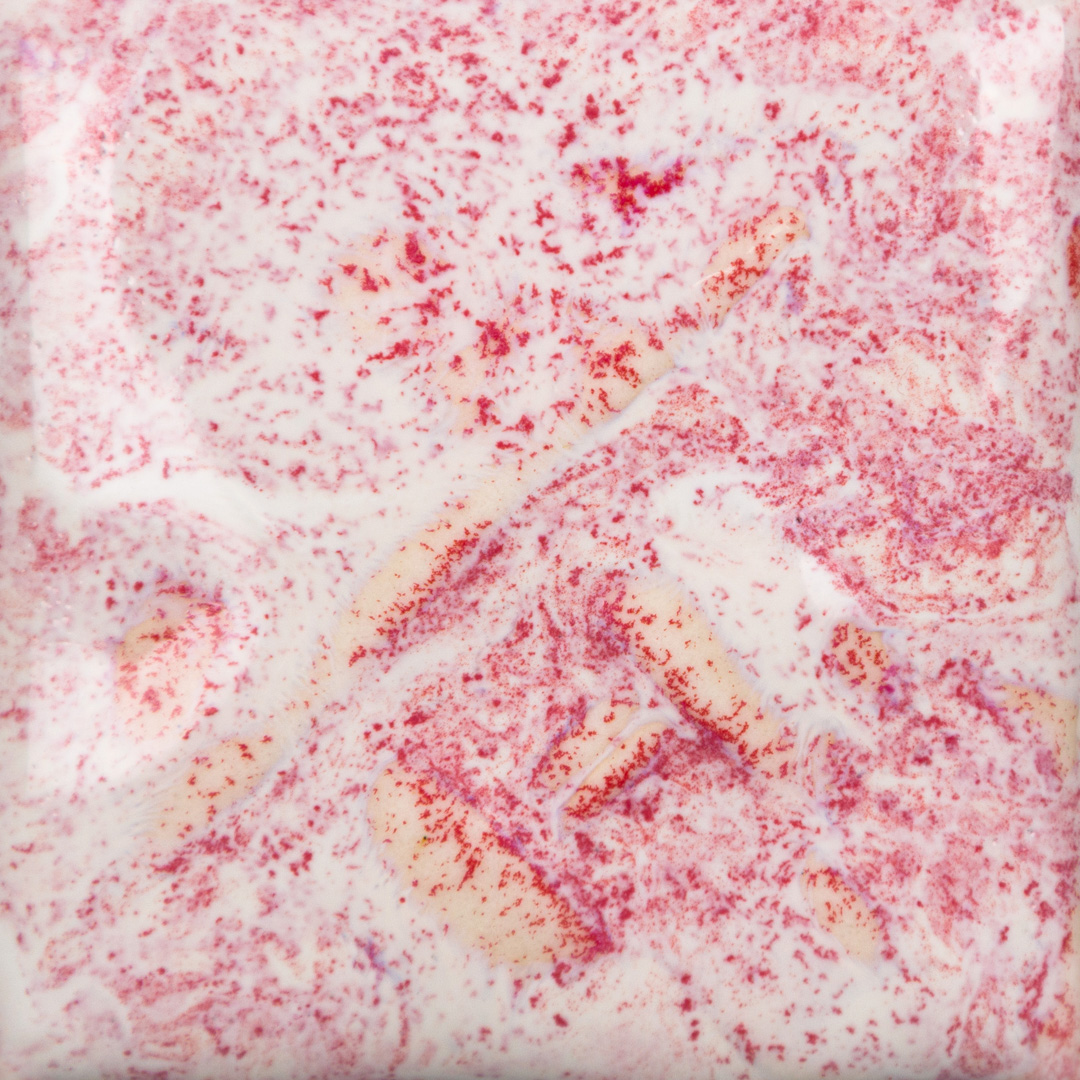
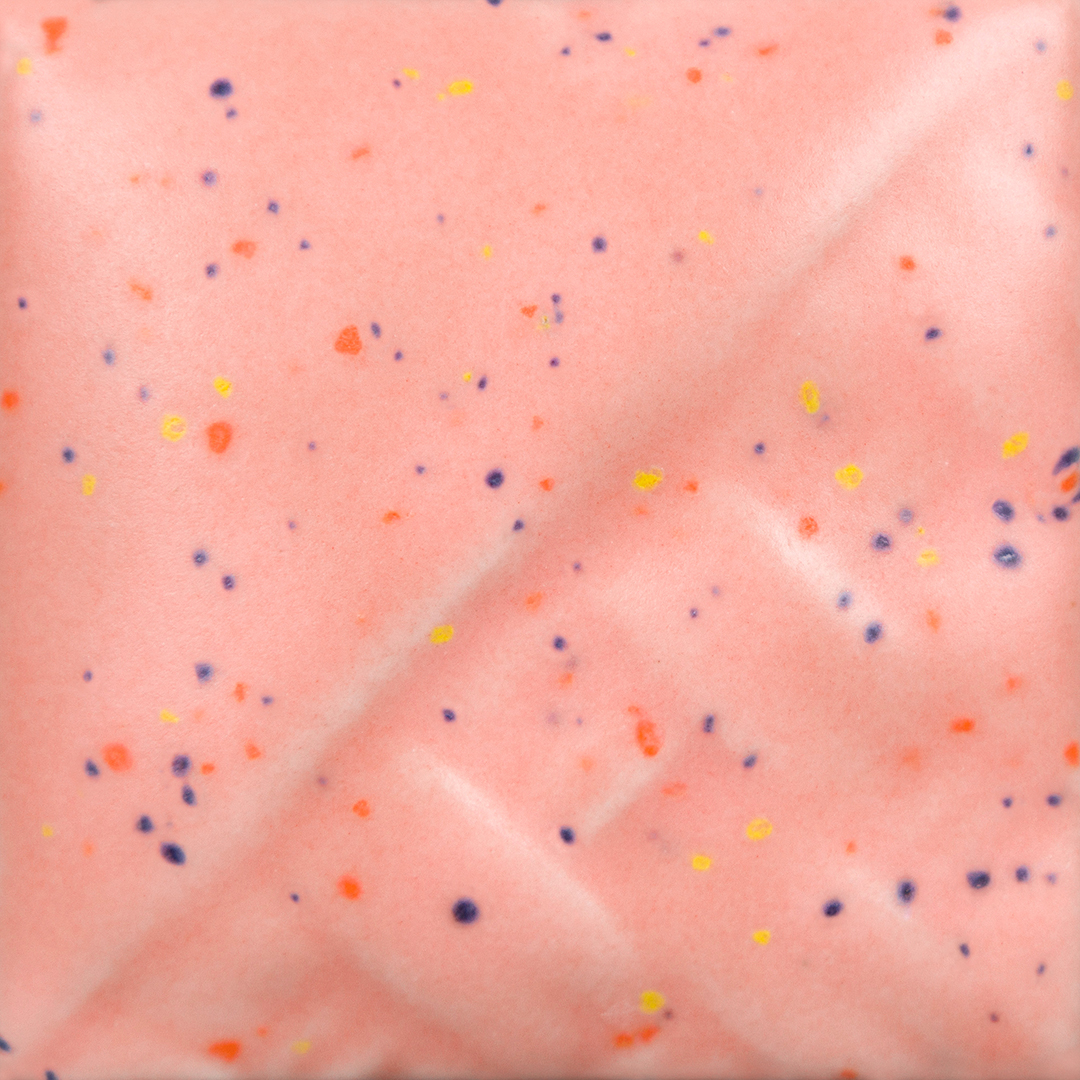
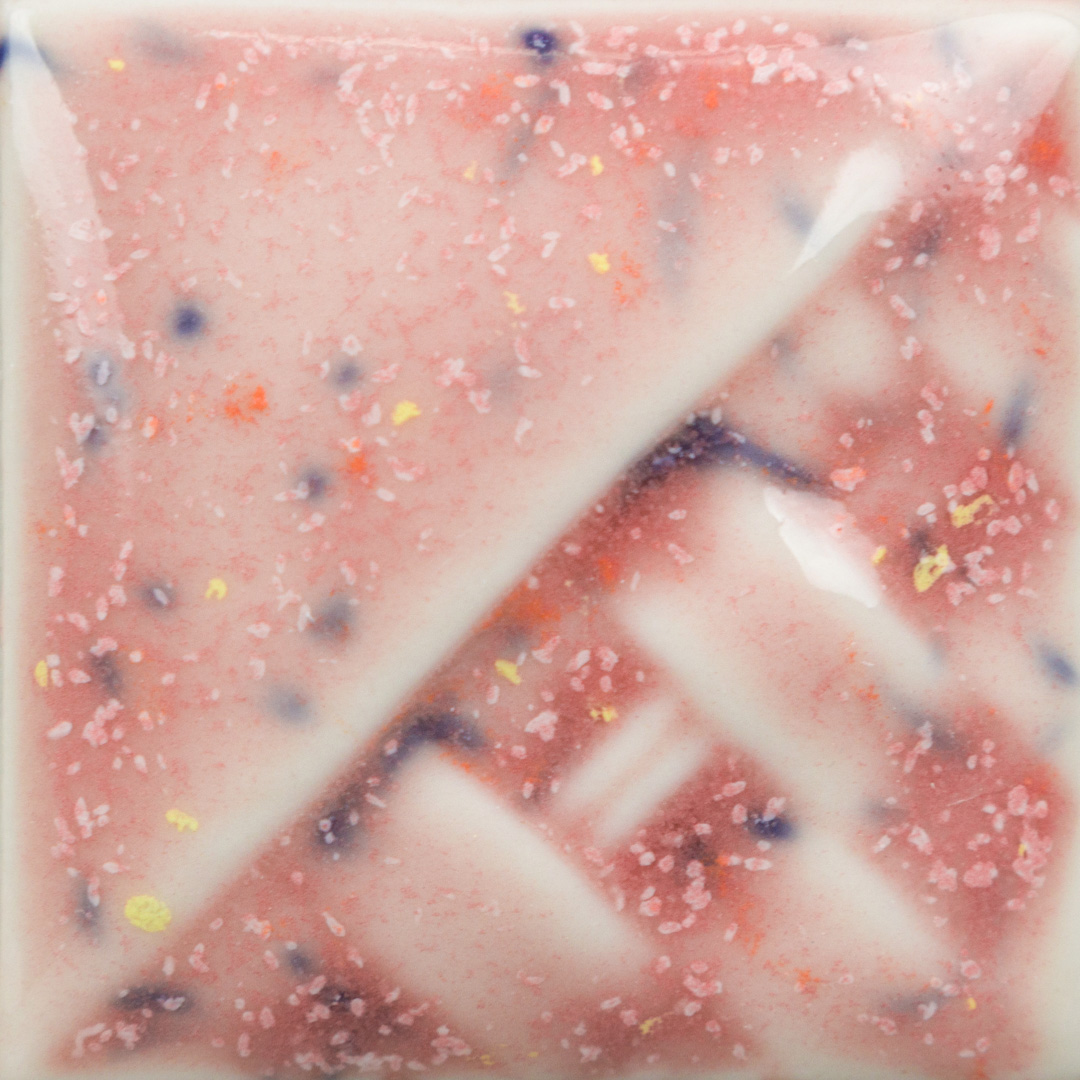
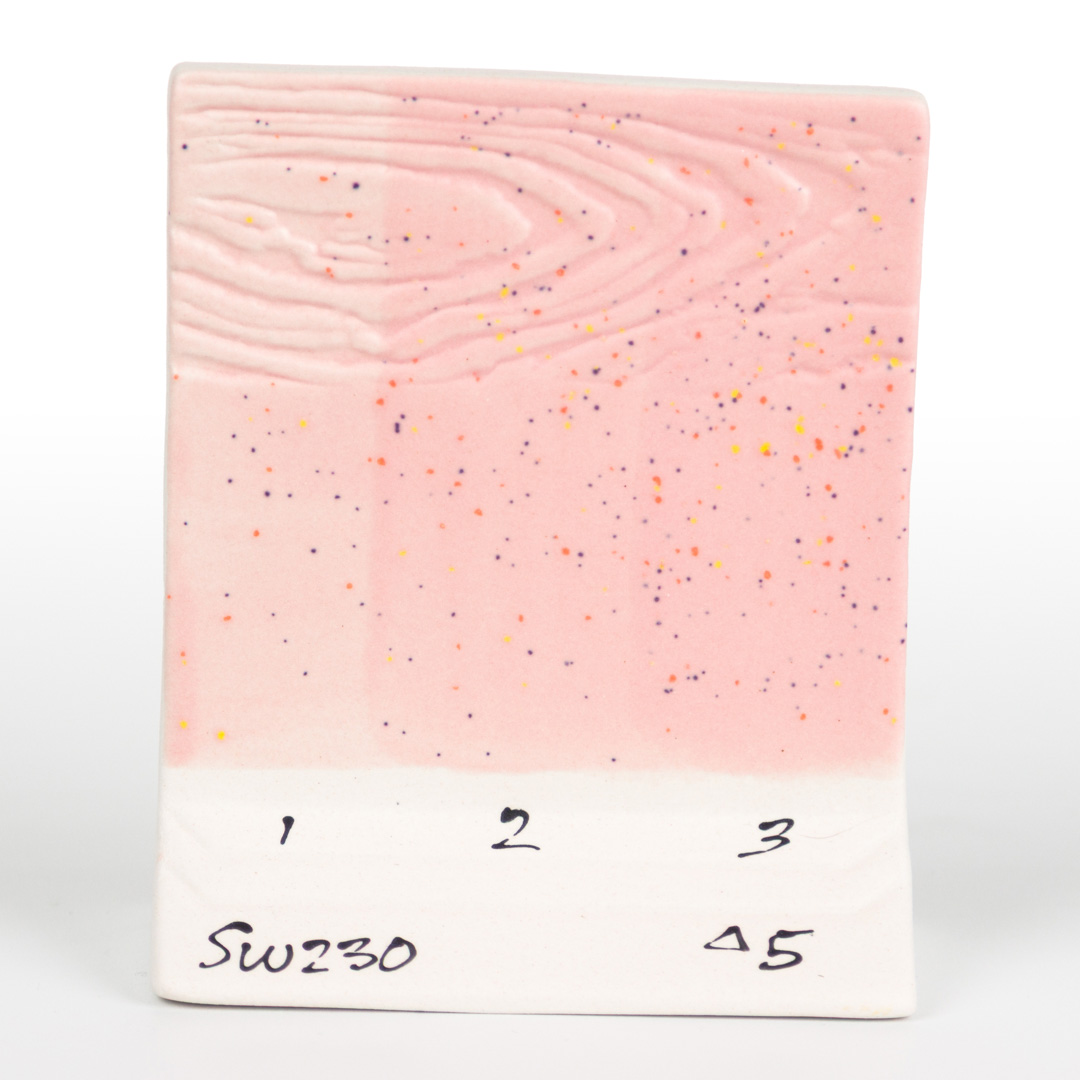
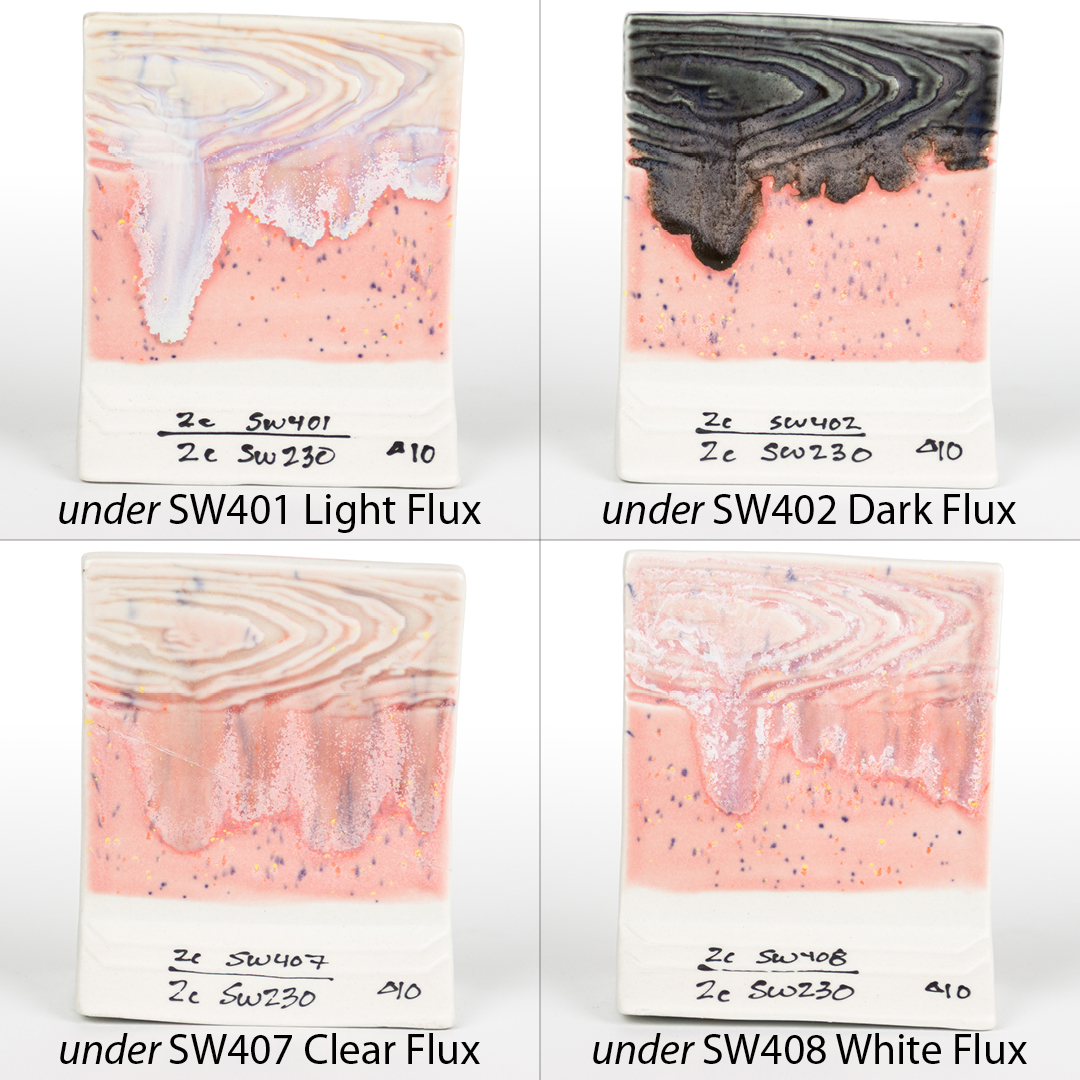
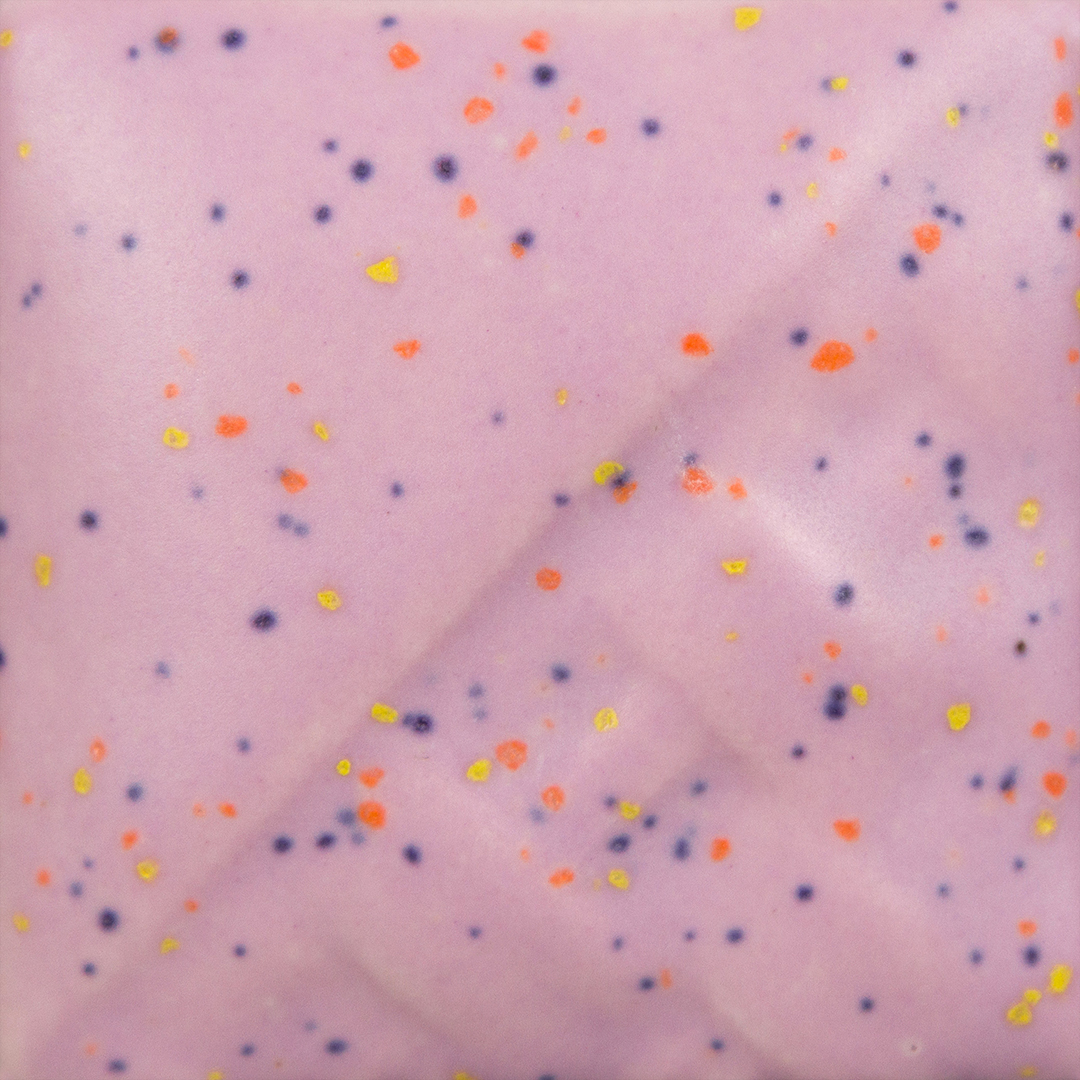
A satin-matte, semi-opaque light pink that breaks over texture. Contains small purple, orange and yellow specks. Stable glaze.
Cone 6 Oxidation
Cone 10 Reduction
1, 2, 3 Coats, Cone 5 Oxidation
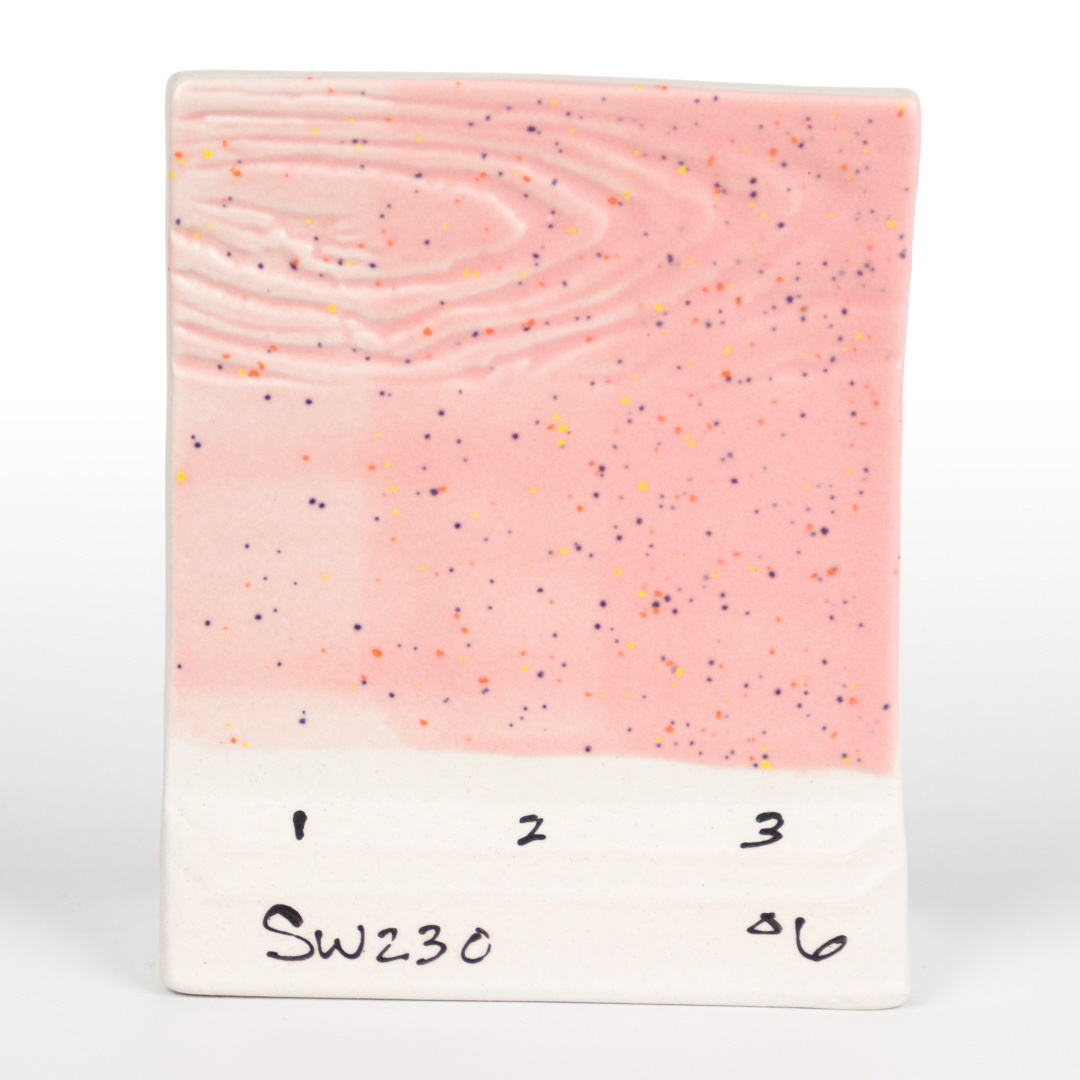
1, 2, 3 Coats, Cone 6 Oxidation

1, 2, 3 Coats, Cone 10 Reduction
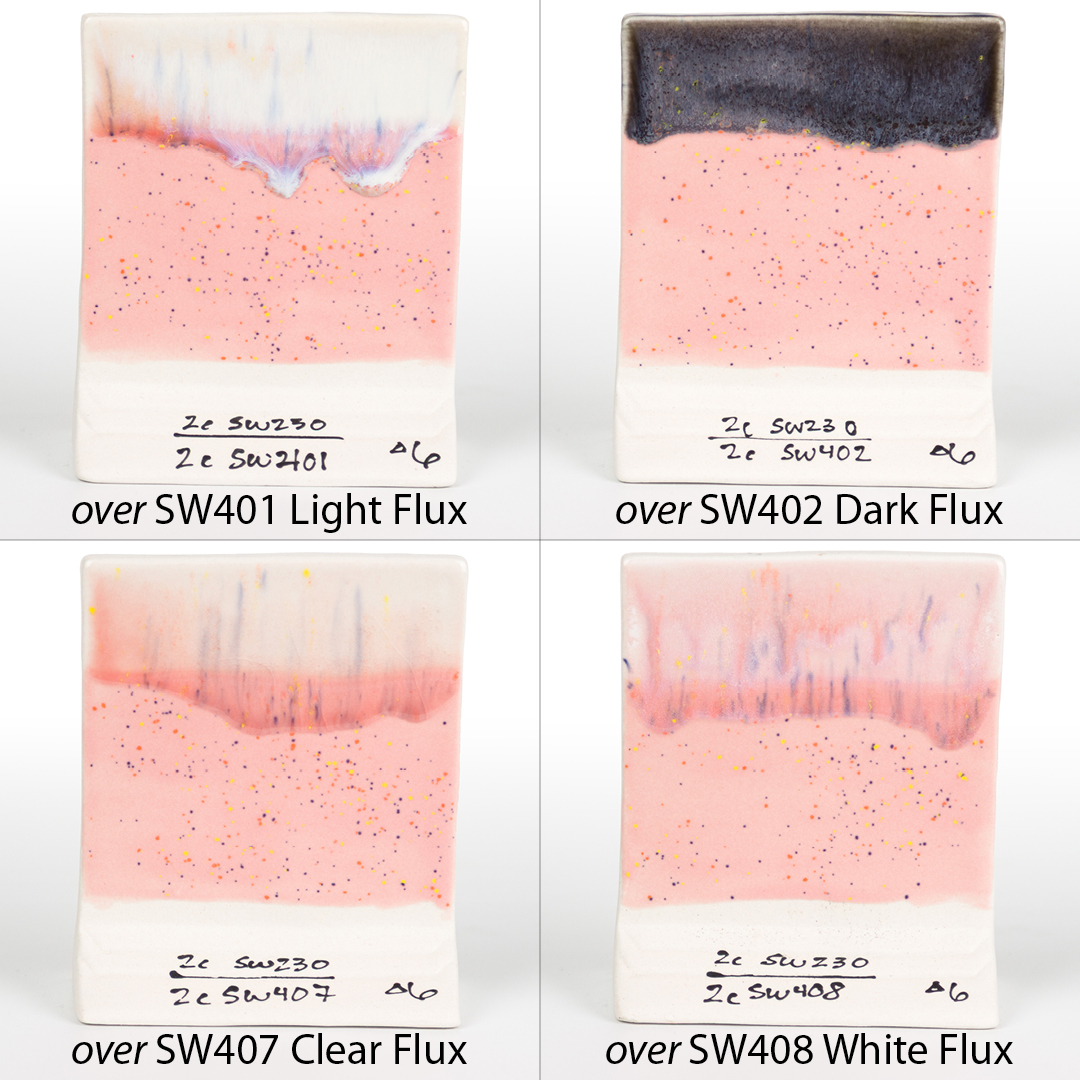
SW230 Pink Speck over Flux, Cone 6 Oxidation
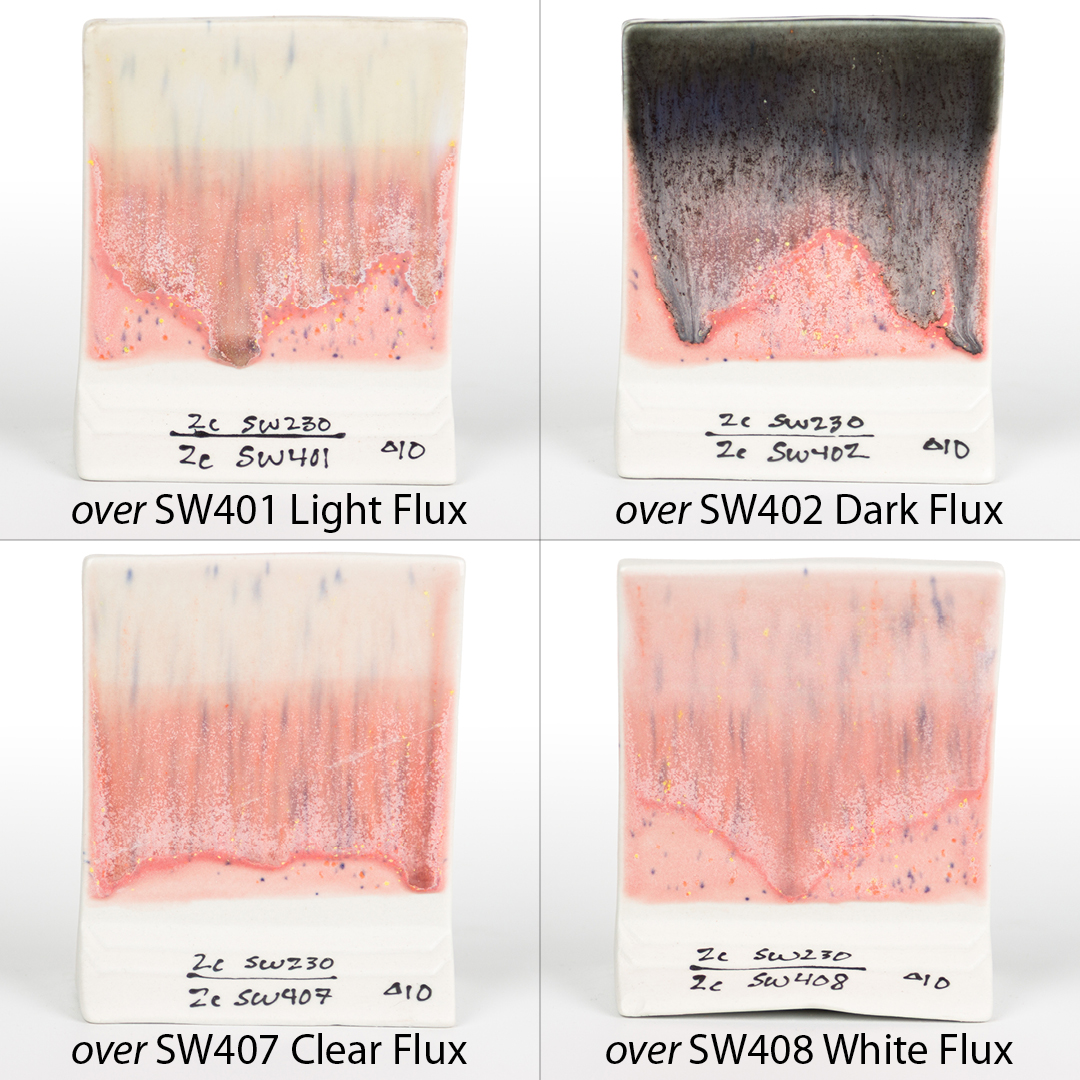
SW230 Pink Speck over Flux, Cone 10 Reduction
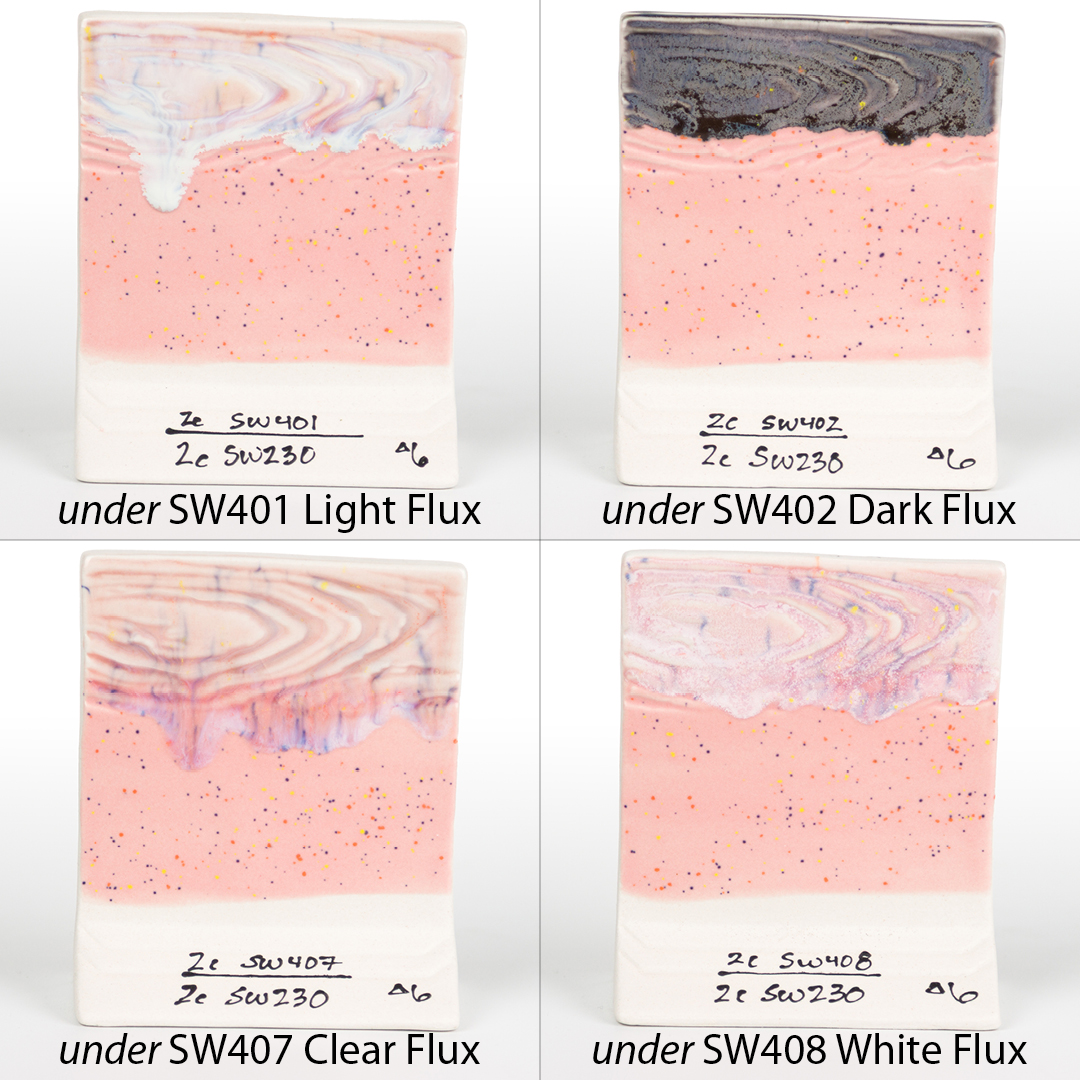
SW230 Pink Speck under Flux, Cone 6 Oxidation
SW230 Pink Speck under Flux, Cone 10 Reduction
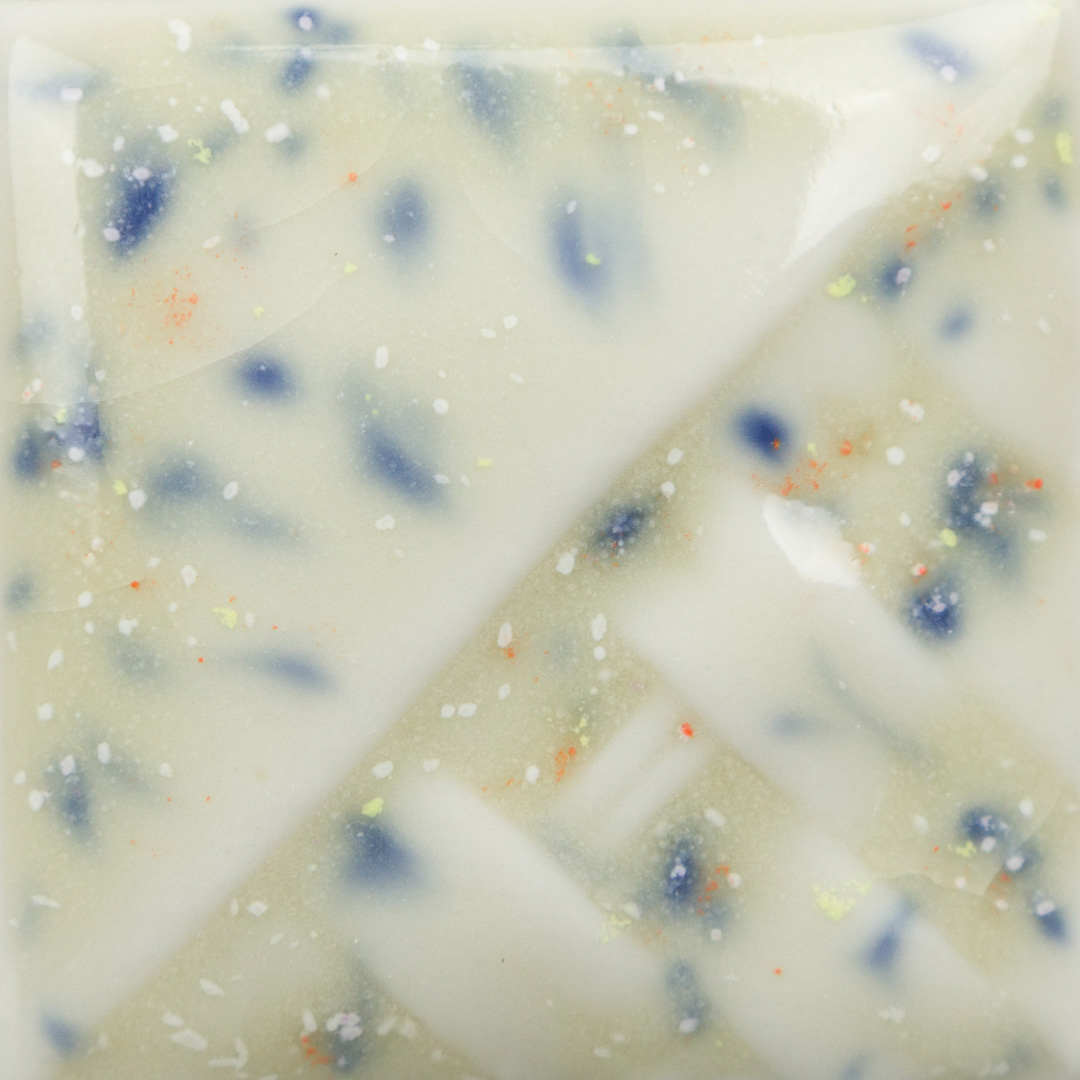
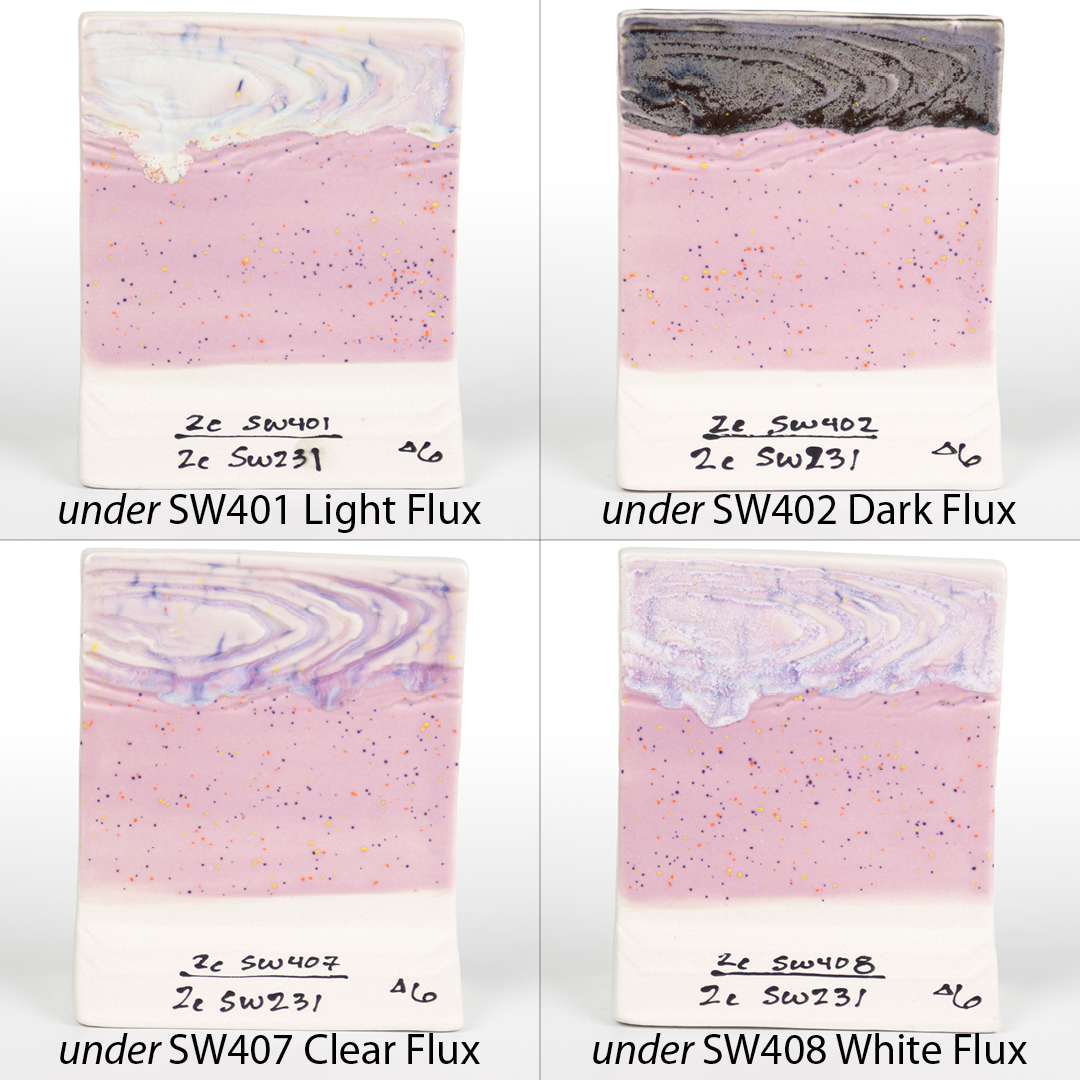
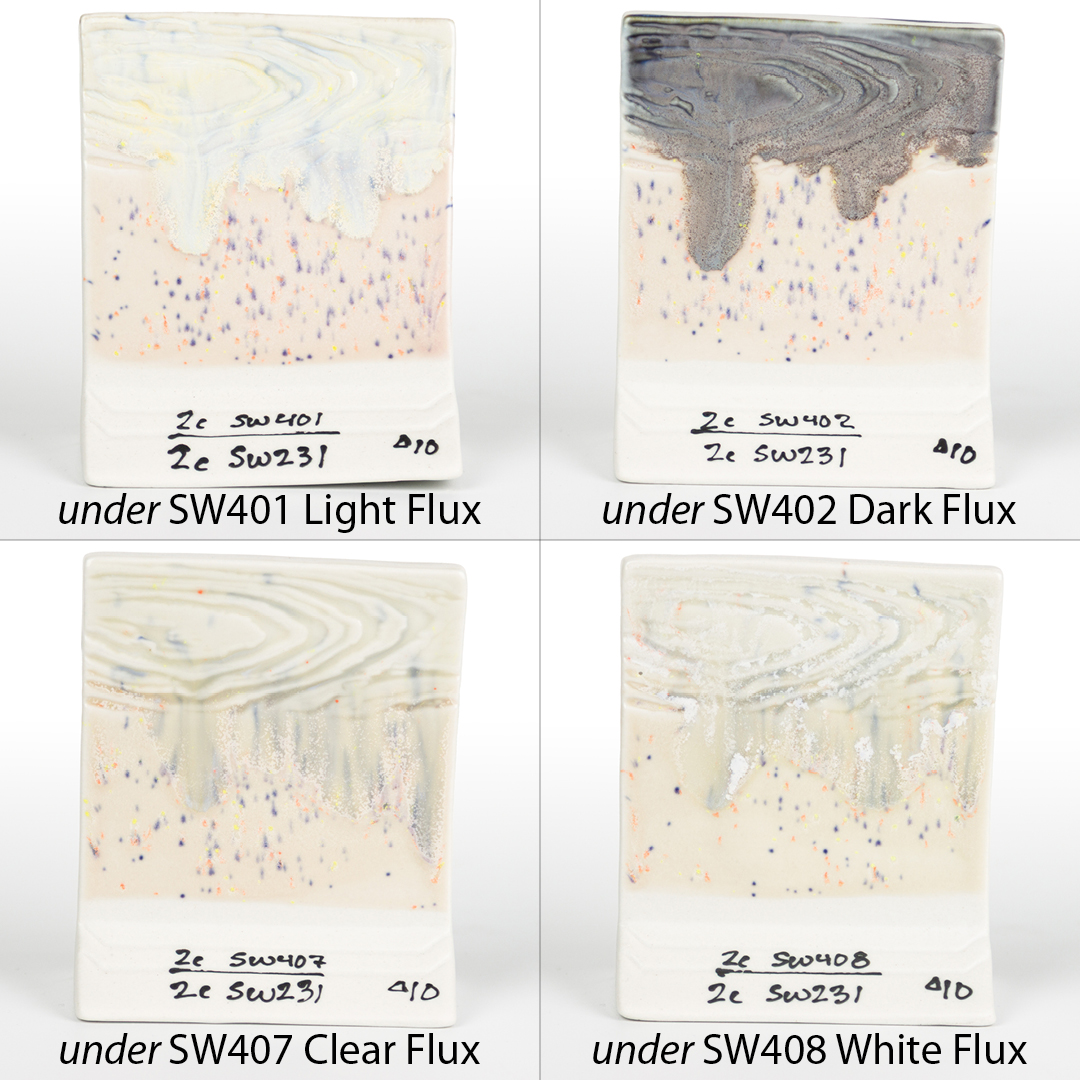
A glossy, semi-opaque teal glaze with a mottled float that breaks over texture. This glaze is stable.

Cone 6 Oxidation
Cone 10 Reduction
1, 2, 3 Coats, Cone 5 Oxidation
1, 2, 3 Coats, Cone 6 Oxidation

1, 2, 3 Coats, Cone 10 Reduction
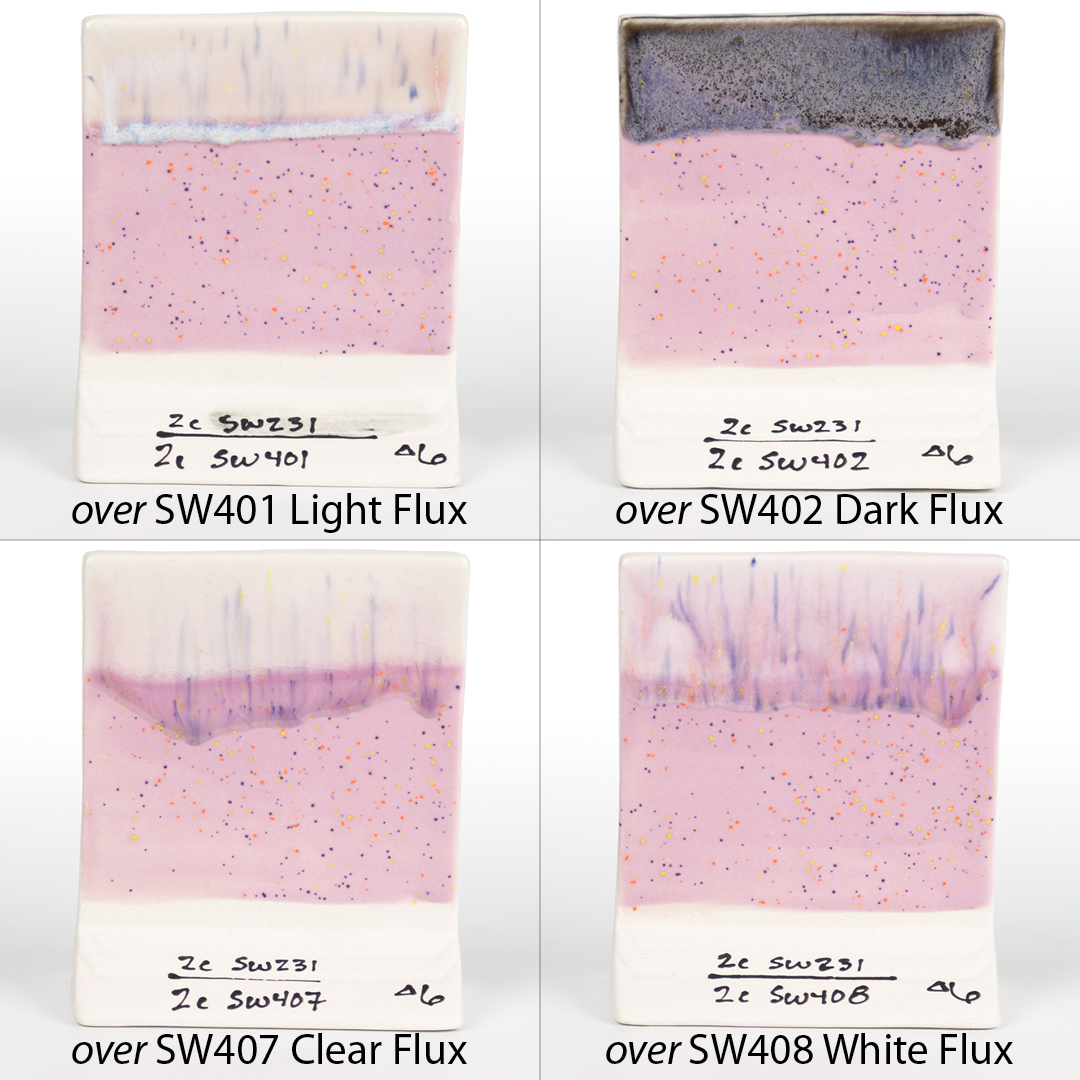
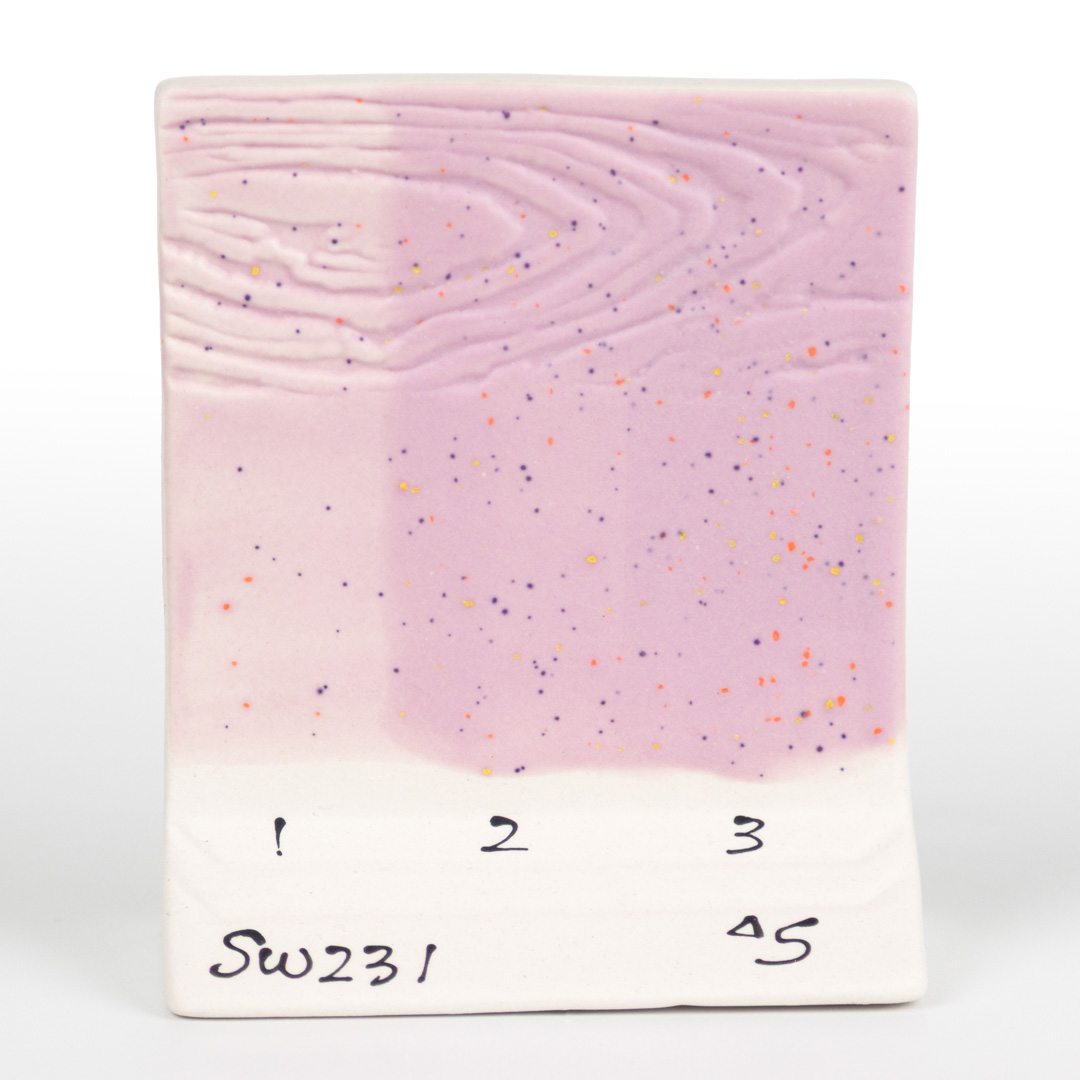
SW231 Lilac Speck over Flux, Cone 6 Oxidation
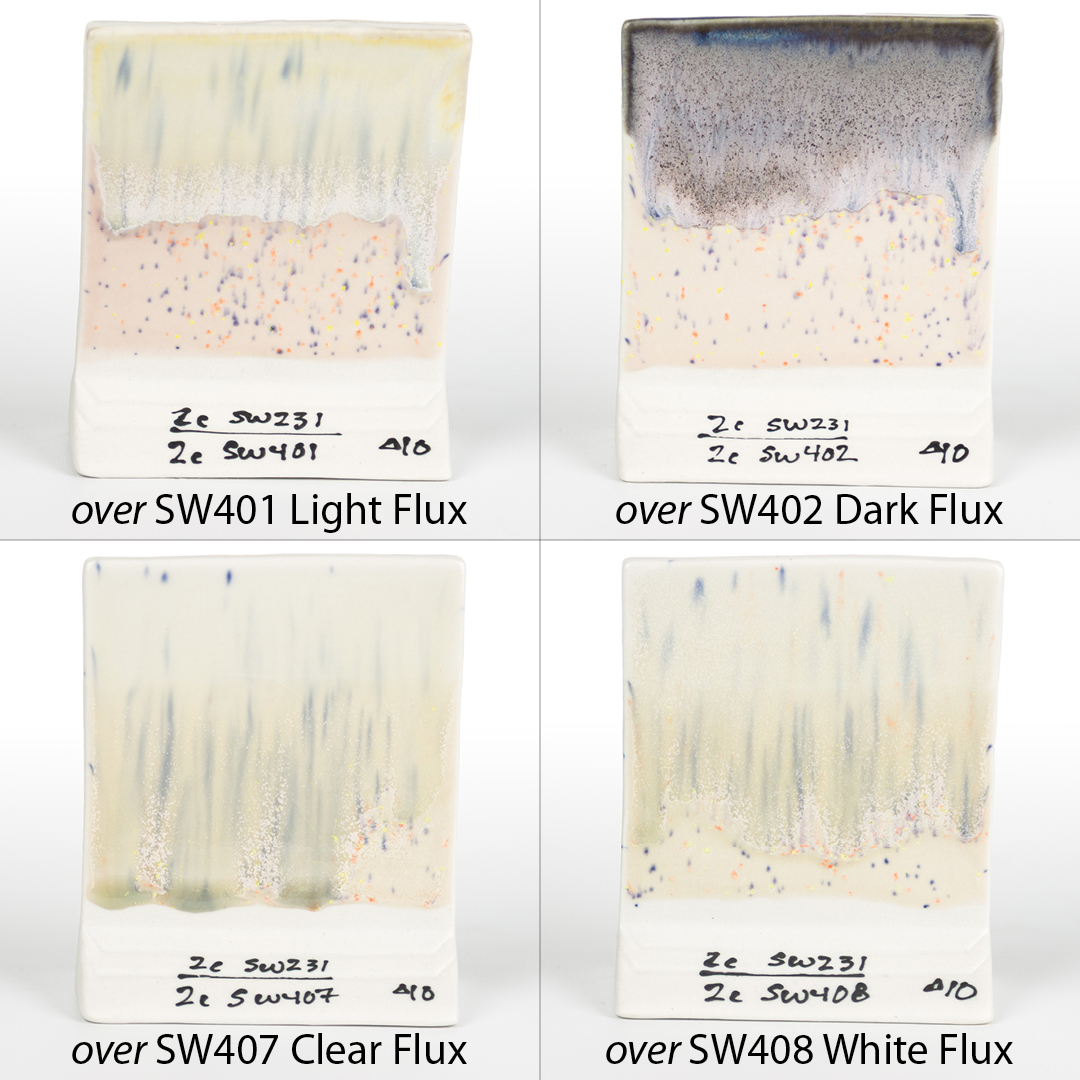
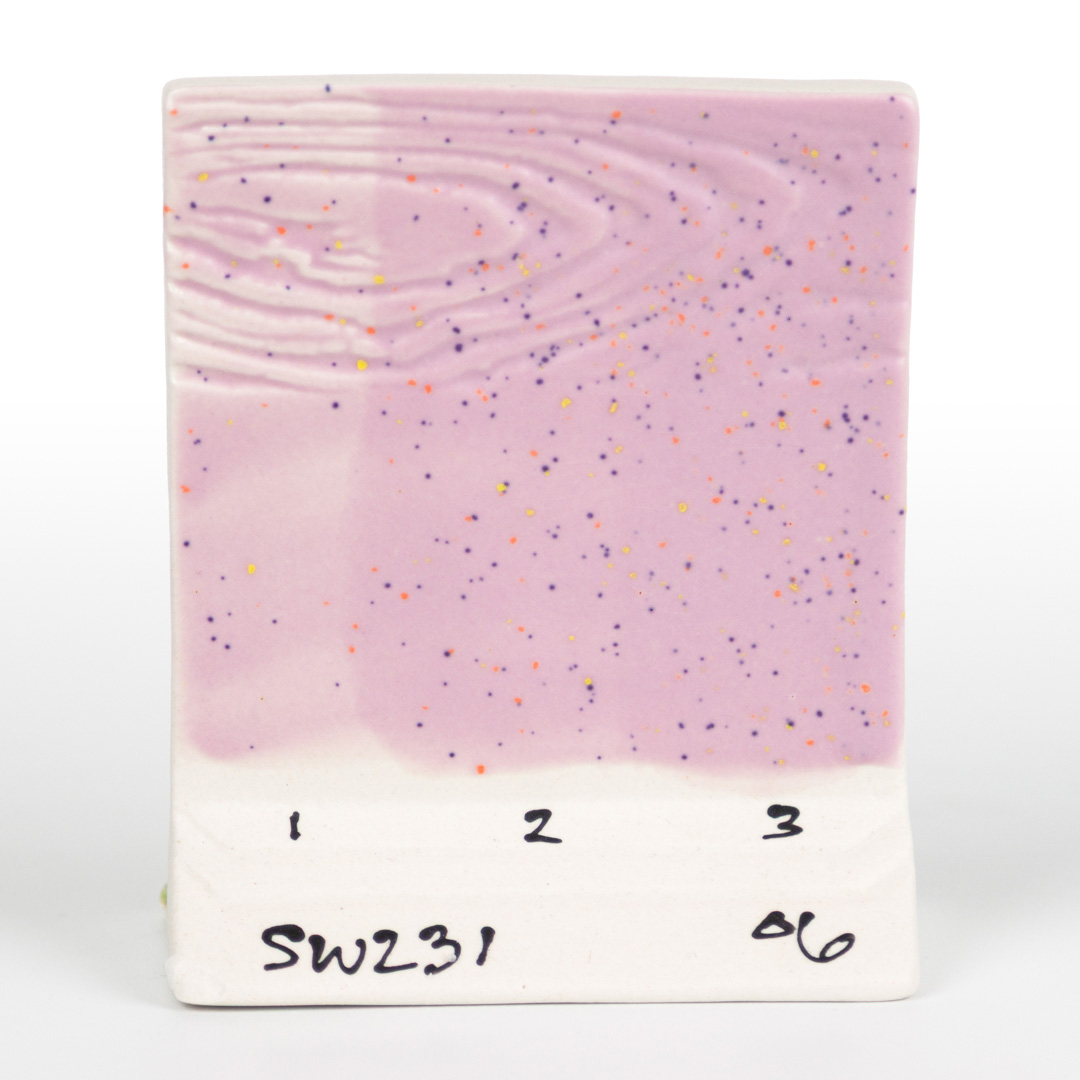
SW231 Lilac Speck over Flux, Cone 10 Reduction
SW231 Lilac Speck under Flux, Cone 6 Oxidation
SW231 Lilac Speck under Flux, Cone 10 Reduction
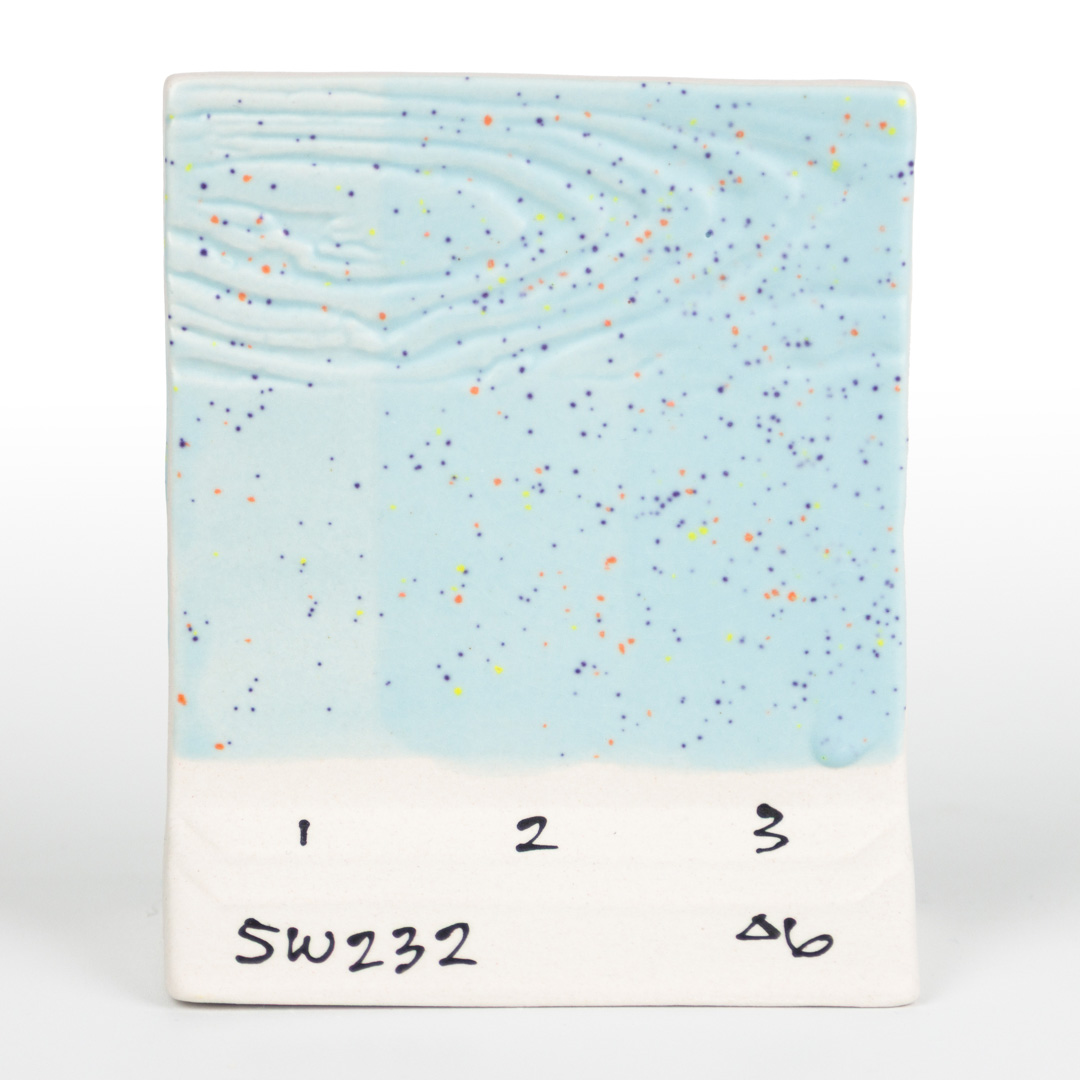
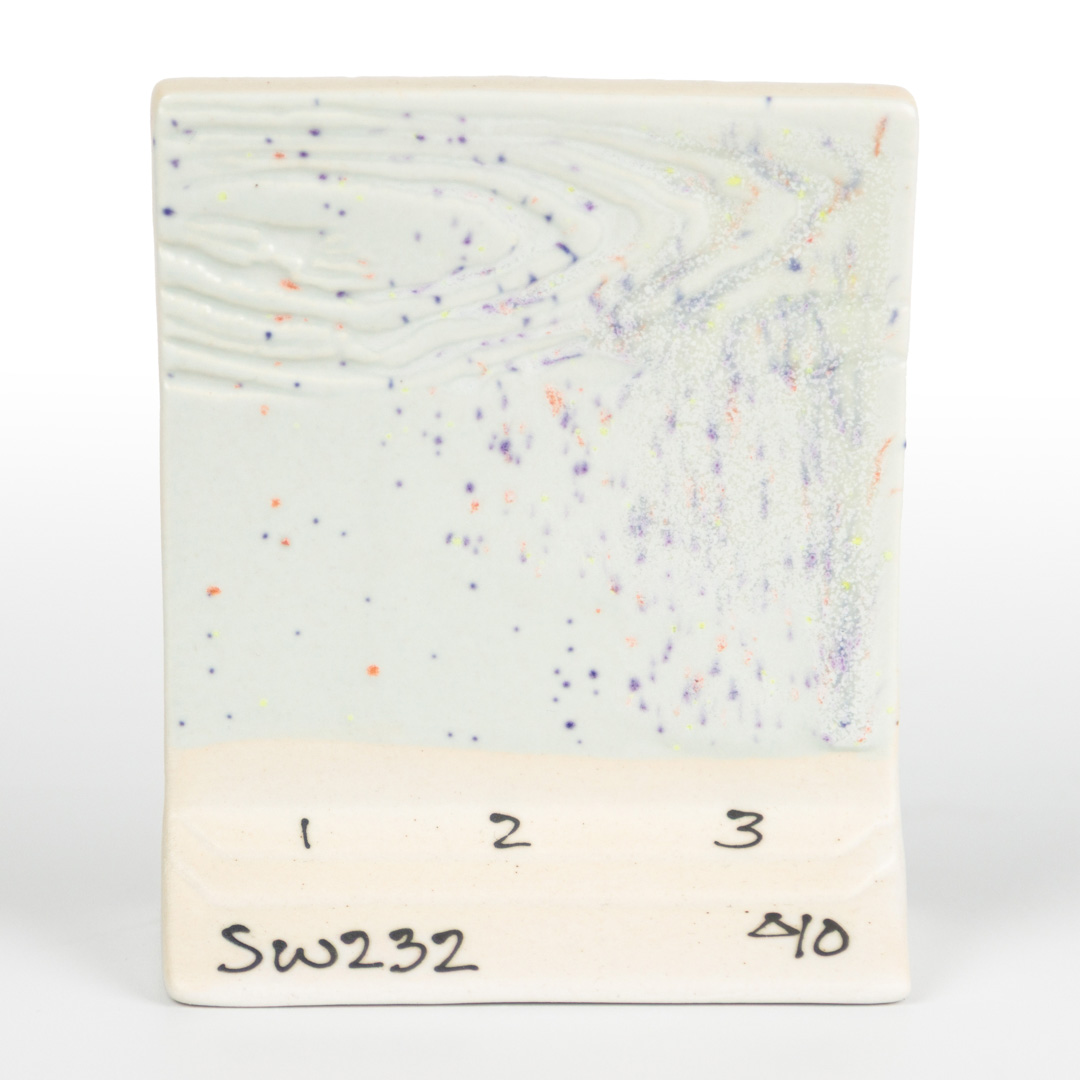
A highly-pigmented, gloss glaze. The highly stable qualities of this glaze make it ideal for design work and full opaque coverage at mid-range temperatures.
Cone 6 Oxidation
Cone 10 Reduction

1, 2, 3 Coats, Cone 5 Oxidation
1, 2, 3 Coats, Cone 6 Oxidation
1, 2, 3 Coats, Cone 10 Reduction
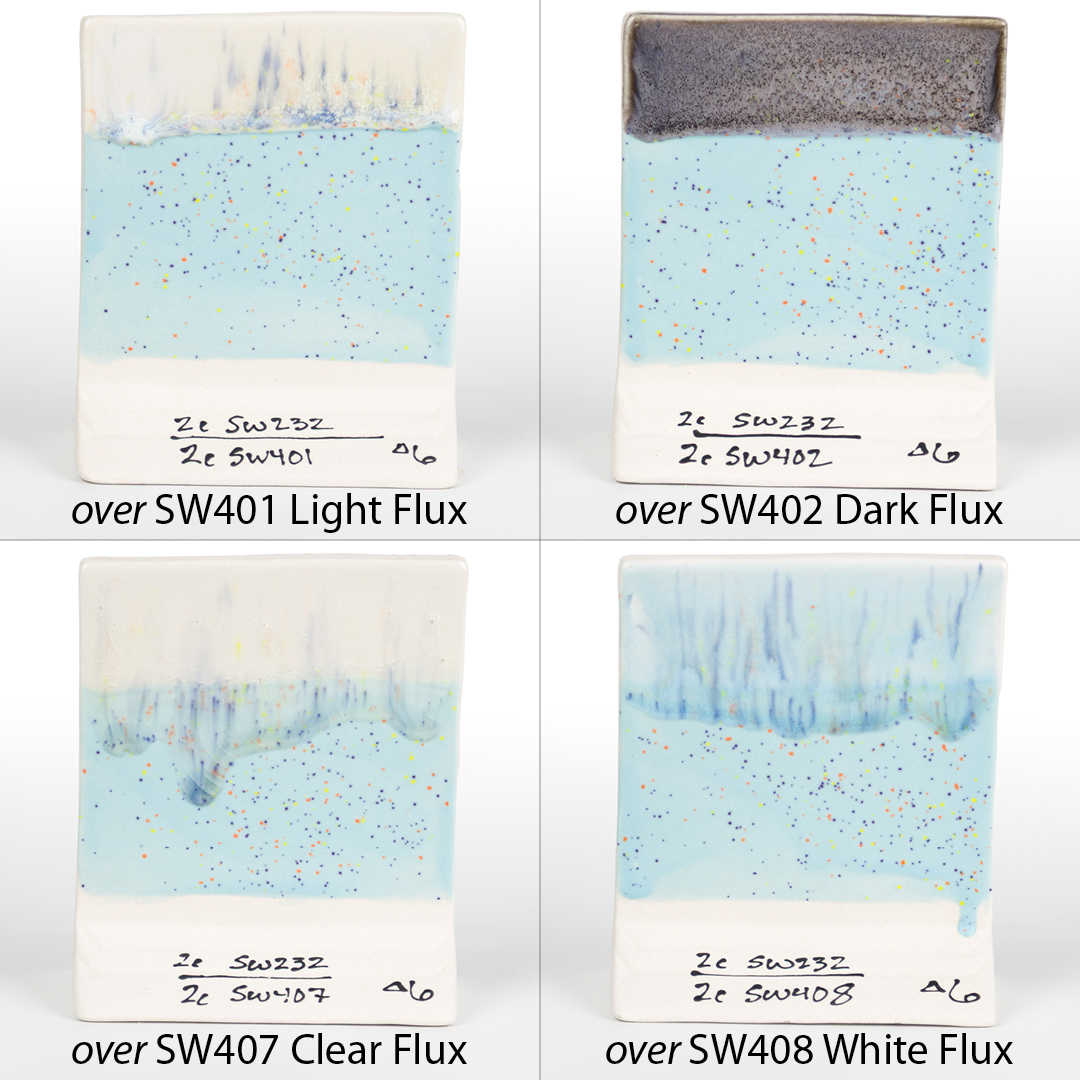
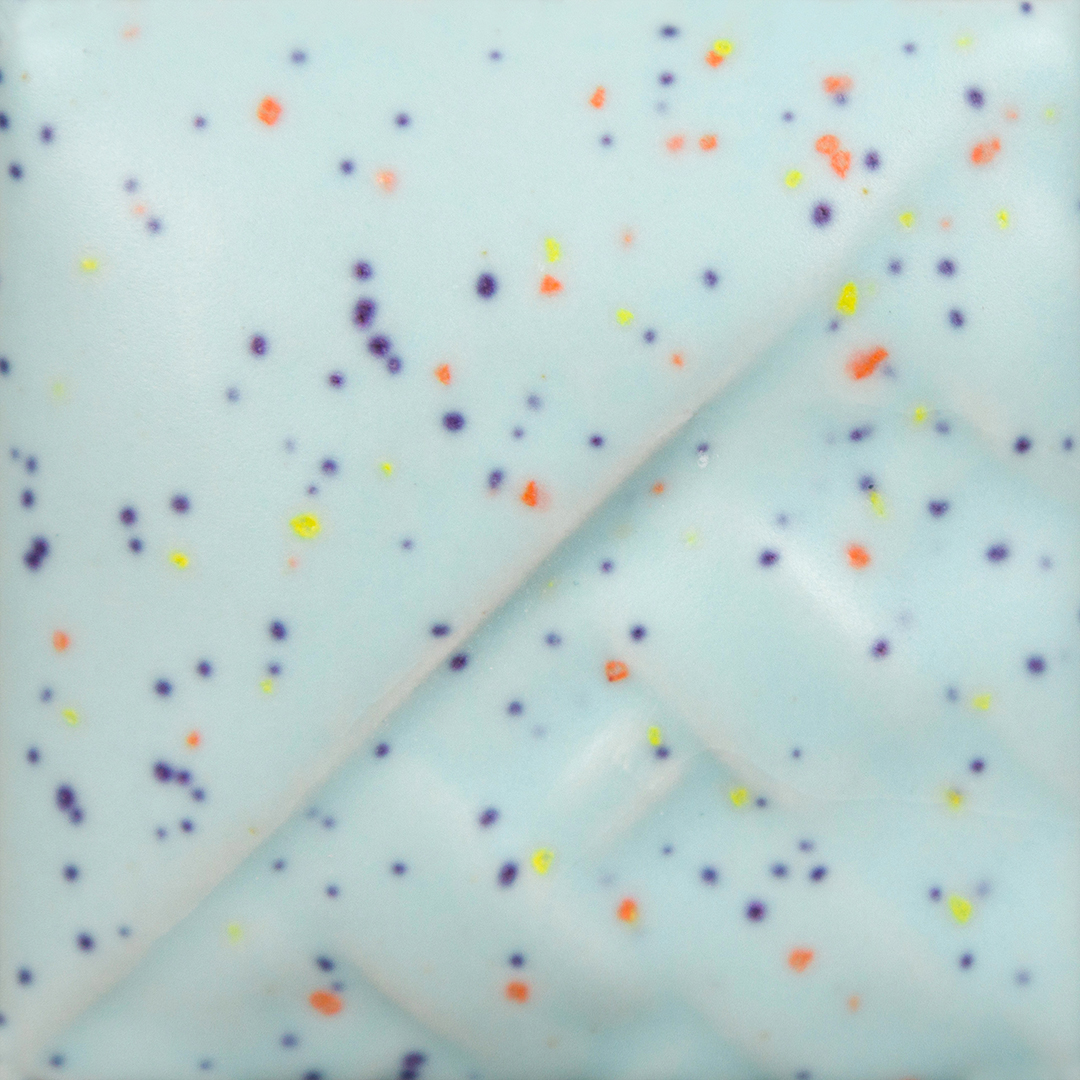
SW232 Baby Blue Speck over Flux, Cone 6 Oxidation
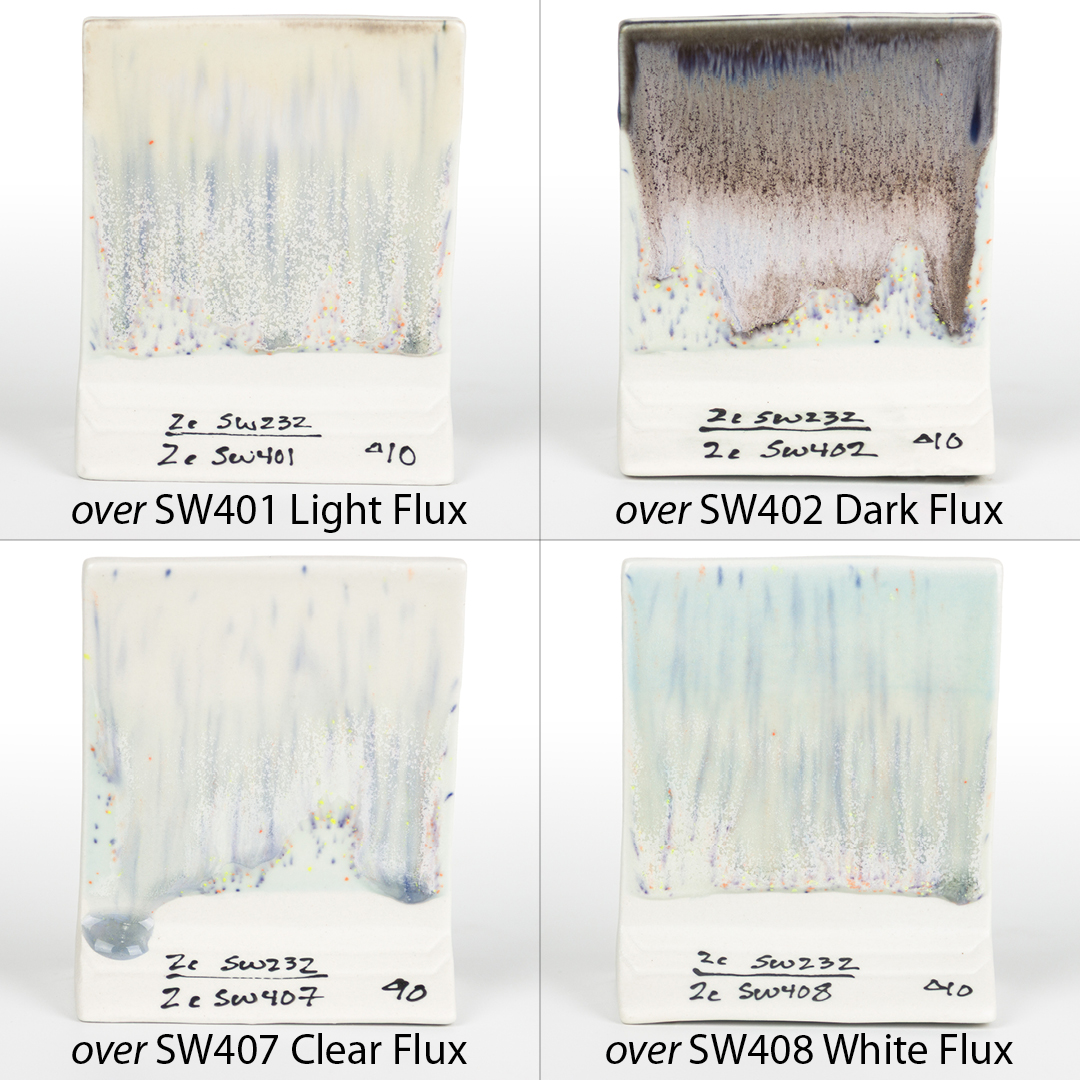
SW232 Baby Blue over Flux, Cone 10 Reduction
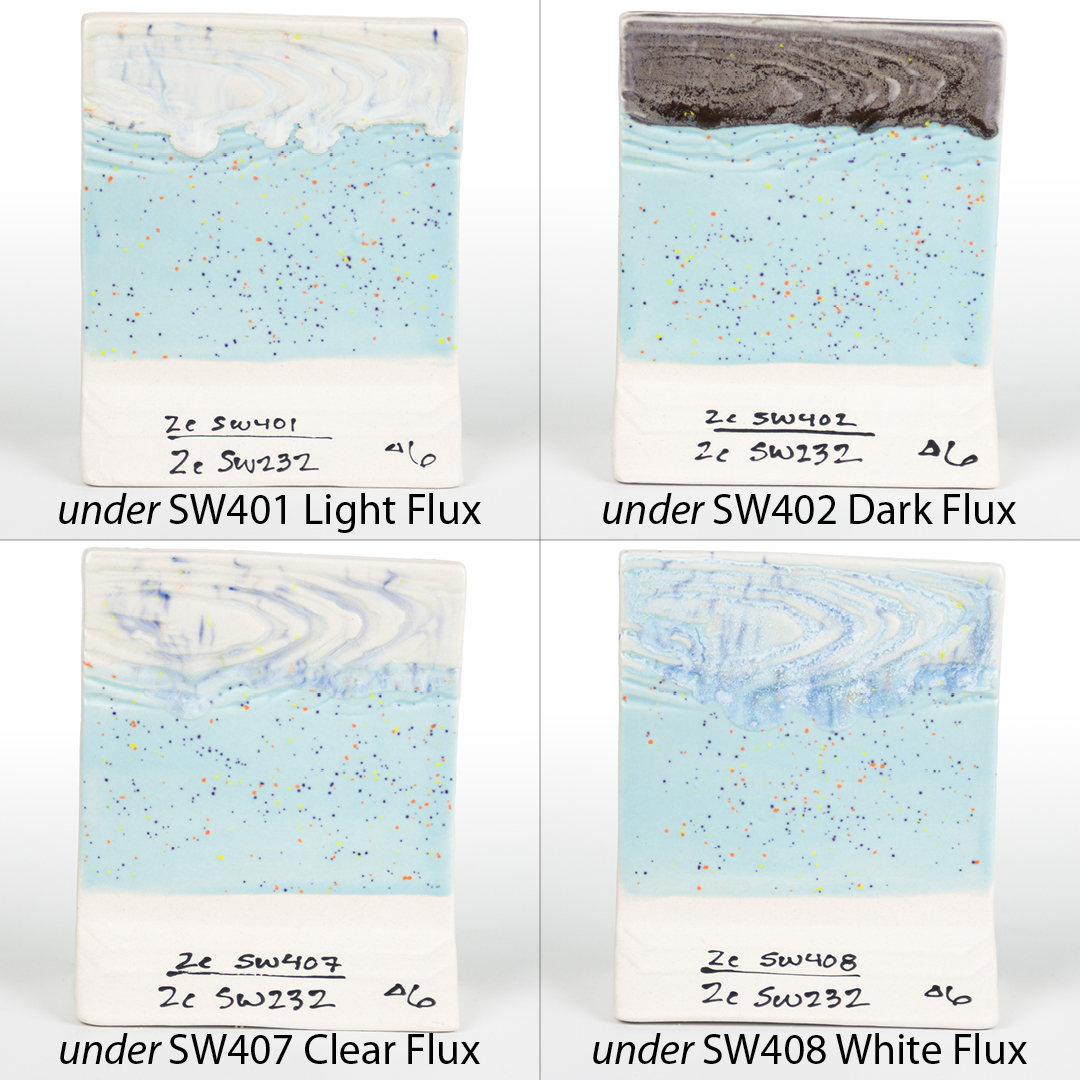
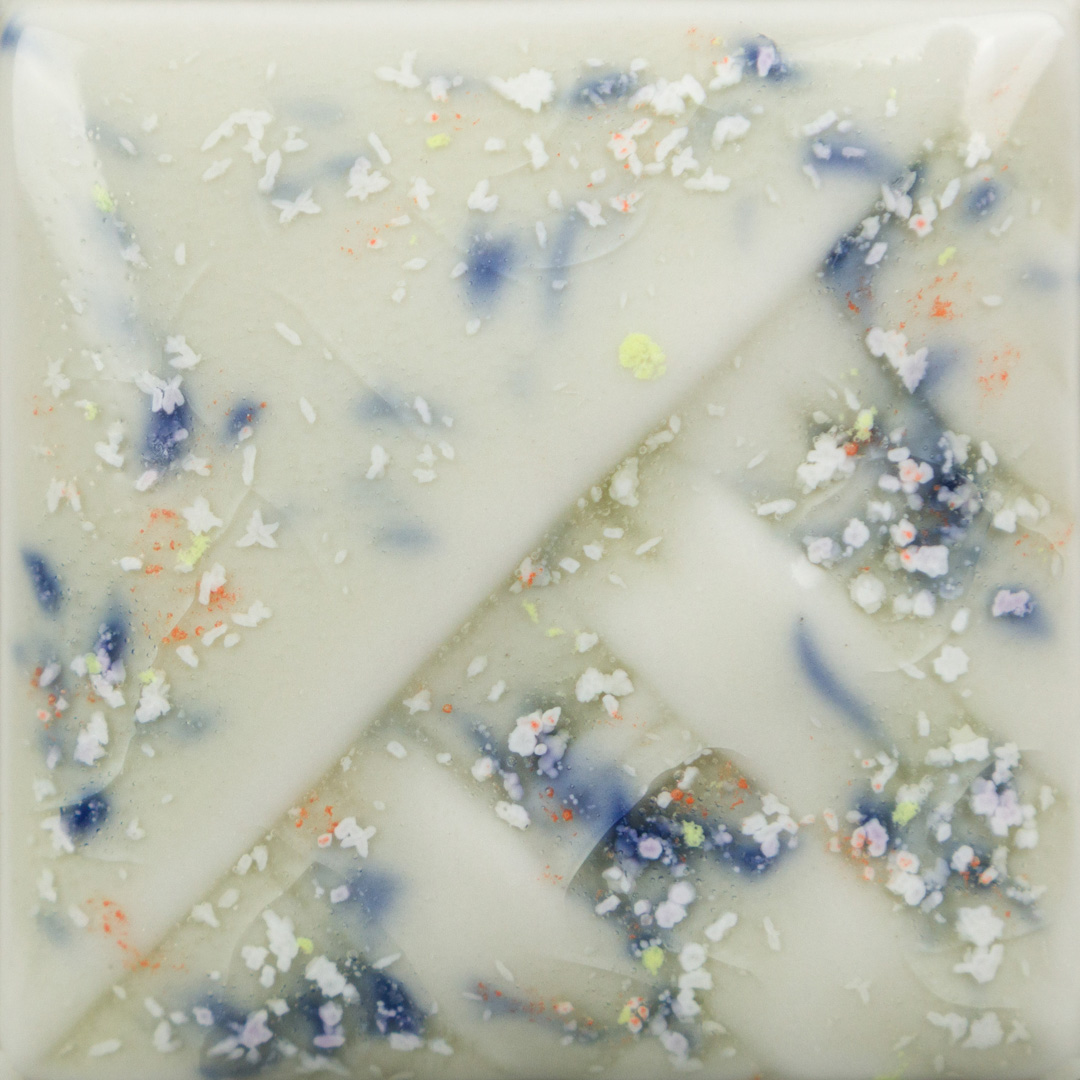
SW232 Baby Blue Speck under Flux, Cone 6 Oxidation
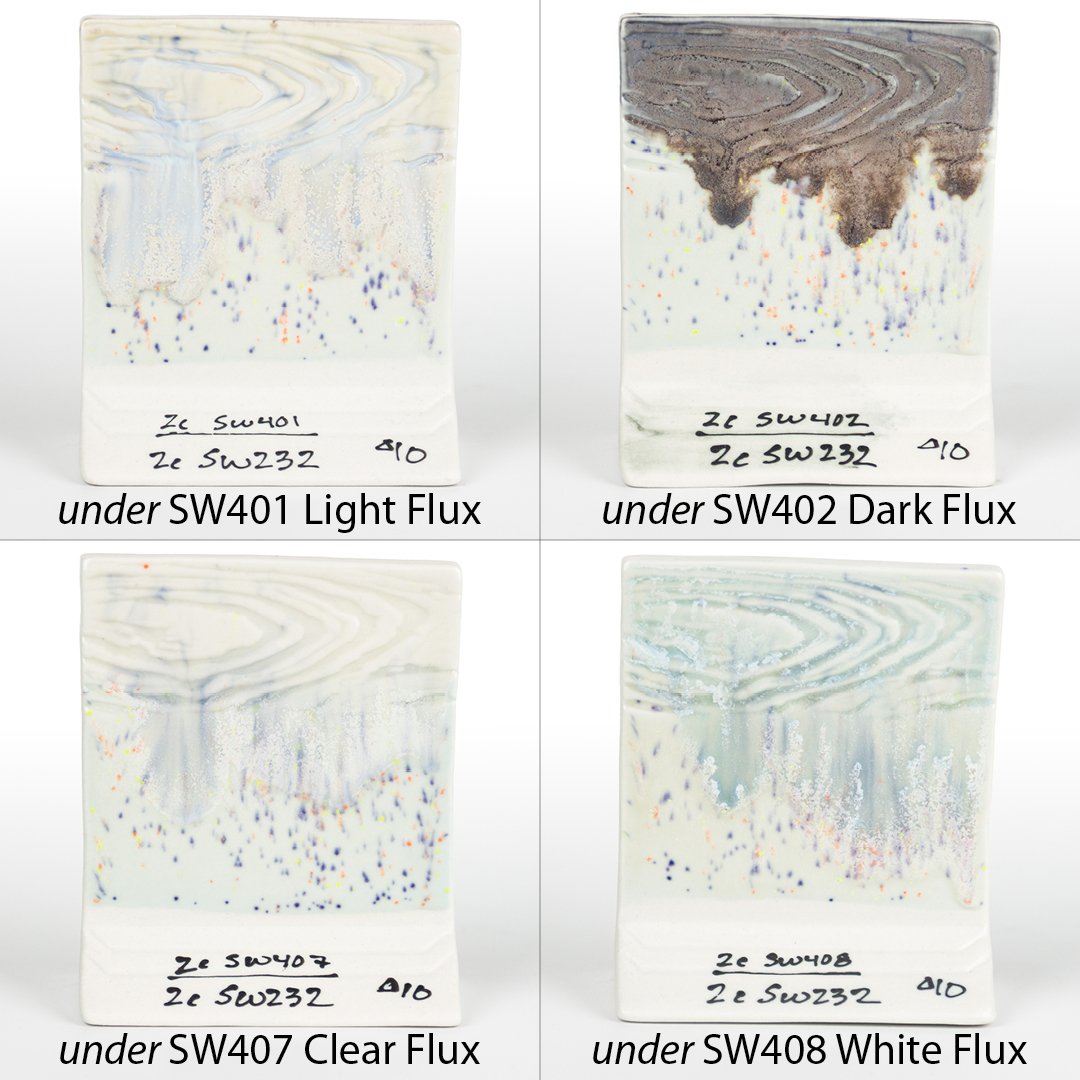
SW232 Baby Blue Speck under Flux, Cone 10 Reduction
A translucent, mobility enhancer that is intended to be layered with glazes.
Cone 6 Oxidation
Cone 10 Reduction
A translucent white, mobility enhancer that is intended to be layered with glazes.
Cone 6 Oxidation
Cone 10 Reduction