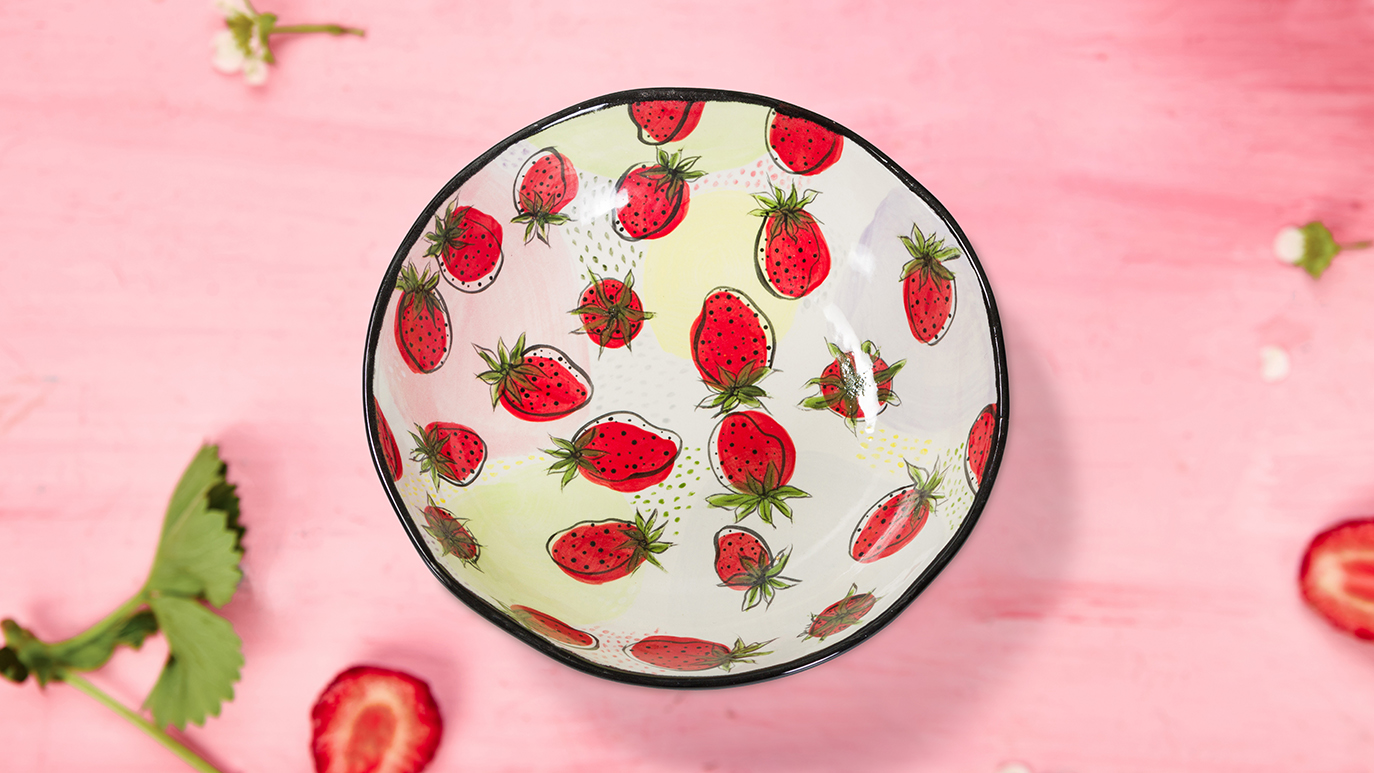
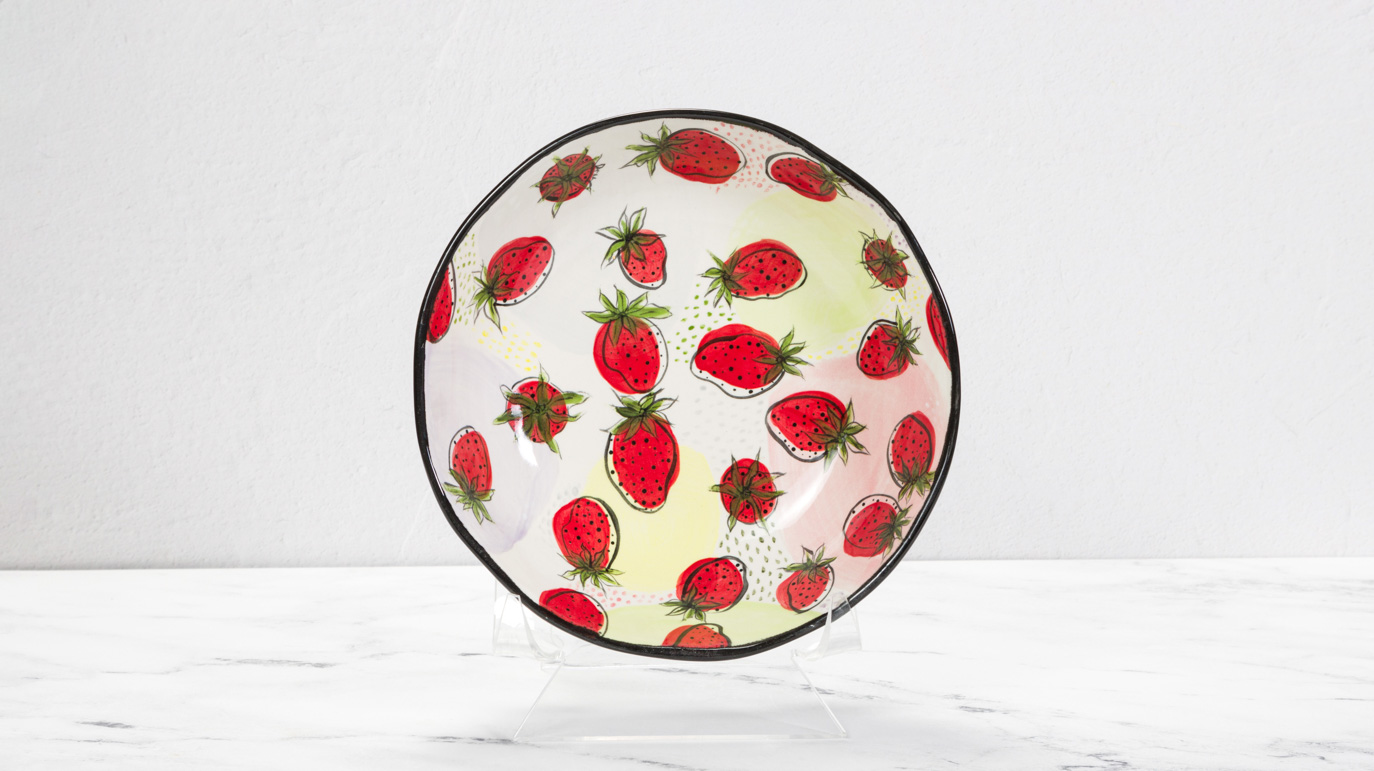
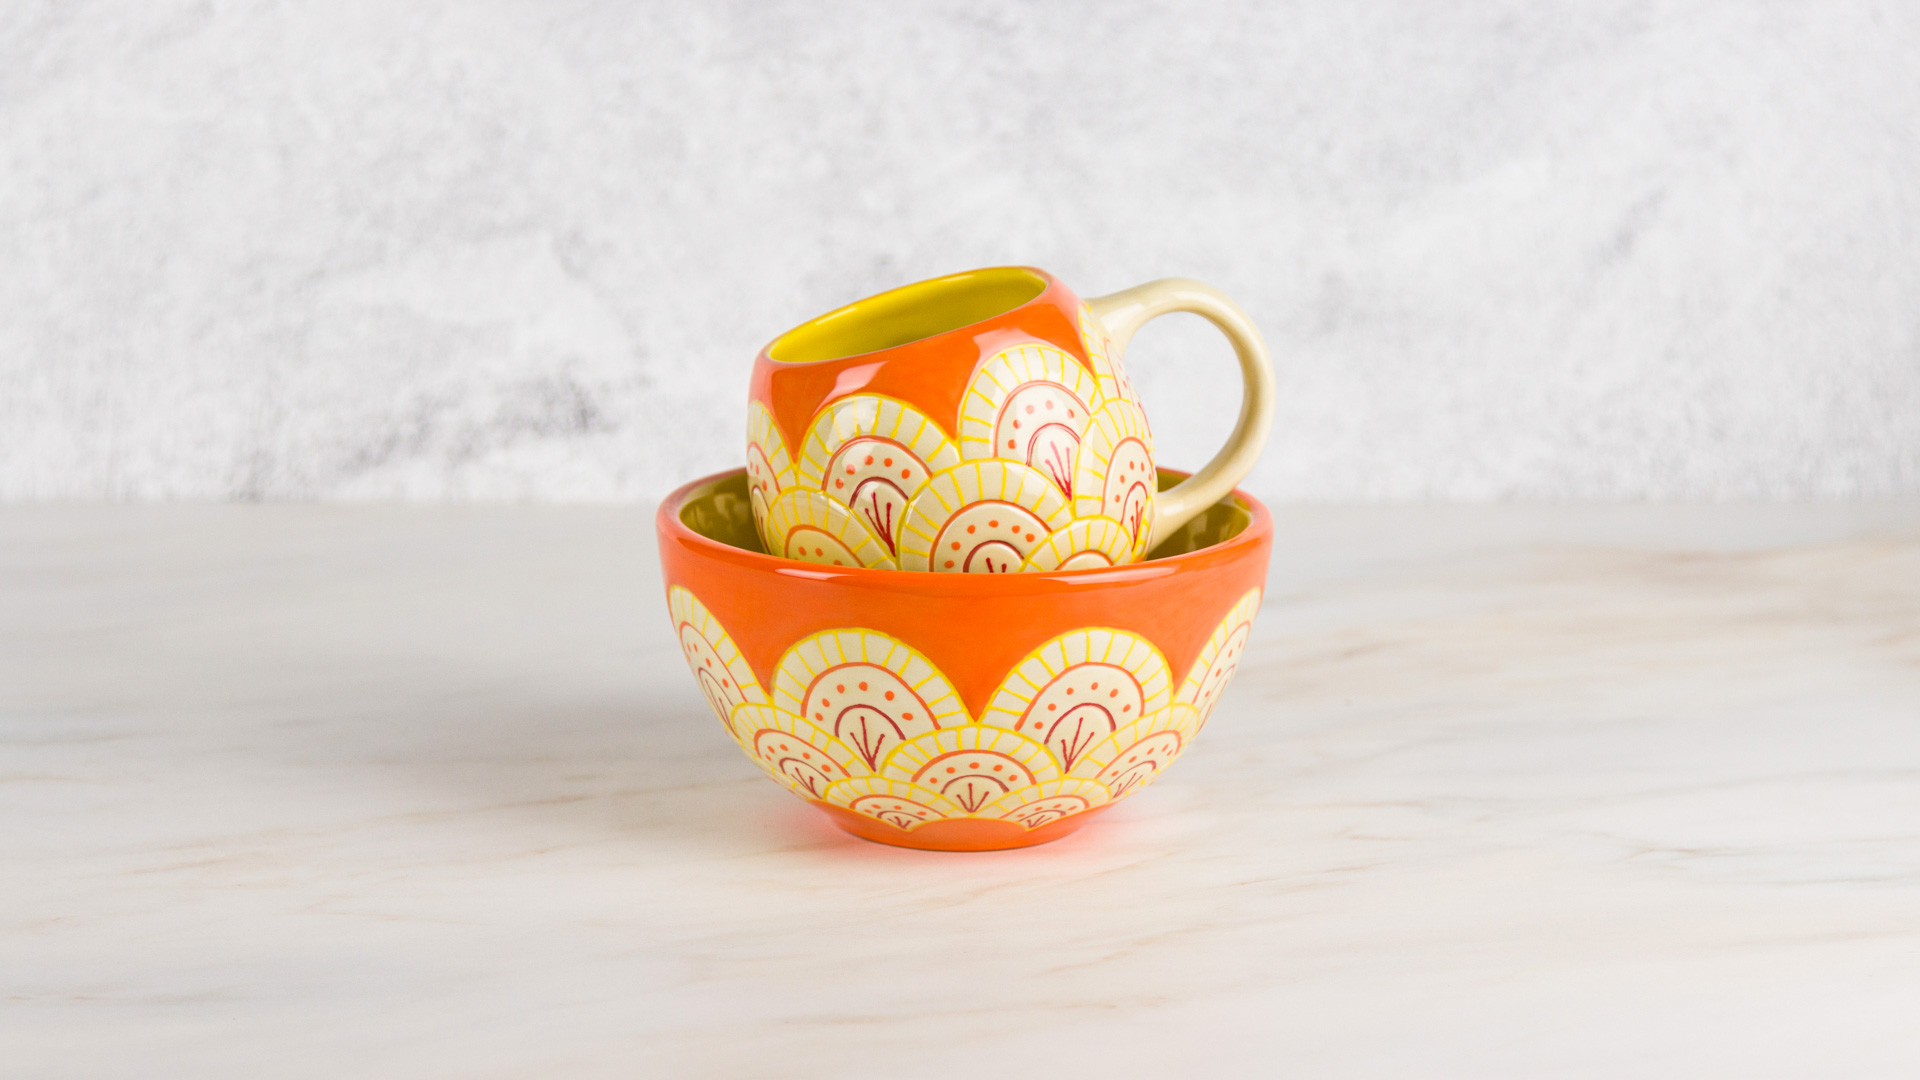
Bowl of Berries
Designer: Dru Woodward
Instructions
- With a damp sponge lightly wipe the piece to remove dust and to condition the piece ready to paint.
- For background of the inside of the bowl: place on palette, spaced apart, a dime size amount of Neon Yellow, Neon Green, Light Grey, Light Grape, and Dark Pink. Add enough White to each of these colors to make a 50/50 mix. Then add some water to each mix to make the consistency similar to regular milk. Using a fan glaze brush, fully load with 1 of the colors then in a circular motion paint in 1 coat only of an irregular circle shape. Continue with each color leaving areas of bare bisque between the color shapes. More than one of each color shapes may be applied depending on how large you decide to make your shapes. These circles/shapes are not intended to be a perfect circle—you may want to pencil in your shape before painting. Refer to pattern/picture page. Let dry.
- Strawberry placement: using pencil lightly pencil a “T”, about the size of your thumb, where you want the strawberries to be. Pencil in a 0 for top view strawberries. Remember to space the berries apart with enough room to allow for their calyx.
- Add Really Red to the palette . For all strawberries, 3 coats will be needed. Where you have T’s, using either round brush, fully load in Really Red. Stroke in Really Red from the side of T down to the bottom of the T, then apply the same to other side-similar to making a heart. Fill in the center if your stroke did not cover the entire strawberry. Refer to pattern/picture page. Continue until all strawberries are painted 1 coat, let dry—then repeat 2 times. Where you have 0’s just apply 1 coat of Really Red completely filling a somewhat irregular circle, let dry—then repeat 2 times.
- For the calyx: with a pencil lightly draw a straight line where each calyx will be. Refer to pattern/picture page. Add to palette Bright Kiwi, this will be our base coat. Using small Project Bisque: Mayco 1114 Casual Serving Bowl Project Colors: Best of Duncan Concepts: CN074 Really Red CN182 Bright Kiwi CN201 Light Grey CN244 White CN253 Black CN261 Light Grape CN343 Dark Pink CN501 Neon Yellow CN505 Neon Green Glaze: Pure Brilliance Clear Glaze Brushes: Fan Glaze Brush No. 10/0 & 1 Liner No. 4 & 6 Round Detail brush (optional) Miscellaneous Palette for Paint Paper Towels Pencil Water Container Replacement Sponge Sponge Brush on stick Palette Knife BEST OF Designed by Dru Woodward, Duncan Ambassador round or no. 1 liner fully load with Kiwi and paint each calyx from center out to tip. Complete one berry at a time until they have all been painted.
- Add another dime size of Kiwi to the palette, to this add 1 or 2 drops of Black to get an olive looking green. Using the same brush as previously, load in Kiwi and side load in Mix apply 1 coat on top of Kiwi to all calyx in the same manner as before. It does not matter which side the darker color is placed on the calyx. Once all are painted. Let dry.
- Add Black to the palette. This will be used for the detail—therefore thin with water so that the paint will flow off the liner brush, do not thin too much or color may look washed out after firing. The strawberry outline is not detailed in a traditional way. The outline is completed by starting from under the calyx slightly off the unpainted edge of the strawberry shape then continuing down to the bottom edge of the strawberry following contours. Then the opposite side is done by starting at calyx slightly inside the edge of the strawberry on top of the red continuing down again following the contours until meeting the “offset” at the bottom of the strawberry. After all the strawberries have all been outlined then outline all calyx, remember to paint in a vein to the middle of the calyx also. Use end of brush handle or toothpick to make small dots for the strawberry seeds. If needed refer to the pattern/picture page. Let dry
- Add to the palette just a little of the original 5 colors used for the background shapes. Neon Yellow, Light Grey, Dark Pink, Light Grape, and Neon Green.
- Using a 10/0 liner or detail brush dipped lightly into one of these above colors, apply small brush prints randomly to an unpainted area of approximately 2 inches. Use each color at least one time or more if desired.
- Add a small amount of White to the palette. Using the same liner or detail brush also apply some brush prints randomly on top of colored shapes. Let dry.
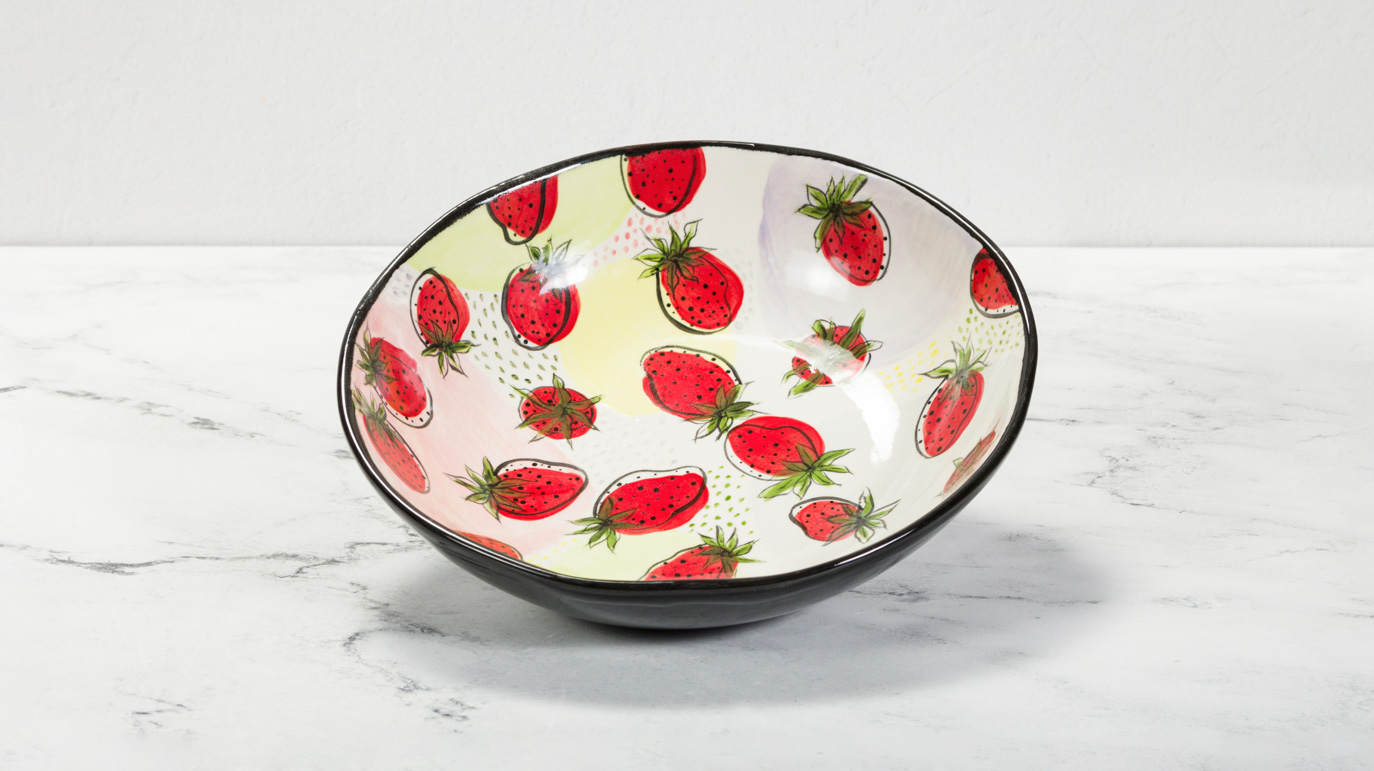
- Rim: fully load dampened sponge brush with black. Hold the sponge brush on edge and apply black by slowly turning to cover the top edge all the way around the entire bowl. Note the painted edge can be made wider by tilting sponge when applying. Let dry and apply 2 additional coats to the rim.
- Back of bowl: using a fan glaze brush apply 3 coats of Black to entire back of piece, let dry between coats.
- When black is thoroughly dry, apply 2 coats of Pure Brilliance to front of bowl overlapping the black edge a little.
- Allow to dry 24 hours, then stilt and fire to shelf cone 06.
- Remember to remove stilt marks.
- 16. Enjoy.
Supplies
Form
- MB-1114 Casual Serving Bowl
Duncan Colors
- CN074 Really Red
- CN182 Bright Kiwi
- CN201 Light Grey
- CN244 White
- CN253 Black
- CN261 Light Grape
- CN343 Dark Pink
- CN501 Neon Yellow
- CN505 Neon Green
- Pure Brilliance Clear Glaze
Decorating Accessories
- Fan Glaze Brush
- No. 10/0 & 1 Liner
- No. 4 & 6 Round
- Detail brush (optional)
Miscellaneous Supplies
- Palette for Paint
- Paper Towels
- Pencil
- Water Container
- Replacement Sponge
- Sponge Brush on stick
- Palette Knife
- Pattern
Top