Bunny Tree Top in Acrylics with Glazed Tree Ring

Designer: Bob Moreni

Share

Instructions

Bunny Tree Top

  1. Begin with properly fired shelf cone 04 bisque. Moisten a clean sponge and wipe bisque to remove any dust.
  2. Using an AB710 ¾ Flat Shader, basecoat the bunny head with OS489 Saddle Brown.  Allow to dry!
  3. Using a DB803 #8 Round, drybrush the bunny head with OS471 Medium Brown, then with OS467 Light Brown. Do not wash the brush between colors.  Just go from one color to the next that are in the same tones. Highlight the bunny head with OS432 Ivory, then some OS431 White.
  4. Using a DB803 #8 Round, drybrush the bunny cheeks and muzzle with OS432 Ivory the with OS431 White.
  5. Using a DB803 #8 Round, drybrush inside the bunny’s ears, cheeks and nose by picking up some OS597 Rich Peach and some OS431 White on the brush at the same time making the peach lighter.  If needed add a bit more OS431 White.
  6. Using an AB710 ¾ Flat Shader and an AB 705 #5 Round, basecoat the bow with OS564 Pansy.  Allow to dry!
  7. Using a DB803 #8 Round, drybrush the bow with OS591 Dusty Violet then OS452 Purple.  Highlight with OS450 Lilac and some OS431 White.
  8. Using an AB710 ¾ Flat Shader and an AB 705 #5 Round, basecoat the collar with OS558 Mimi Pink.  Allow to dry!!
  9. Using a DB803 #8 Round, drybrush the collar with OS444 Light Pink, then with OS589 Pink, and then some OS431 White.
  10. Using an AB705 #5 Round, basecoat the eyes with OS431 White.  Allow to dry!!
  11. Using an AB705 #5 Round, apply OS457 Medium Blue for the iris of the eyes, shade the iris using an AB709 3/8 Angular Shader with OS459 Bright Blue.
  12. Using an AB705 #5 Round, apply OS476 Black to the pupil of the eyes. Allow to dry!!  Add a highlight of OS431 White to the eyes.
  13. Using an AB702 10/0 Liner, outline the eyes and add eyelashes with OS476 Black.
  14. Using an AB702 10/0 Liner, paint stripes on the bow with OS431 White.
  15. Using a Stylus Tool, add dots on the collar with OS431 White and OS564 Pansy.  Allow to dry!!
  16. Using an AB710 ¾ Flat Shader, apply 2 light coats of AS954 Matte Brush-on-Sealer to the whole piece. Allow to dry!!
  17. Using an AB705 #5 Round, apply 2 coats of AS953 Gloss Brush-on-Sealer to the eyes.  Allow to dry!
  18. Using an AB702 10/0 Liner, apply 2 coats of SG880 Crystal Brush -on-Glitter to the stripes on the bow and the dots on the collar.
  19. Allow to dry completely. DO NOT Fire!!

Tree Ring

  1. Begin with properly fired shelf cone 04 bisque. Moisten a clean sponge and wipe bisque to remove any dust.
  2. Using a CB604 #4 Soft Fan, apply 1 coat of SC002 Melon-choly to the tree ring. Allow to slightly dry.  With a damp sponge wipe back the color leaving it in the deep crevices.  Allow to dry!
  3. Using a CB602 #2 Soft Fan, apply 3 coats of SC002 Melon-choly to all the wells in the tree ring.
  4. In a cup, mix 2 parts of FN049 Flamingo with 4 parts NTBR Clear One. Mix well!
  5. Using a CB604 #4 Soft Fan, apply 3 coats of the mix to the whole tree ring. Allow to dry!
  6. Stilt and fire to shelf cone 06/05.

Supplies

Form

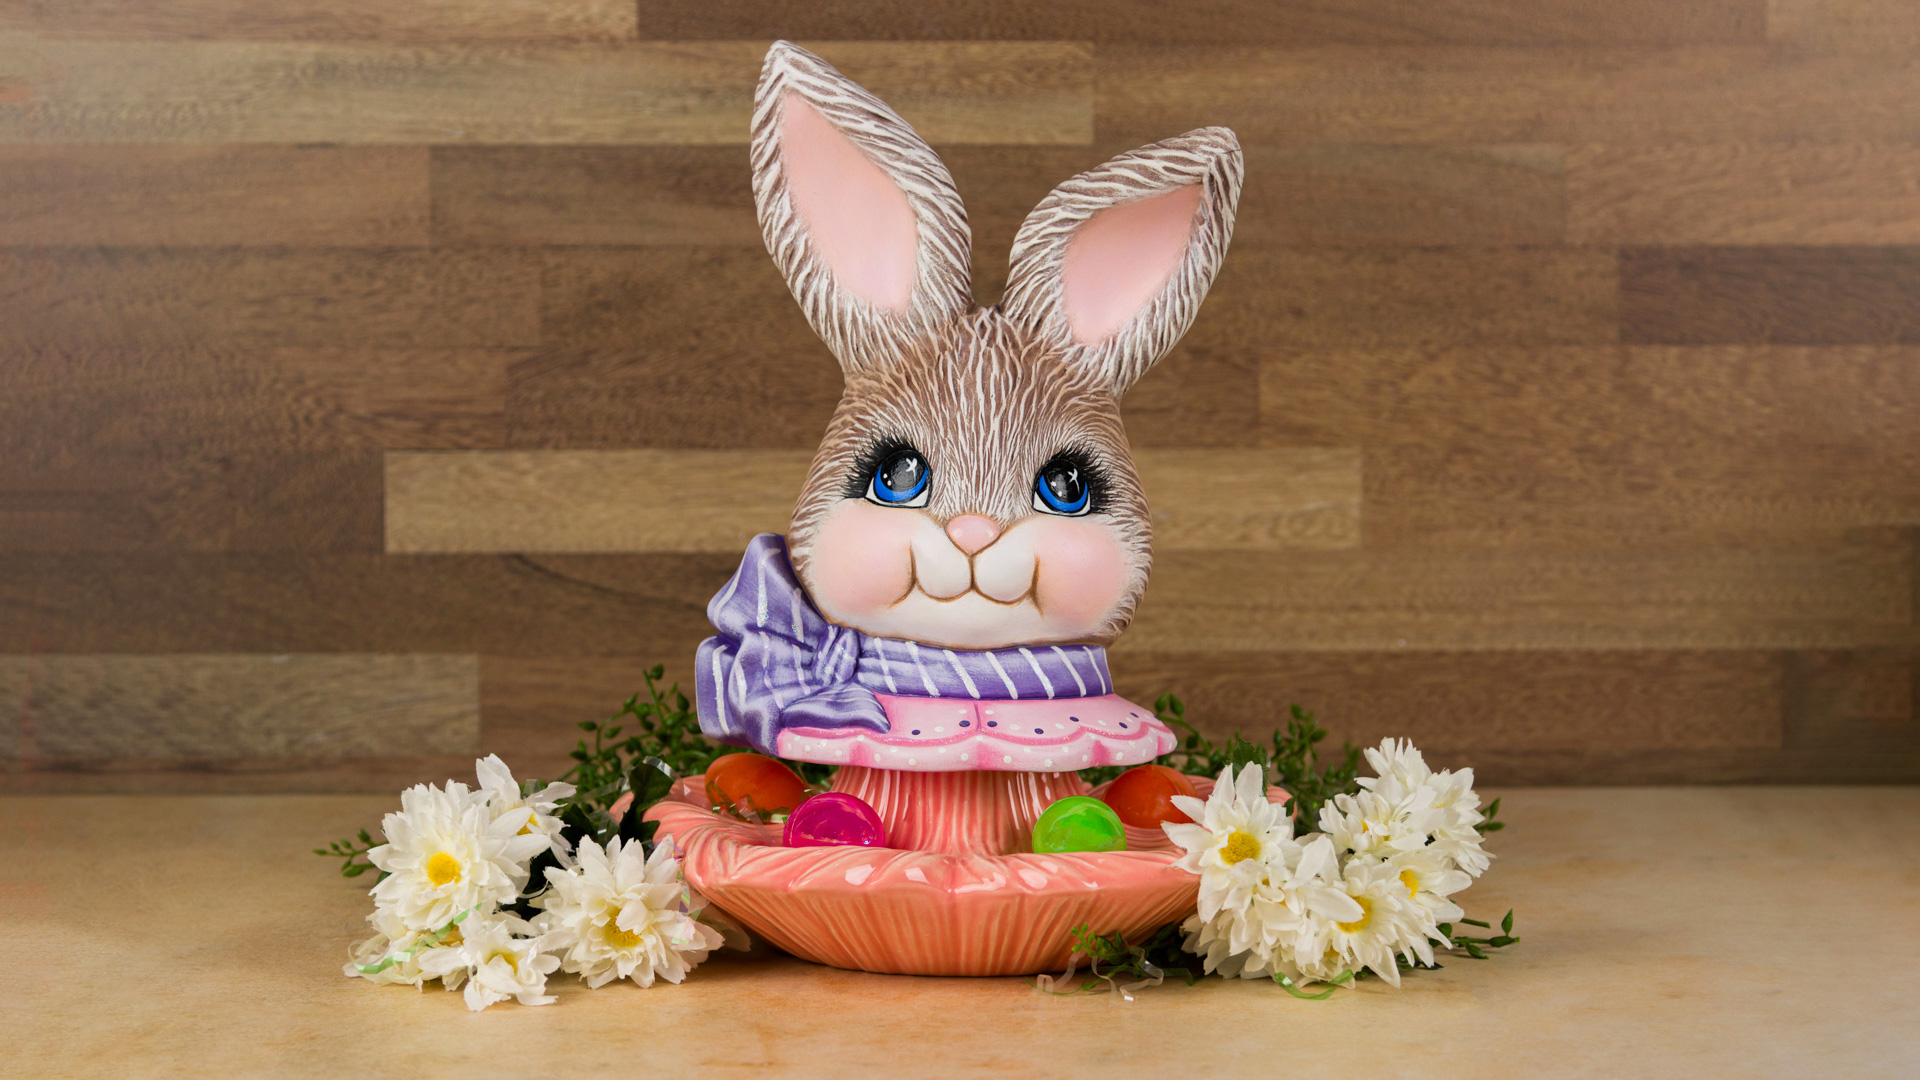
  • 4495 Yum Yum Tree 10” Small Tier
  • 4509 Easter Bunny Tree Top

Colors

  • AS953 Gloss Sealer
  • AS954 Matte Sealer
  • OS431 White
  • OS432 Ivory
  • OS444 Light Pink
  • OS450 Lilac
  • OS452 Purple
  • OS457 Medium Blue
  • OS459 Bright Blue
  • OS467 Light Brown
  • OS489 Saddle Brown
  • OS564 Pansy
  • OS558 Miami Pink
  • OS589 Pink
  • OS591 Dusty Violet
  • OS597 Rich Peach
  • OS599 Medium Taupe
  • SG880 Crystal Brush-on-Glitter
  • NTBR Clear One Brushing Clear Glaze
  • FN049 Flamingo
  • SC002 Melon-choly

Decorating Accessories

  • AB710 ¾ Flat Shader
  • AB709 3/8 Angular Shager
  • AB705 #5 Round
  • AB702 10/0 Liner
  • CB602 #2 Soft Fan
  • CB604 #4 Soft Fan
  • DB801 #3 Round
  • DB802 #5 Round
  • DB803 #8 Round
  • DB804 #3 Flat

Miscellaneous Accessories

  • Synthetic Sponge
  • Water Bowl
  • Paper Towels
  • Desert Paper Plates
  • Cup
  • Stylus Tool
Top