- Begin with properly fired shelf cone 04 bisque. Moisten a clean sponge and wipe bisque to remove any dust.
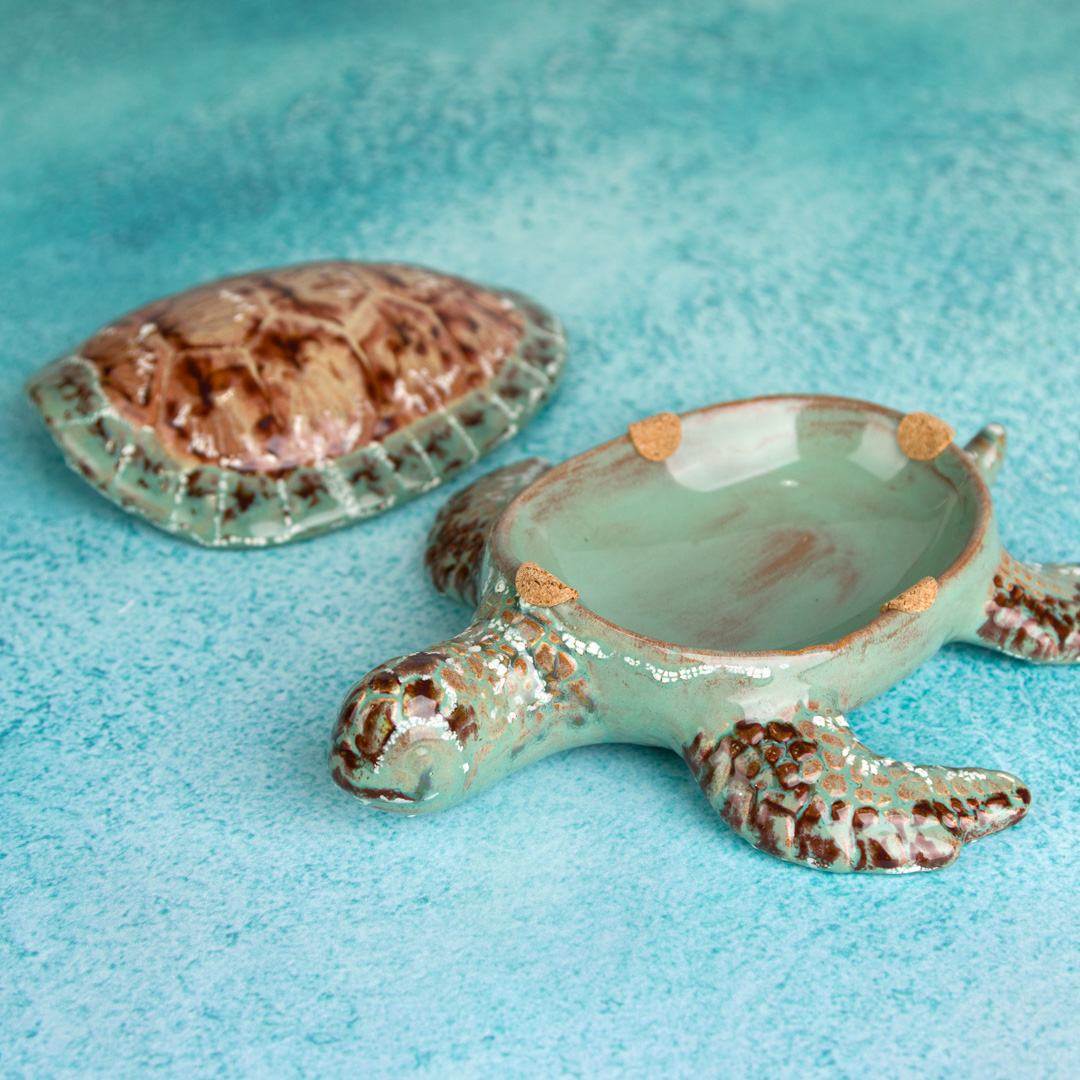
- Base (the bottom piece of the box)
- With a mop brush, paint the entire bottom piece (inside and out, top and bottom) with 3 coats of Sea Green.
- Keep coats even and a bit generous for solid color.
- Lid: Underside (interior side of the top shell)
- With a mop brush, paint 3 coats of Sea Green on the underside of the lid.
- Lid: Segmented outer rim around the top of the shell
- Using a mop brush, paint 3 coats of Sea Green on the outer segmented rim.
- Make sure to paint the very edge of the lid to make sure that it meets or overlaps the coats on the underside.
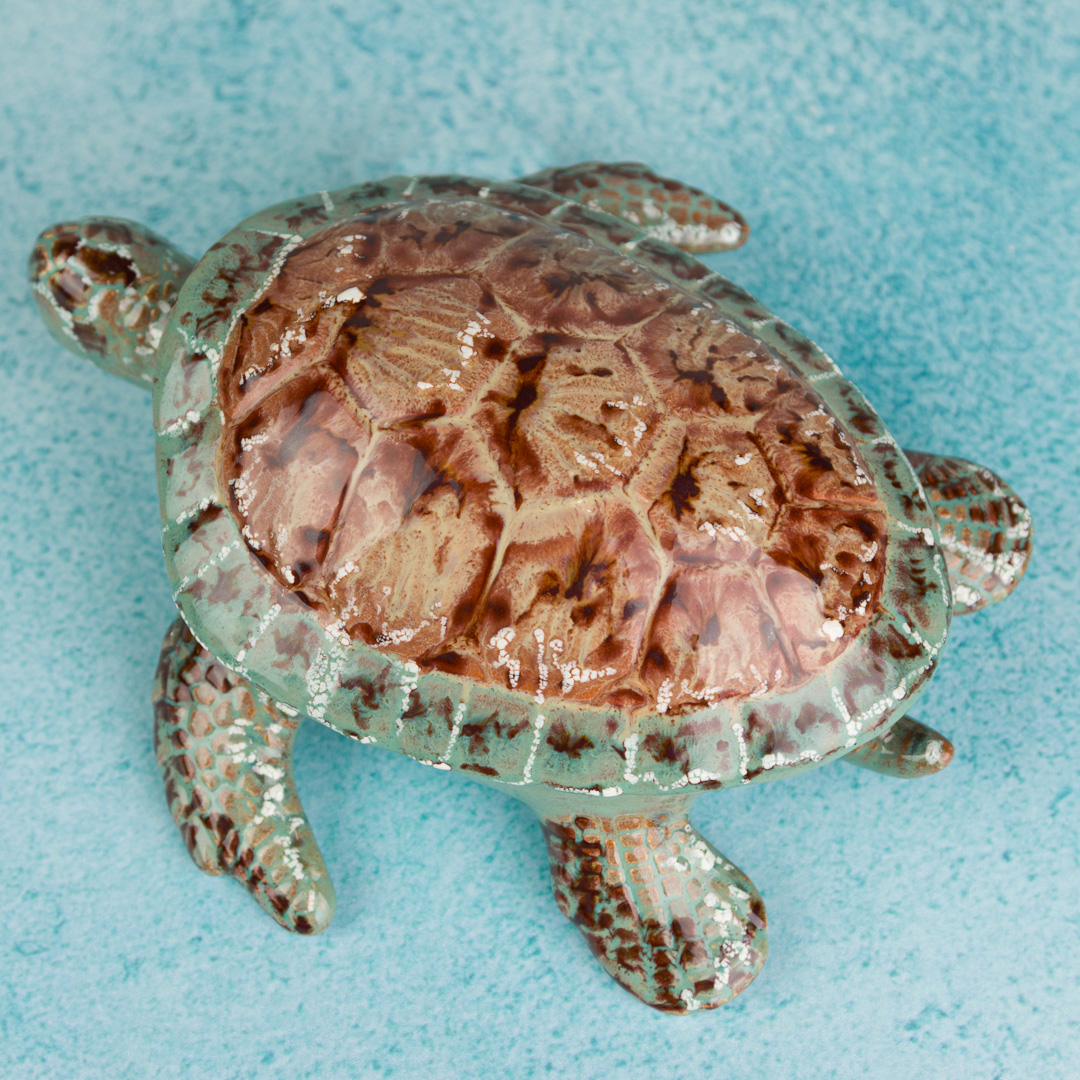
- Lid: Center/middle of the top shell
- Using a mop brush, paint 3 coats of Ginger Root to the middle sections (inside of the rim painted step 4) of the top of the shell.
- Make sure that the coats of Ginger Root touch the coats of Sea Green to ensure that there isn’t bare bisque showing after firing.
- Shell Linework
- Using Autumn in a writer bottle, add lines in each section of the middle part of the shell starting at the top of each section and streaking lines as shown as step 6 on the template. You will also add lines on top of the Sea Green that you painted around the top rim of the shell.
- Using Copper Adventurine in a writer bottle, add lines to highlight the “top” portions of the shell sections (shown as step 7 on the template).
- Using Cobblestone in a writer bottle, add lines to highlight the portions of each section as shown in step 8 on the template.
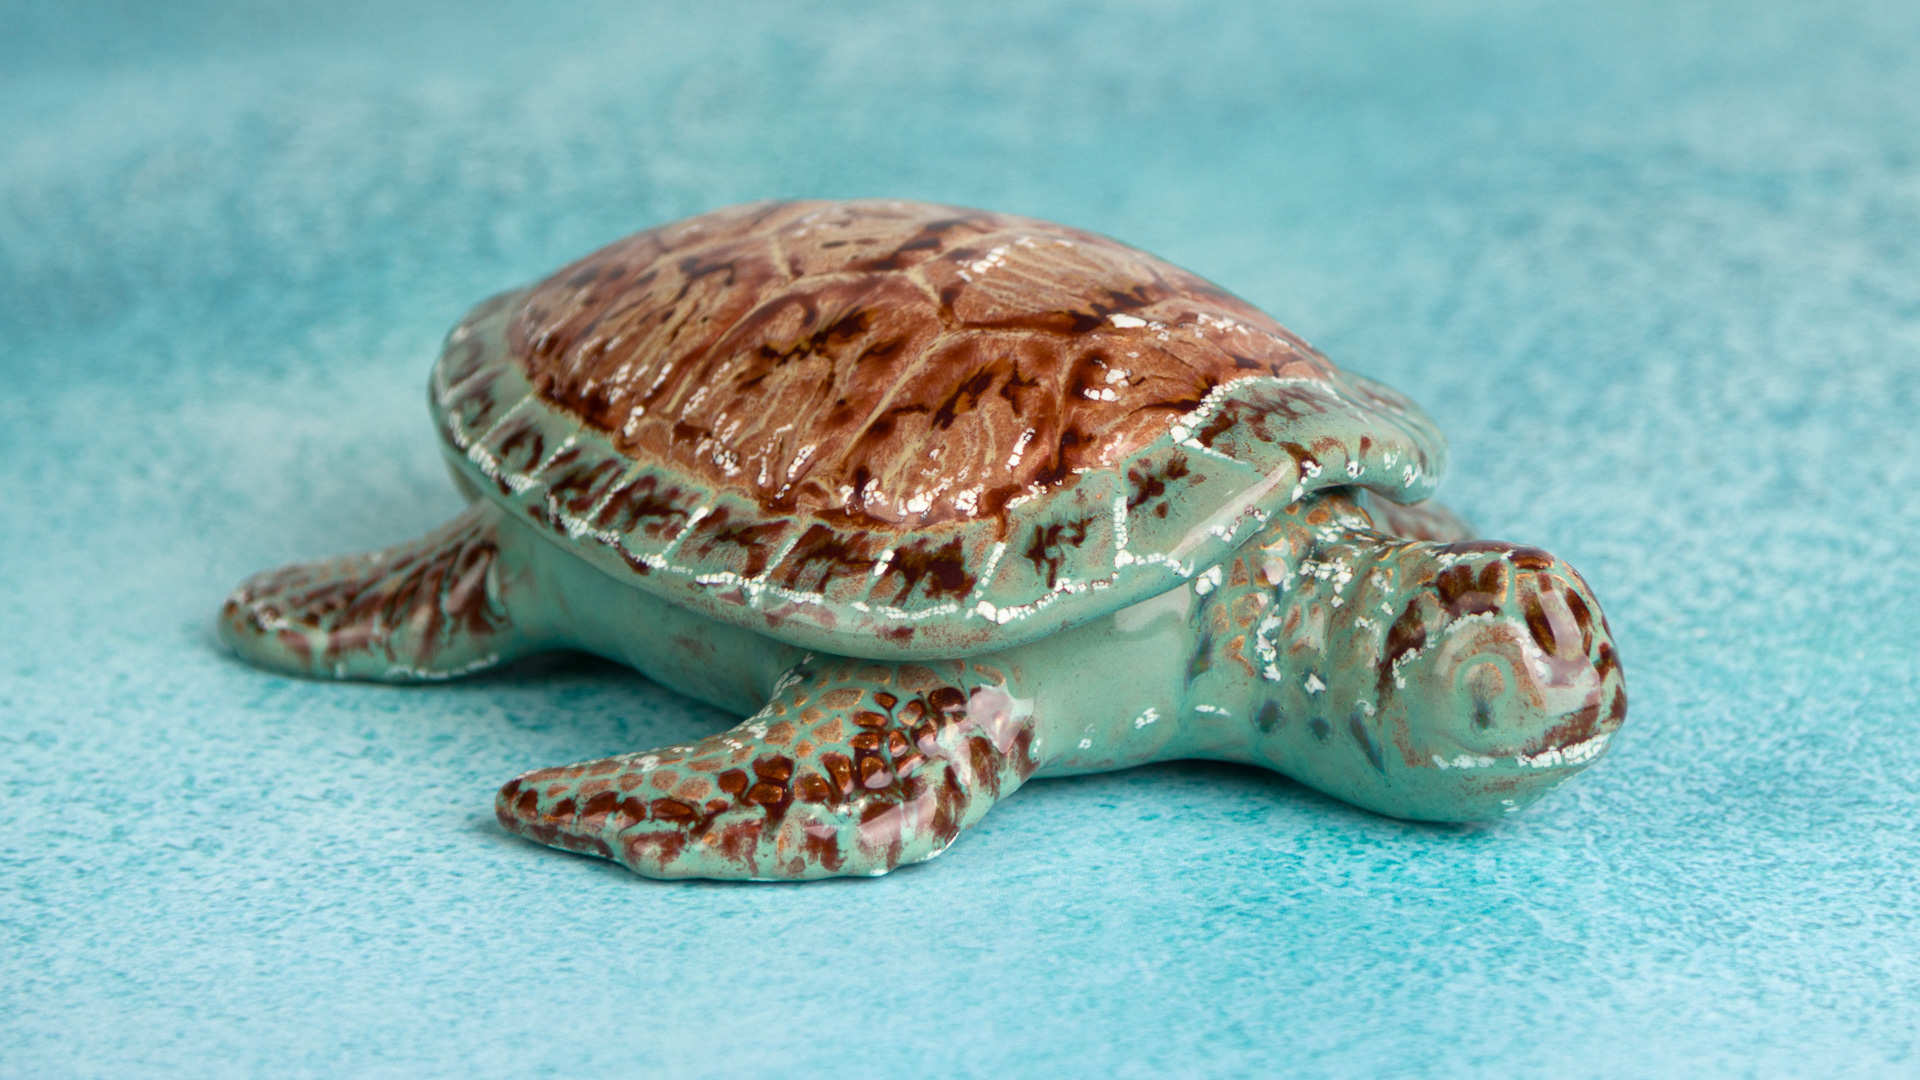
- Finishing the bottom “body”
- Using the writer bottle with Copper Adventurine, Make dots on the first couple of rows of textured “skin” on the front of the flippers, the nose and front part of the head. Add some lines on the base of the tail also.
- Using Ginger Root in a writer bottle, make dots on the middle couple of rows of textured “skin” on the flippers, neck, and middle of the tail.
- Using Autumn in a writer bottle, make dots on the back couple of rows of textured “skin” on the flippers, neck, and end of the tail.
- Using Cobblestone in a writer bottle, make lines randomly on the head, flippers, and tail. Cobblestone will resemble the froth that the ocean creates, so use it sparingly.
- Let dry overnight and fire to cone 06.
- Dremel stilt marks and display!
Additional Adaptations & Tips
- It is fun to overlap the Autumn and Copper Adventurine lines a little bit. It gives the piece a melty look.
- Autumn on top of Sea Green will result in a blue-ish color. Copper Adventurine on top of Sea Green results in a rich brown color.
- Thin brush strokes of Sea Green results in a brown undertone showing through. If you want your turtle to be more brown than green, use thinner coats of Sea Green. If you want your turtle to be more green, use thicker coats of Sea Green.