Mountain Quote Plate

Designer: Marcia Roullard

Share

Instructions

  1. Begin with properly fired shelf cone 04 bisque. Moisten a clean sponge and wipe bisque to remove any dust.Create
  2. a border around the edge of the platter. TIP: Place your pinkie against the edge of the platter and press the pencil approximately 3/8″ from the edge of the platter. Start tracing around the platter by moving your arm but keeping the pencil stationary.
  3. Draw another line that is 1/4″ from the 3/8″ edge.
  4. Either cut out the pattern and trace around or use the AC-230 Clay Carbon paper and to trace the design onto the piece. NOTE: Do not trace the quote or sun rays on yet – the background will be painted first.
  5. Using the Soft Fan brush and the Script Liner, apply 2 coats of SC-86 Old Lace to the background around the sky and mountains.
  6. Using the Script Liner, paint the 1/4″ border line with 2 coats of SC-54 Vanilla Dip. Hold the brush just like you did with the pencil to draw the line. Reload the brush with glaze frequently.
  7. Small Mountain: Use the Script Liner to apply 3 coats of glaze to the various sections of the mountains. Bottom of the small mountain is SC-26 Green Thumb, middle is SC-7 Leapin’ Lizard and the top is SC-16 Cotton Tail.
  8. Sun: Using the Script Liner apply 3 coats of SC-97 Cant-elope to the center of the sun and blend in 3 coats SC-75 Orange-A-Peel around the edges.
  9. Large Mountain: Use the Script Liner to apply 3 coats of glaze to the various sections of the mountains. Bottom of the large mountain is SC-8 Just Froggy, middle is SC-7 Leapin’ Lizard and the top is SC-16 Cotton Tail.
  10. Sky: Using the Script Liner and the Soft Fan brush apply 3 coats of SC-12 Moody Blue to create the sky. OPTIONAL: To get a crisp edge between the sky and mountains, cut a piece of tape and place it on the inside of the traced mountain line. Place the tape edge along the traced line, but on the inside of the line.
  11. Remove the tape before the glaze is dry to avoid chipping.
  12. The hills in front of the mountains are glazed with 3 coats of SC-99 Charm-ing using the Script Liner.
  13. Trace the words on the sky. Use the SG-402 White Designer Liner to write the words. OPTIONAL: Use the Detail Liner to apply 2 coats of the Designer Liner to the words.
  14. Use the SG-408 Orange Designer Liner to create the sun rays.
  15. The remaining border is painted with 3 coats of SC-48 Camel Back applied in the same manner and the inner border. Allow the glaze to dry until the shine is gone before applying the next coat of glaze. This was done last to avoid rubbing off the glaze. Allow to dry.
  16. Dip into NT-CLR.
  17. Stilt and fire cone 05/06.

Supplies

Form

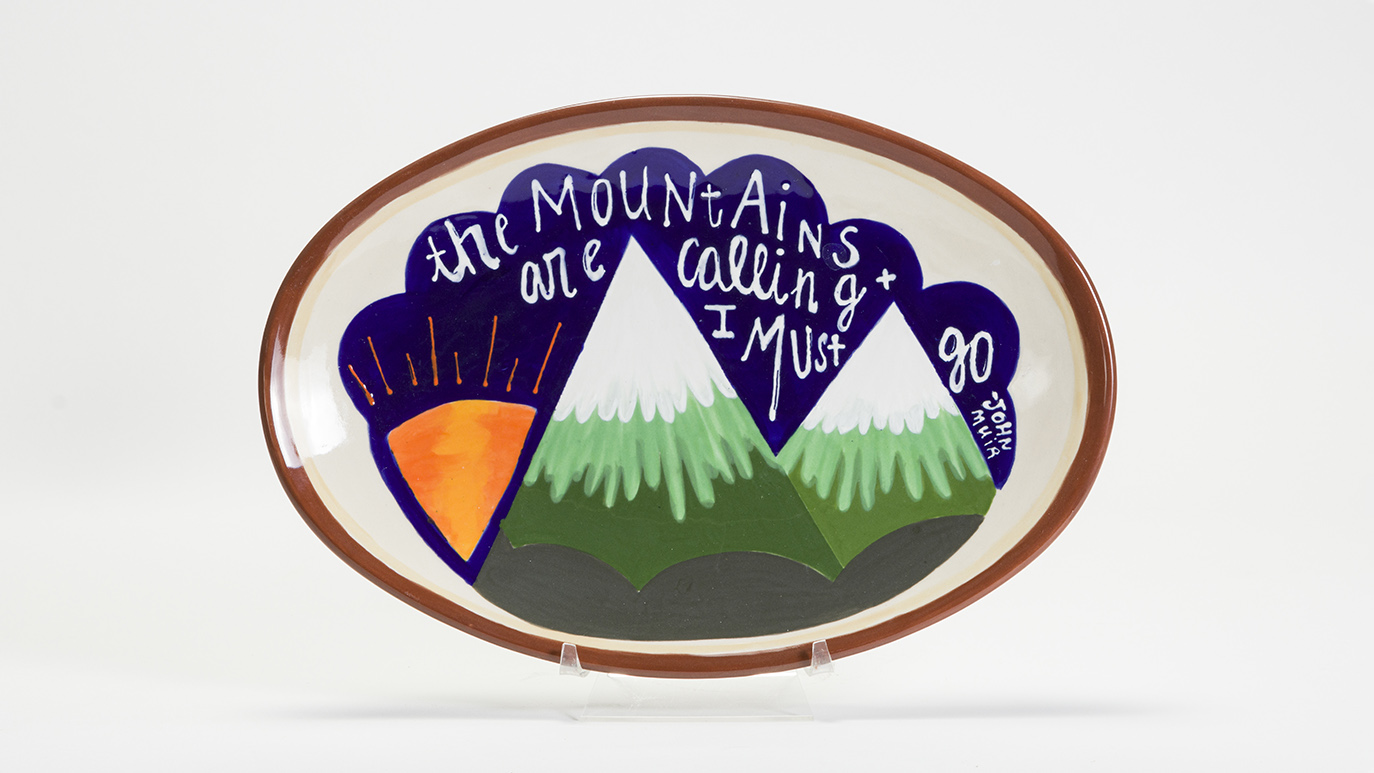
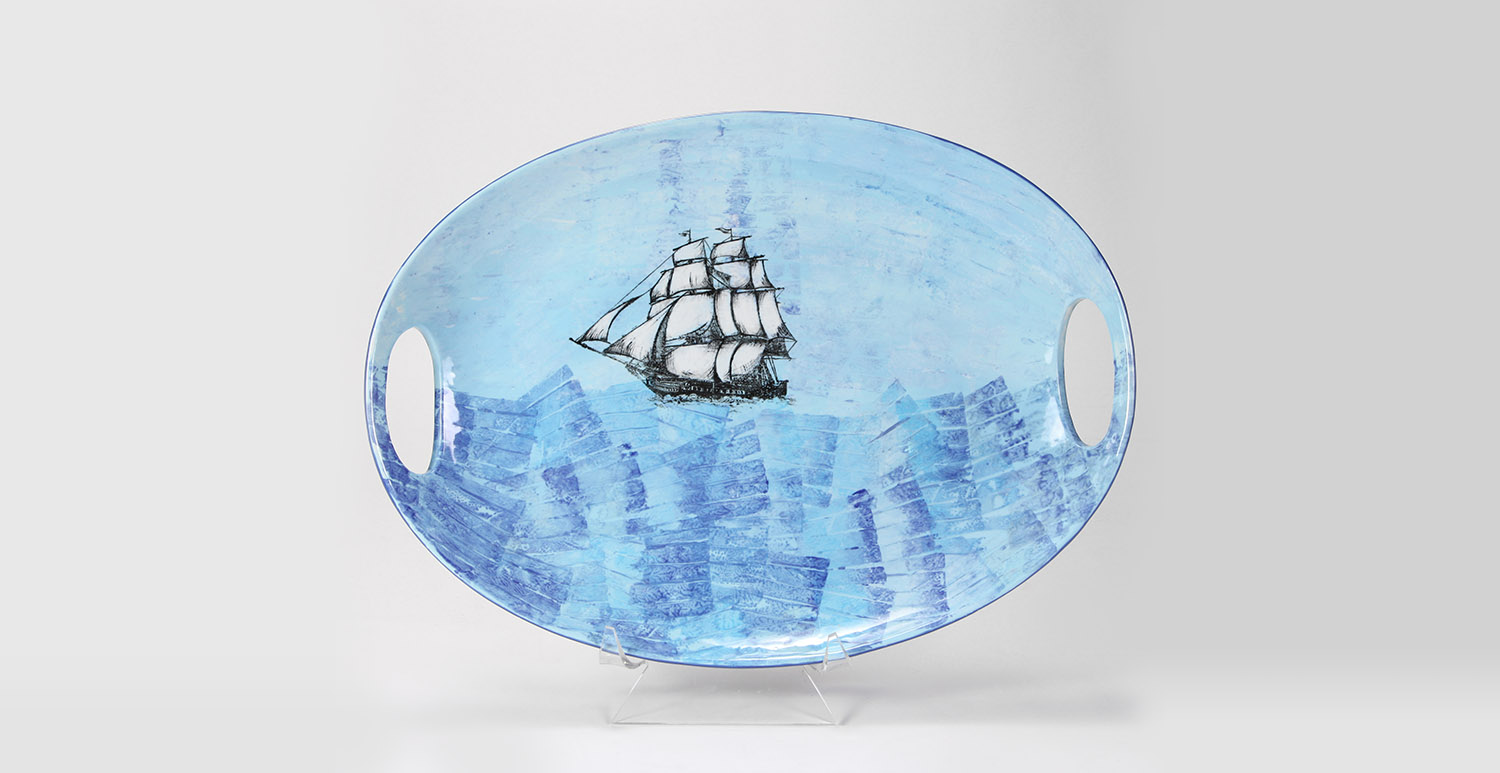
  • MB-131 Large Oval Platter

Color

  • SC-7 Leapin’ Lizard
  • SC-8 Just Froggy
  • SC-12 Moody Blue
  • SC-16 Cotton Tail
  • SC-26 Green Thumb
  • SC-48 Camel Back
  • SC-54 Vanilla Dip
  • SC-75 Orange-A-Peel
  • SC-86 Old Lace
  • SC-97 Cant-elope
  • SC-99 Charm-ing
  • SG-402 White
  • SG-408 Orange
  • NT-CLR Clear One Dipping Glaze

Decorating Accessories

  • RB-106 #6 Script Liner
  • RB-144 #4 Soft Fan
  • RB-110 #10/0 Detail Liner
  • AC-230 Clay Carbon Paper
  • MC-001 Tape

Miscellaneous Accessories

  • Pencil
  • Sponge
  • Scissors
  • Palette
  • Pattern
Top