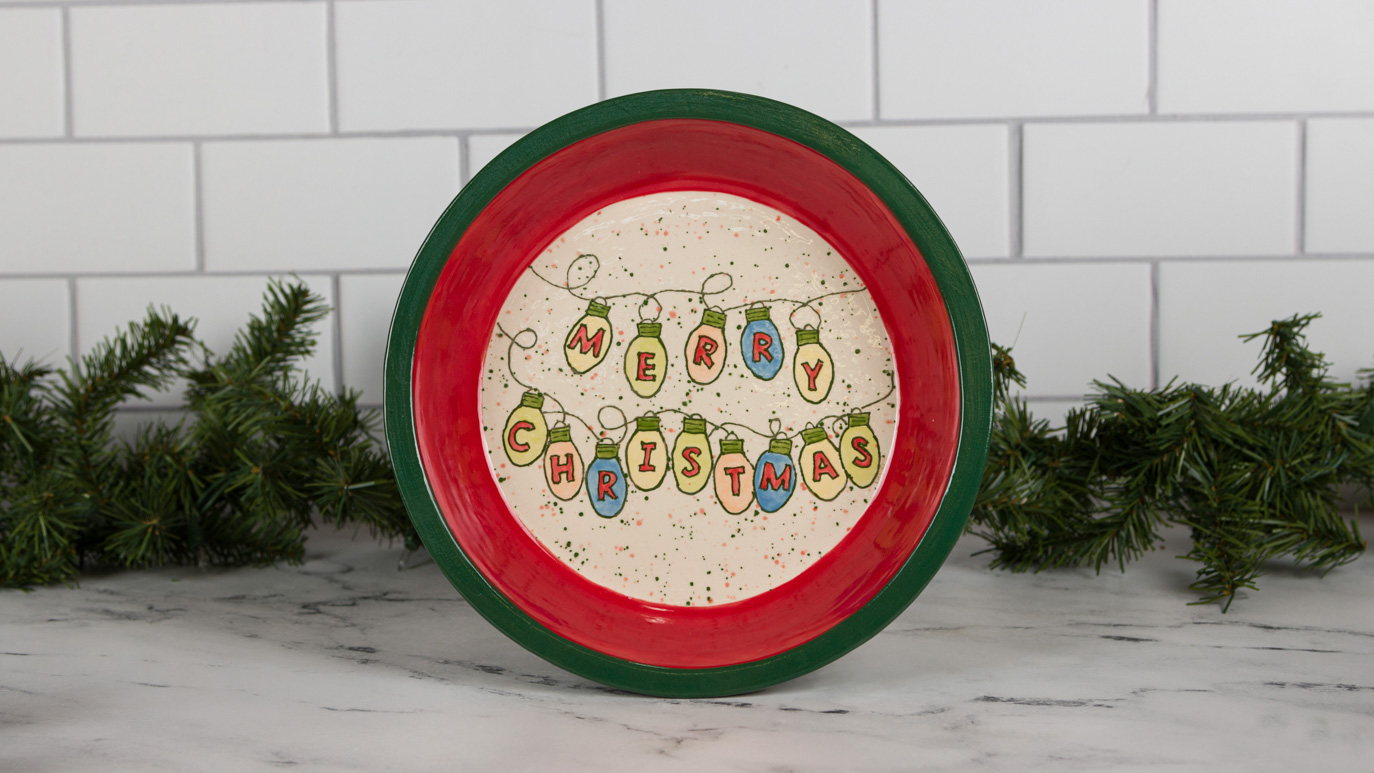
Retro Lights Pie Plate

Designer: Tim McPherson

Share

Instructions

  1. Trace on the pattern using the Clay Carbon paper.
  2. Outline the entire pattern with the Green Designer Liner.
  3. Using the Mini Liner, apply 2 coats of Hot Tamale to the lettering.
  4. Using the Pointed Round, apply 2 coats of Green Thumb to the top area of the light bulbs.
  5. Using the round, apply 2 coats of Dandelion to the yellow light bulbs.
  6. Using the Round, apply 2 coats of Sour Apple to the green light bulbs.
  7. Using the Round, apply 2 coats of Jack O Lantern to the orange light bulbs.
  8. Using the Round, apply 2 coats of The Blues to the blue light bulbs.
  9. Using both the Script Liner and Soft Fan, apply 3 coats of Red Gloss to the inside side walls.
  10. Using both the Script Liner and the Soft Fan, apply 3 coats of Dark Green Gloss to the rim and outside wall, stopping about ¼” from the bottom edge, as Stoneware gets fired dry footed.
  11. Using the Script Liner and Soft Gan, apply 1 coat of Clear to the background areas around the lights.
  12. Using the Script Liner and Soft Fan, apply 1 coat of Peppermint to the background over the Clear.
  13. Remove any color from the bottom of the piece.
  14. Place on a well kiln washed shelf and fore to shelf cone 6

Supplies

Form

  • SB-101 Pie Plate

Colors

  • SW-001 Clear
  • SW-504 Red Gloss
  • SW-509 Dark Green Gloss
  • SG-707 Speckta-Clear Peppermint
  • SG-405 Green Designer Liner
  • SC-26 Green Thumb
  • SC-27 Sour Apple
  • SC-24 Dandelion
  • SC-23 Jack O Lantern
  • SC-74 Hot Tamale
  • SC-31 The Blues

Decorating Accessories

  • CB-110 # 10/0 Mini Liner
  • CB-404 # 4 Pointed Round
  • CB-604 # 4 Soft Fan
  • CB-106 # 6 Script Liner
  • AC-230 Clay Carbon paper

Miscellaneous Accessories

Top