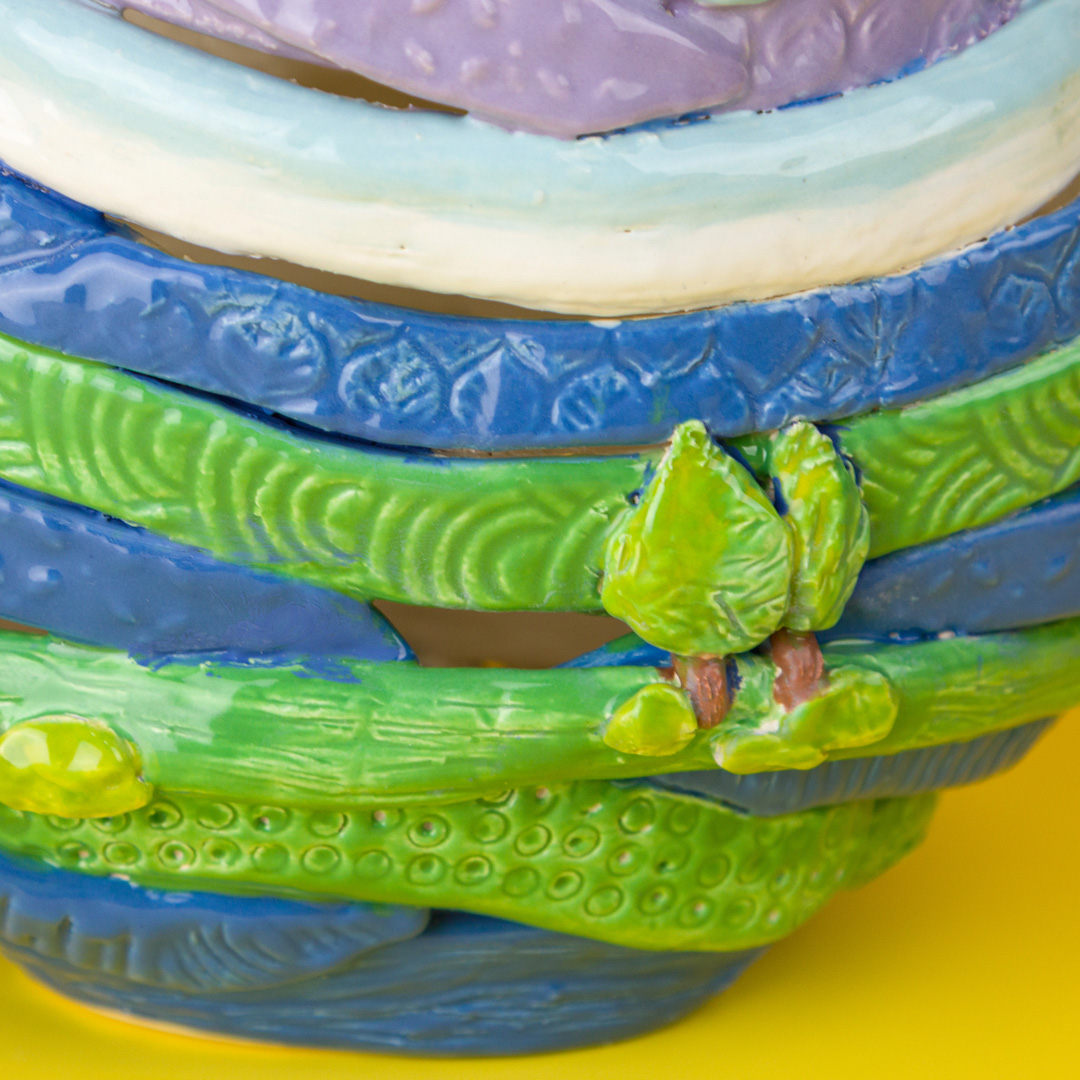
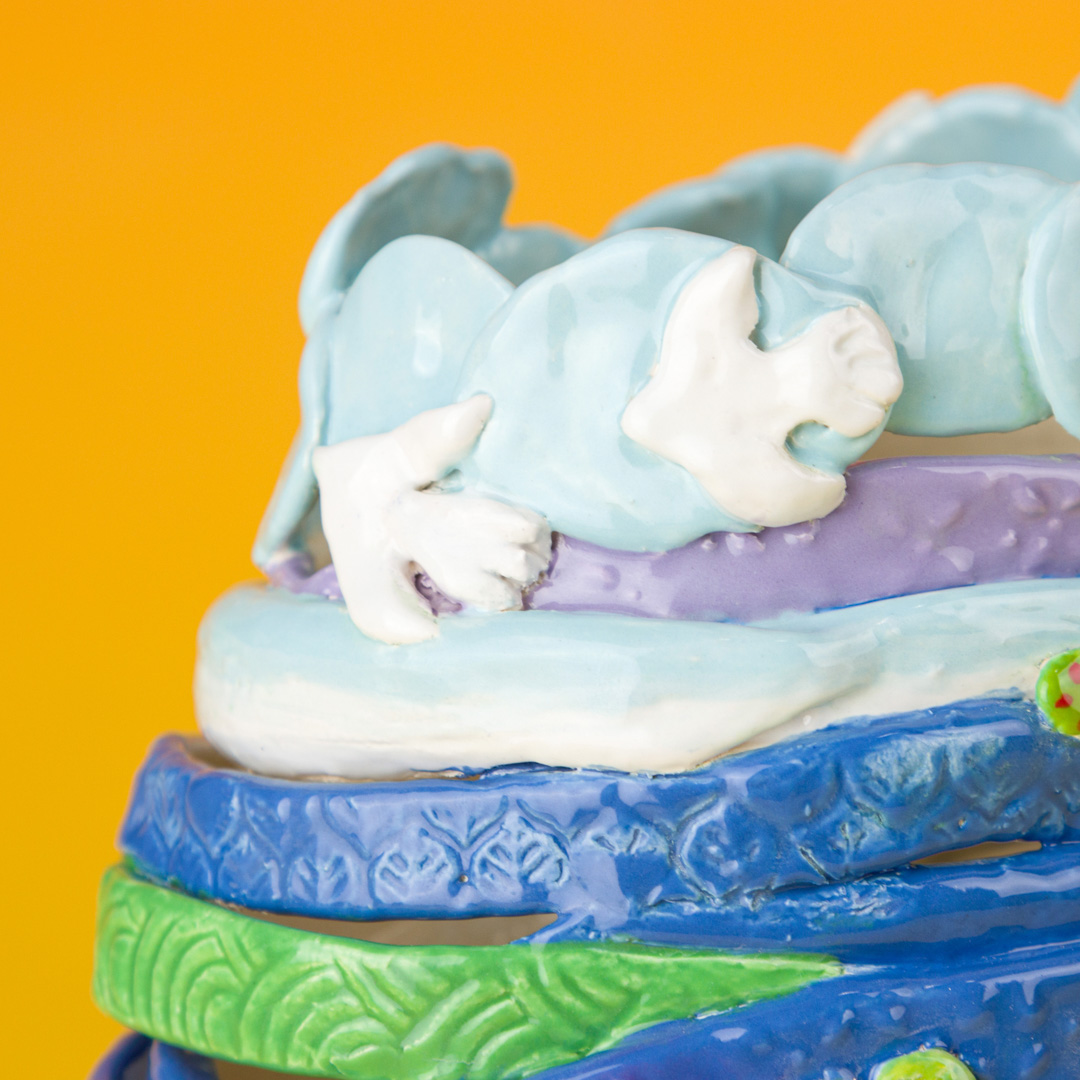
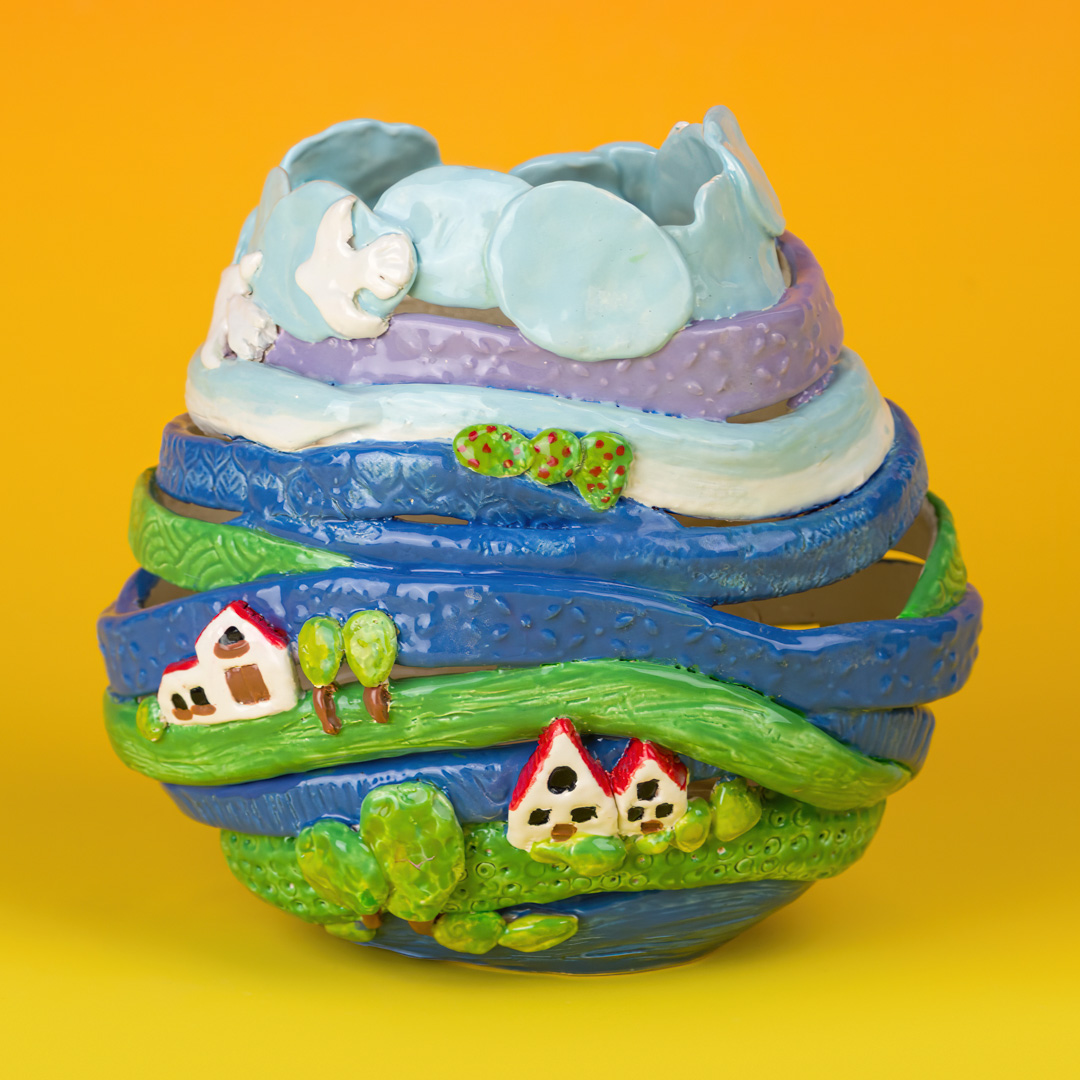
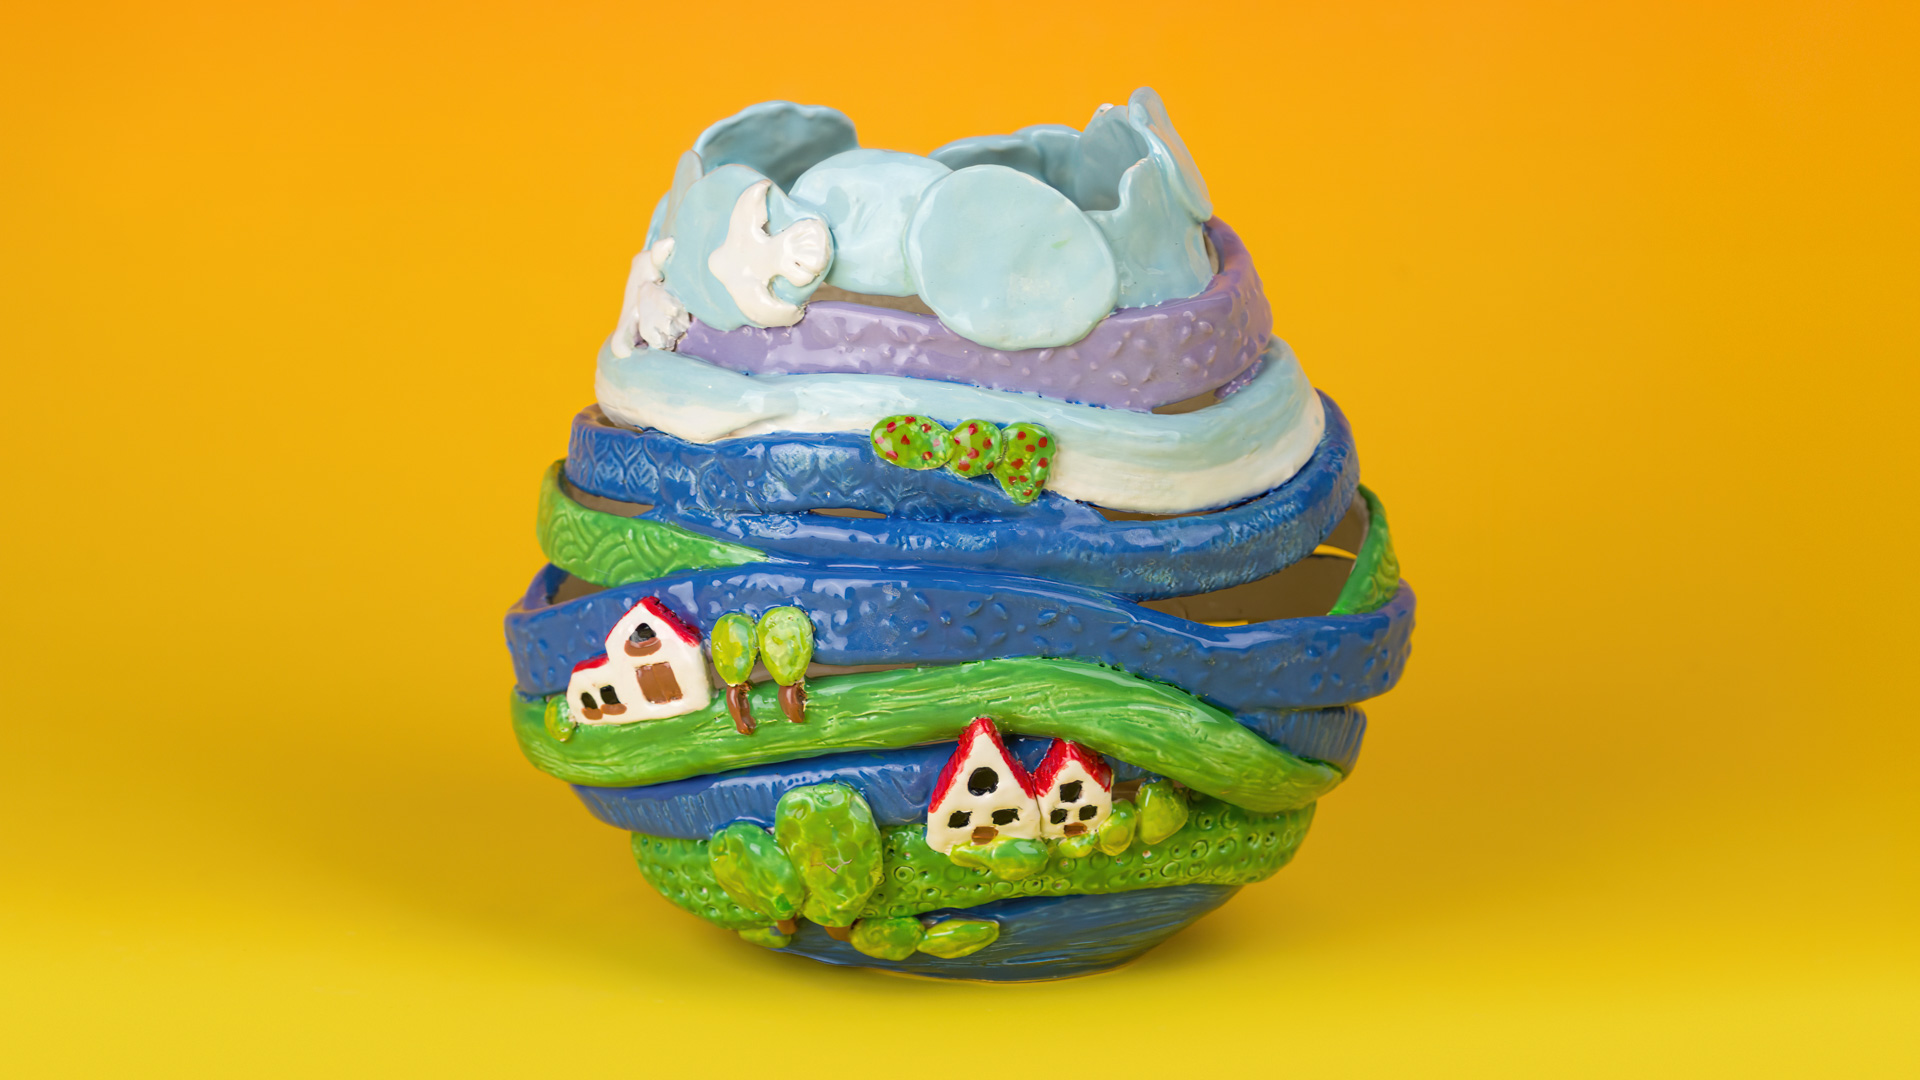
Challenge students to become texture adventurers! By pressing, rolling, or stamping found textures into clay, they’ll transform everyday objects into surfaces full of character.
Students will use textured slabs to build a small sculpture or vessel, celebrating the beauty of patterns.
The challenge: Their final clay piece must use only textures pressed from these finds—no added drawn lines or smooth surfaces. (This constraint pushes creativity and problem-solving.)
Why Stroke & Coat Glazes Art Perfect for Textures Sculptures
Stroke & Coat works beautifully on textured clay, delivering bold color and crisp details. Because Stroke & Coat colors can be mixed together, students can invent their own colors—making every piece as unique as the artist who created it.
Variations & Extensions
Form
Colors
Miscellaneous Accessories