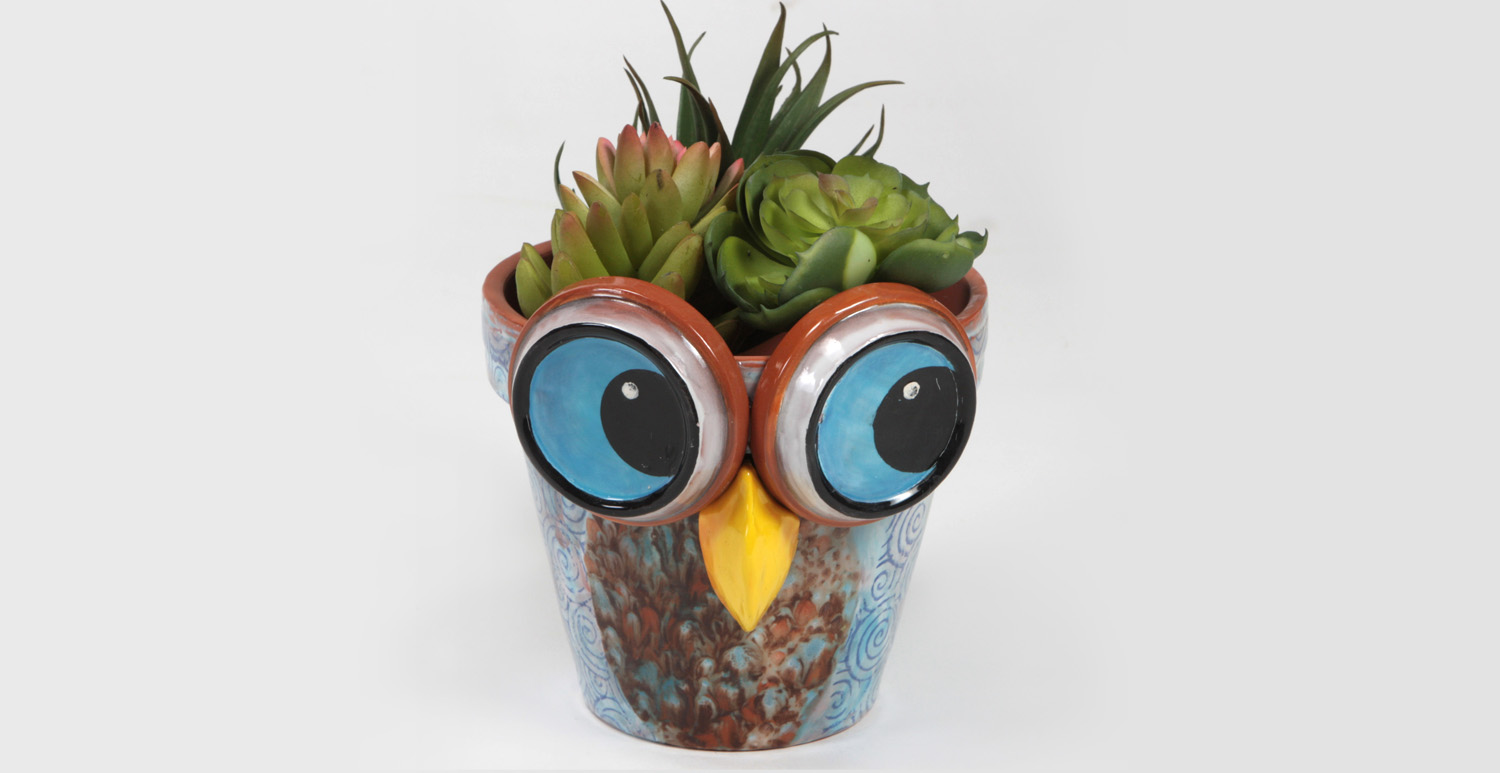
Clay Pot Owl

Designer: Marcia Roullard

Share

Instructions

  1. Pencil in the breast of the owl.
  2. Use the Soft Fan to brush three coats of CG-965 Mocha Marble to the breast. Apply three coats of SC-65 Peri-Twinkle to the remainder of the pot.Let dry.
  3. Use the foam roller to apply SC-12 Moody blue to MT-008 Spiral Mat. Press to the Peri-twinkle section of the owl pot.
  4. For the eyes, use the Script Liner to apply two coats of SC-16 Cotton Tail to the outside edge as shown. Use the Soft Fan to apply three coats of SC-11 Blue Yonder to the bottom of the tray. Let dry.
  5. Use a circle template to outline the pupils to bottom of the trays, over the Blue Yonder.  Use the Script Liner to apply two coats of SC-15 Tuxedo to the pupils. Outline the edge in Tuxedo. Use SC-16 Cotton Tail to create dots in the eyes for the highlight.
  6. Use the Soft Fan to apply two coats of S-2101 Clear to the tray eyes.
  7. Temporarily fix the eyes to the rim of the pot. Use a small piece of clay to shape a beak to fit between the eyes. Let dry. Brush the top of the nose with three coats of SC-6 Sunkissed.
  8. Fire to cone 06 all pieces separately.
  9. After firing, epoxy the eyes and nose to the rim of the clay pot.

Supplies

Form

  • 5 1/2″ Terra Cotta Clay Pot
  • 3″ Terra Cotta Clay Drip Tray (2)
  • *Clay Pots & Trays purchased from Michael’s

Colors

  • SC-6 Sunkissed
  • SC-11 Blue Yonder
  • SC-12 Moody Blue
  • SC-15 Tuxedo
  • SC-16 Cotton Tail
  • SC-65 Peri-Twinkle
  • CG-965 Mocha Marble
  • S-2101 Clear

Decorating Accessories

  • MT-008 Spiral Mat
  • CB-604 #4 Soft Fan
  • CB-106 #6 Script Liner

Miscellaneous Accessories

  • Sponge
  • Circle Template
  • Moist Clay
  • Epoxy Glue
Top