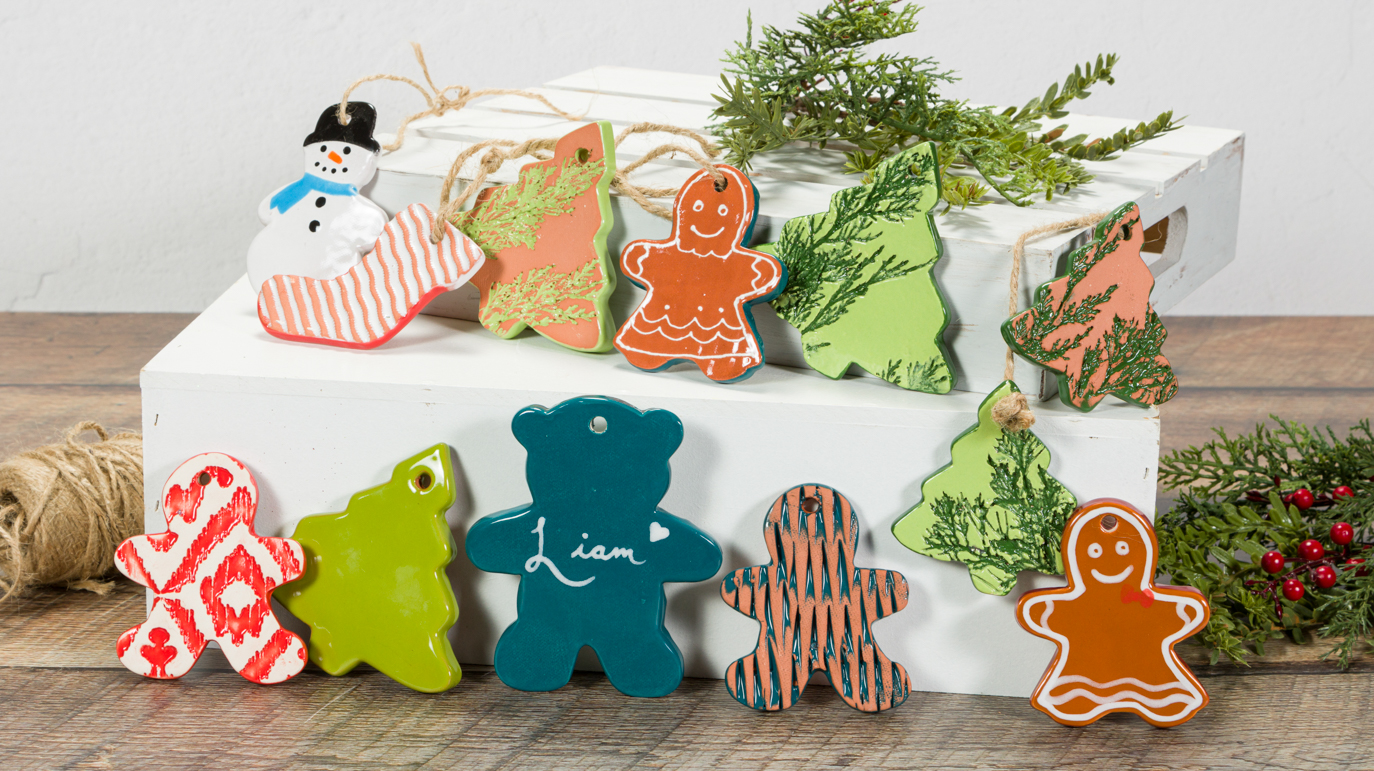
Building
- Roll clay out to about ¼-1/2” thickness
- Press desired texture into the clay.
- Press cookie cutter into clay and pull out shape.
- Use straw to cut out hole to hang from.
- Allow to dry completely.
- Fire to cone 04.
Glazing
- Apply 2-3 coats for design work.
- For texture, apply 1 coat and allow to dry. Wipe back with a damp sponge to reveal texture.
- Allow to dry completely.
- Stilt and glaze fire to cone 06.
Variations/Adaptations/Tips&Tricks
- Place plastic wrap down over the clay before cutting with the cookie cutters to help easily remove clay and create a clean rounded edge,