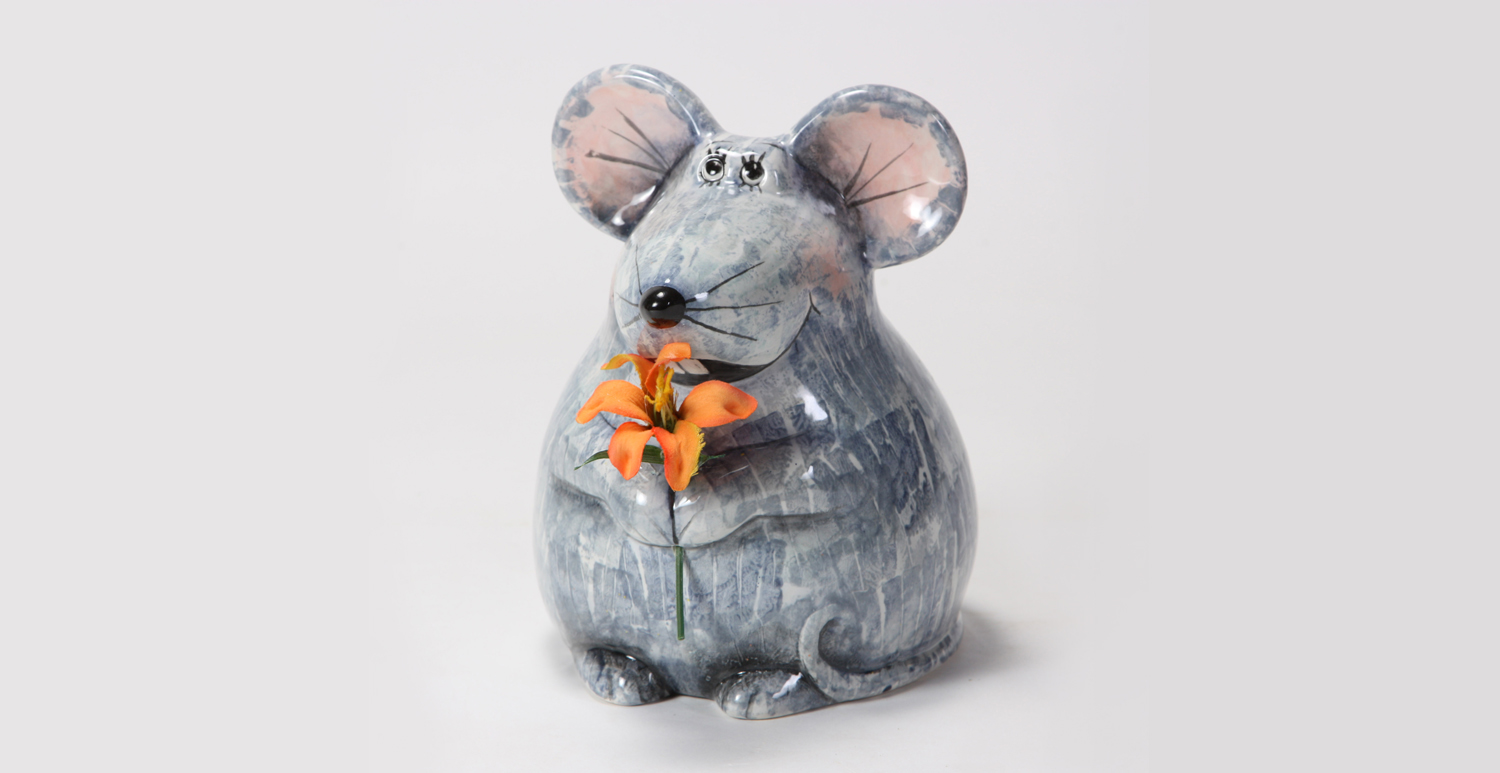
1. Begin with properly fired shelf cone 04 bisque. Moisten a clean sponge and wipe bisque to remove any dust.
2. Dremel a hole just above the hands, and below the hands for the flower.
3. Brush two coats of SC-1 Pink A Boo to the inside of the ears and the cheeks.
4. Brush the remainder of the mouse with two coats of SC-60 Silver Lining with RB-144 Soft Fan.
5. Cut a toilet paper roll in half lengthwise, then make cuts in the short side to look like fringe about 2 inches long., cut sizes vary between 3/8 inch and 1/2 inch. Trim the thickness between cuts so that there is a small space between them when they lay flat.
6. Start at the top of the head, sponge the toilet roll fringe with SC-35 Gray Hare, press to the mouse, for the first couple of stamps, you will need to repeat till glaze builds up on the toilet roll. Stamp in rows, overlapping stamps. Use SC-32 Bluebeard to apply to the toilet roll with the sponge so that all the stamped design is not the same color.
7. Stamp into the ears over the pink glaze at the edges, same for the cheeks, stamp the entire mouse.
8. Brush the nose with SC-15 Tuxedo, outline the mouth, hands, whiskers, and inside of the ears. Float SC-15 Tuxedo inside the ears, around the arms and feet for shadow. Eyes are SC-16 Cotton Tail, pupils and eyelashes with SC-15 Tuxedo use RB-110 Liner.
9. Fire to cone 05/06.
Form
Colors
Decorating Accessories
Miscellaneous Accessories