Begin with a grapefruit sized ball of low-fire clay.
To make the body of the frog, separate the clay to create a smaller ball, about the size of a clementine. Set aside and cover the rest of the clay.
Create a pinch pot from this smaller ball.
Lay the pinch pot on its side to begin drying. The mouth of the pot will sag into an oblong shape as it firms up.
Using clay set aside, roll a 6-inch coil about the width of a dime and cut into two 3-inch coils with your needle tool to create the front legs of the frog.
Carefully bend gentle arches in the middle of your two coils.
Use your finger to smooth and compress both sides of each arch to alleviate any cracks and to prevent cracking during drying and firing.
Lightly pinch one end of each coil to create flat feet and allow coils to firm up with the arches sitting upright.
Using clay set aside, roll an 8-inch coil about the width of a nickel and cut into two 4-inch coils with your needle tool to create the back legs of the frog.
Repeat steps 6 & 7
Using clay set aside, roll an additional 4-inch coil about the width of a nickel to make the tongue. Gradually flatten your coil with wet fingers and curve the flattened coil into a slope.
Allow the flattened, sloped coil to firm up while laying on its side to prevent the curve from straightening as it dries.
Using clay set aside, create the eyes by rolling two smaller balls of clay. Roll a third, slightly larger ball of clay for the fly.
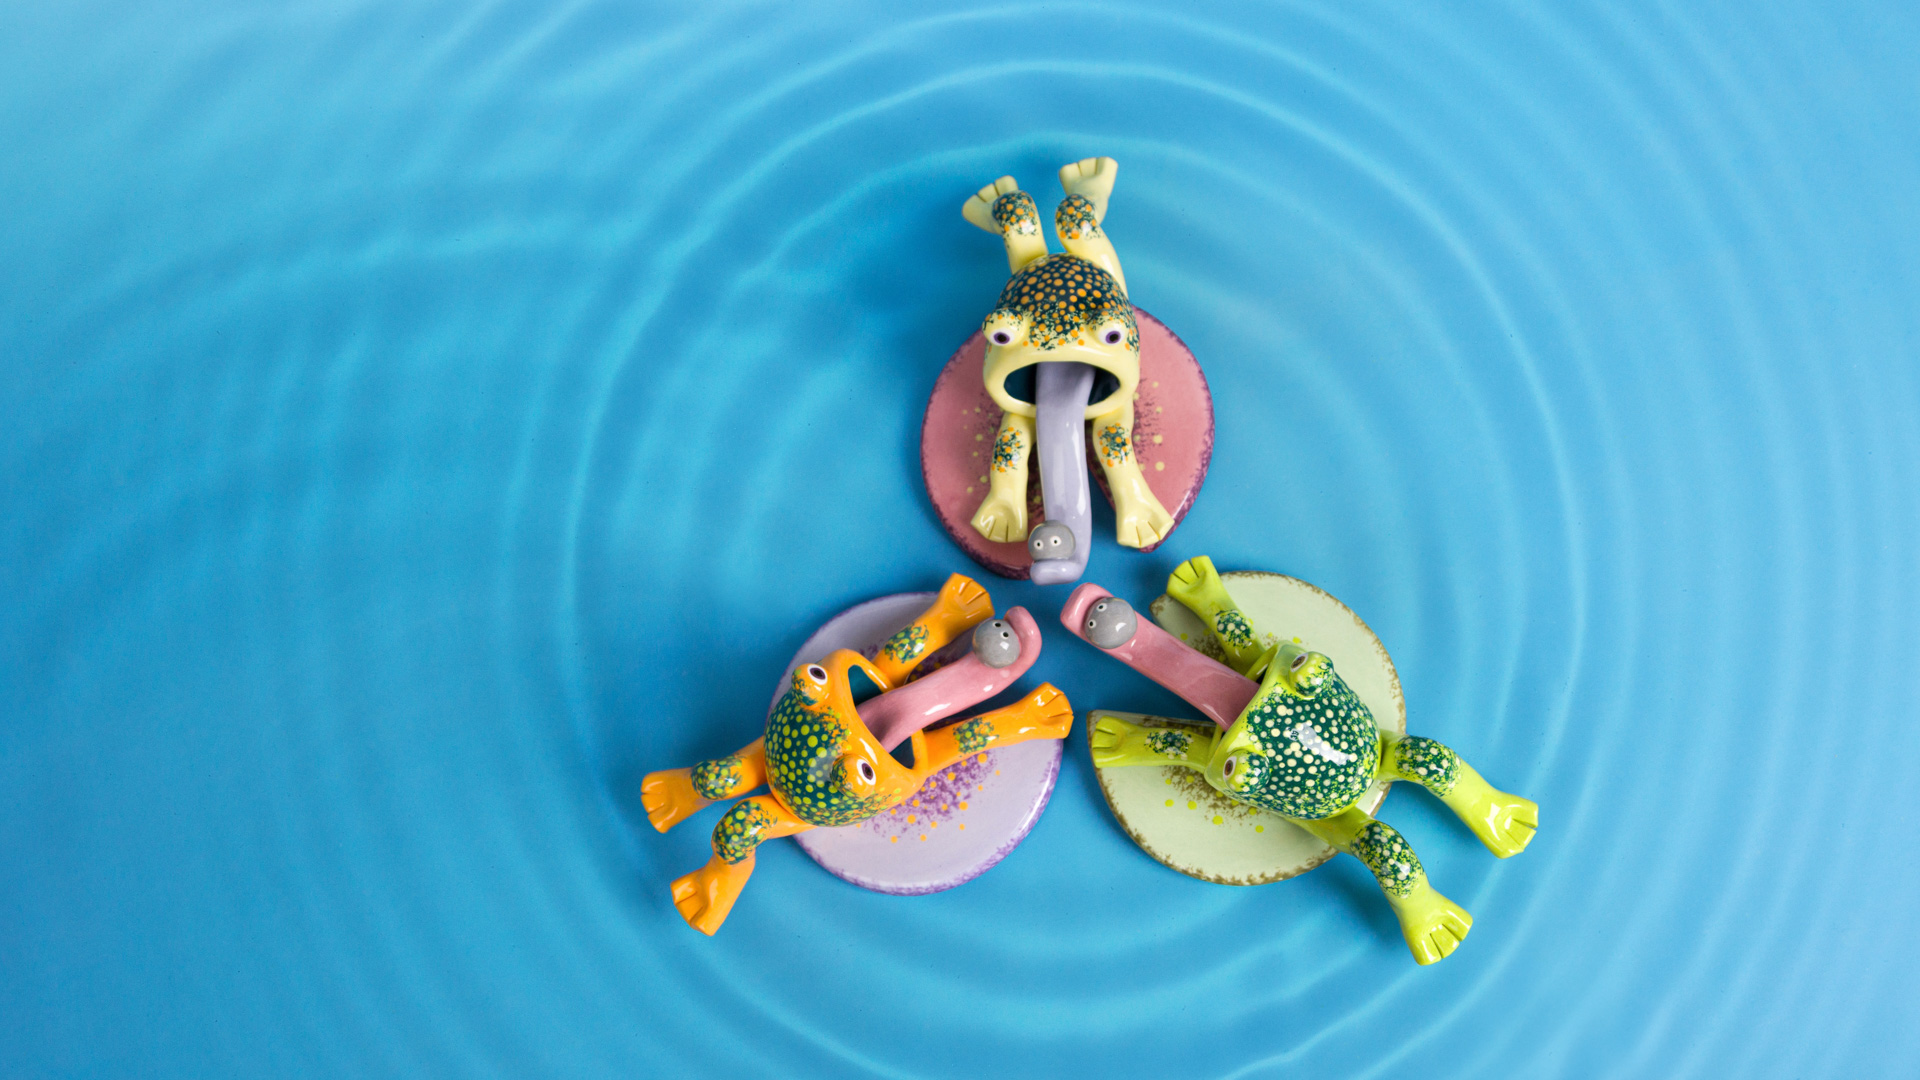
Assemble your frog in the order it was created. Slip and score with your needle tool to attach the legs to the underside of your pinch pot. Follow by slipping and scoring the tongue into the inside wall. As you firmly join the legs underneath and tongue inside, expect the underside of your pinch pot to flatten a bit.
Slip and score with your needle tool to attach the eyes on top of the body, and fly on top of the tongue. Press the underside of the tongue as you attach the fly to prevent the slope from flattening.
Use a toothpick to create toes by cutting two notches into each foot. Allow your frog to dry slowly under plastic.
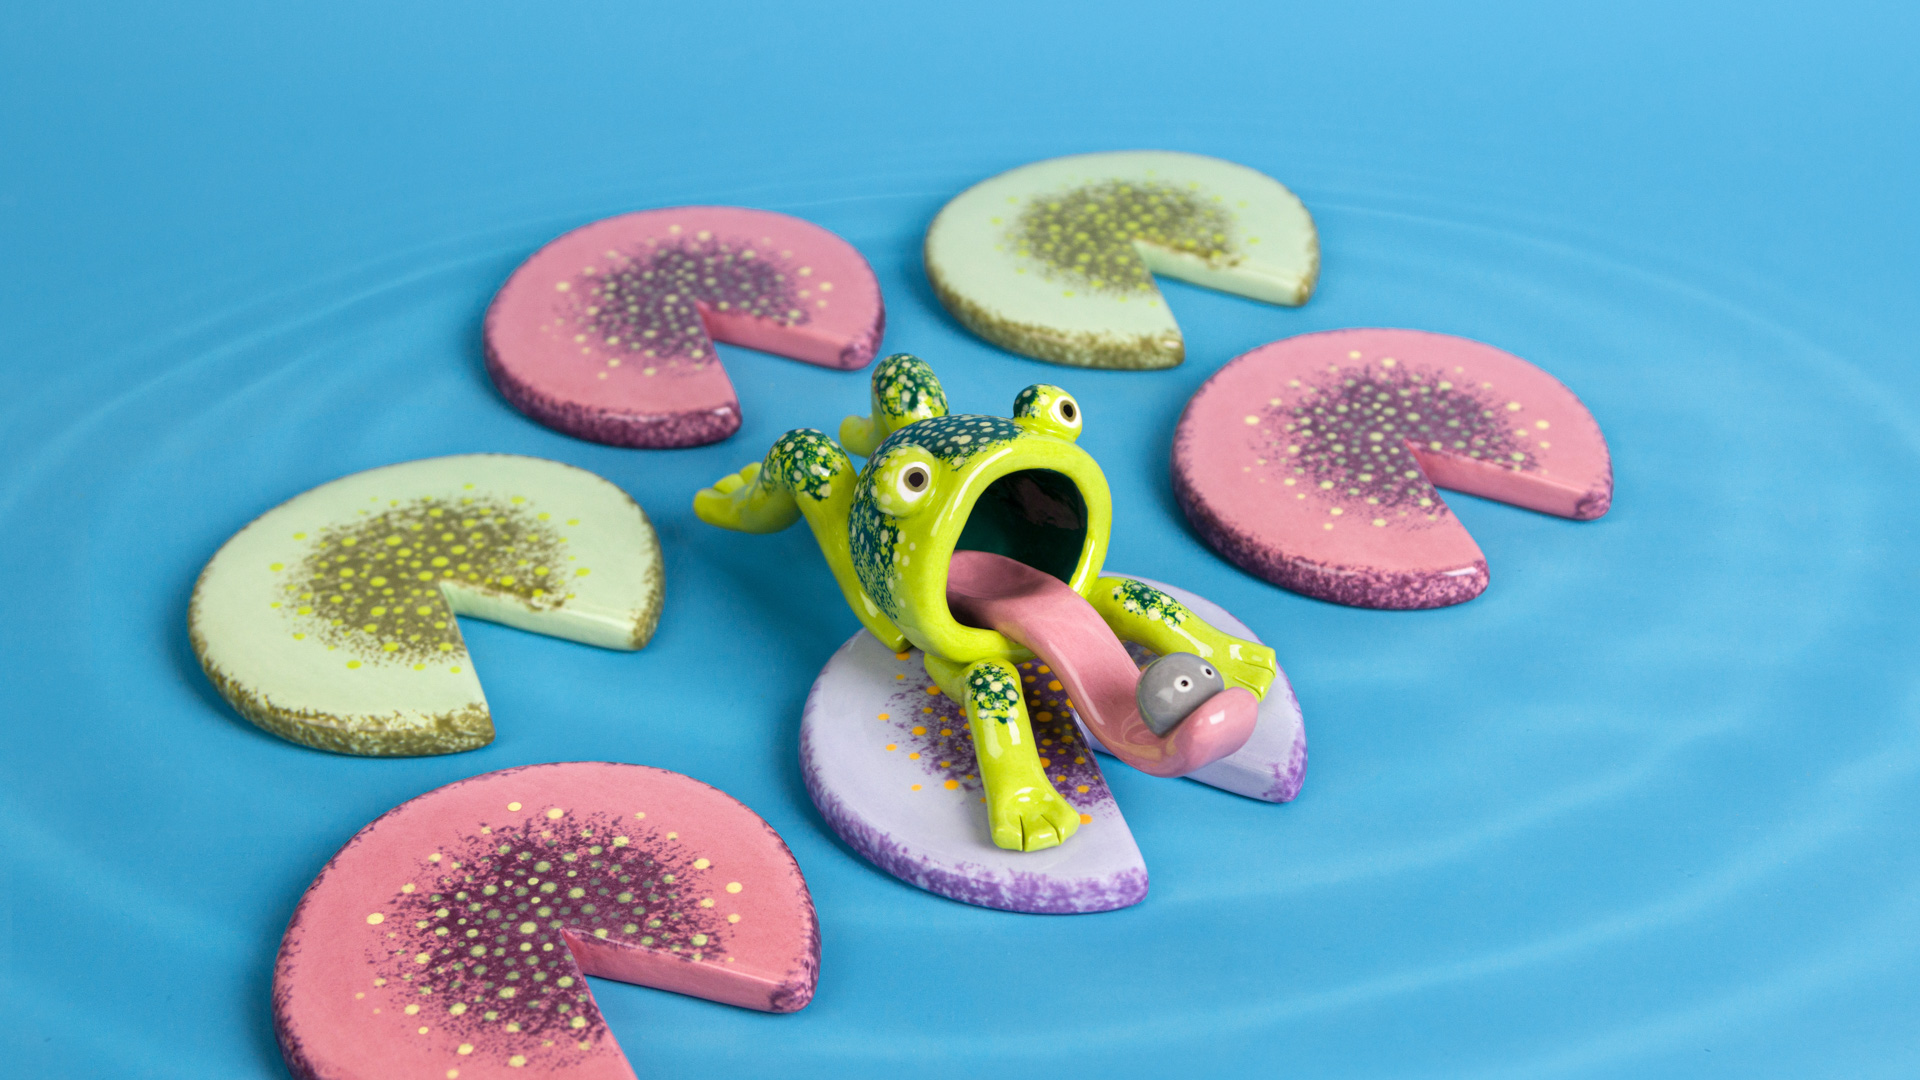
Forming the Lily Pad
Slap together all remaining clay and roll into a slab about 1/4” thick.
Use a rib to firmly compress both surfaces of the slab to prevent cracking during drying and firing.
Use your needle tool to cut a circle about 4 ½” in diameter from the slab and cut a wedge from the circle as if cutting a slice of pizza. Run a damp sponge along the cut surfaces to soften sharp edges. Allow your lily pad to dry slowly with your frog under plastic.
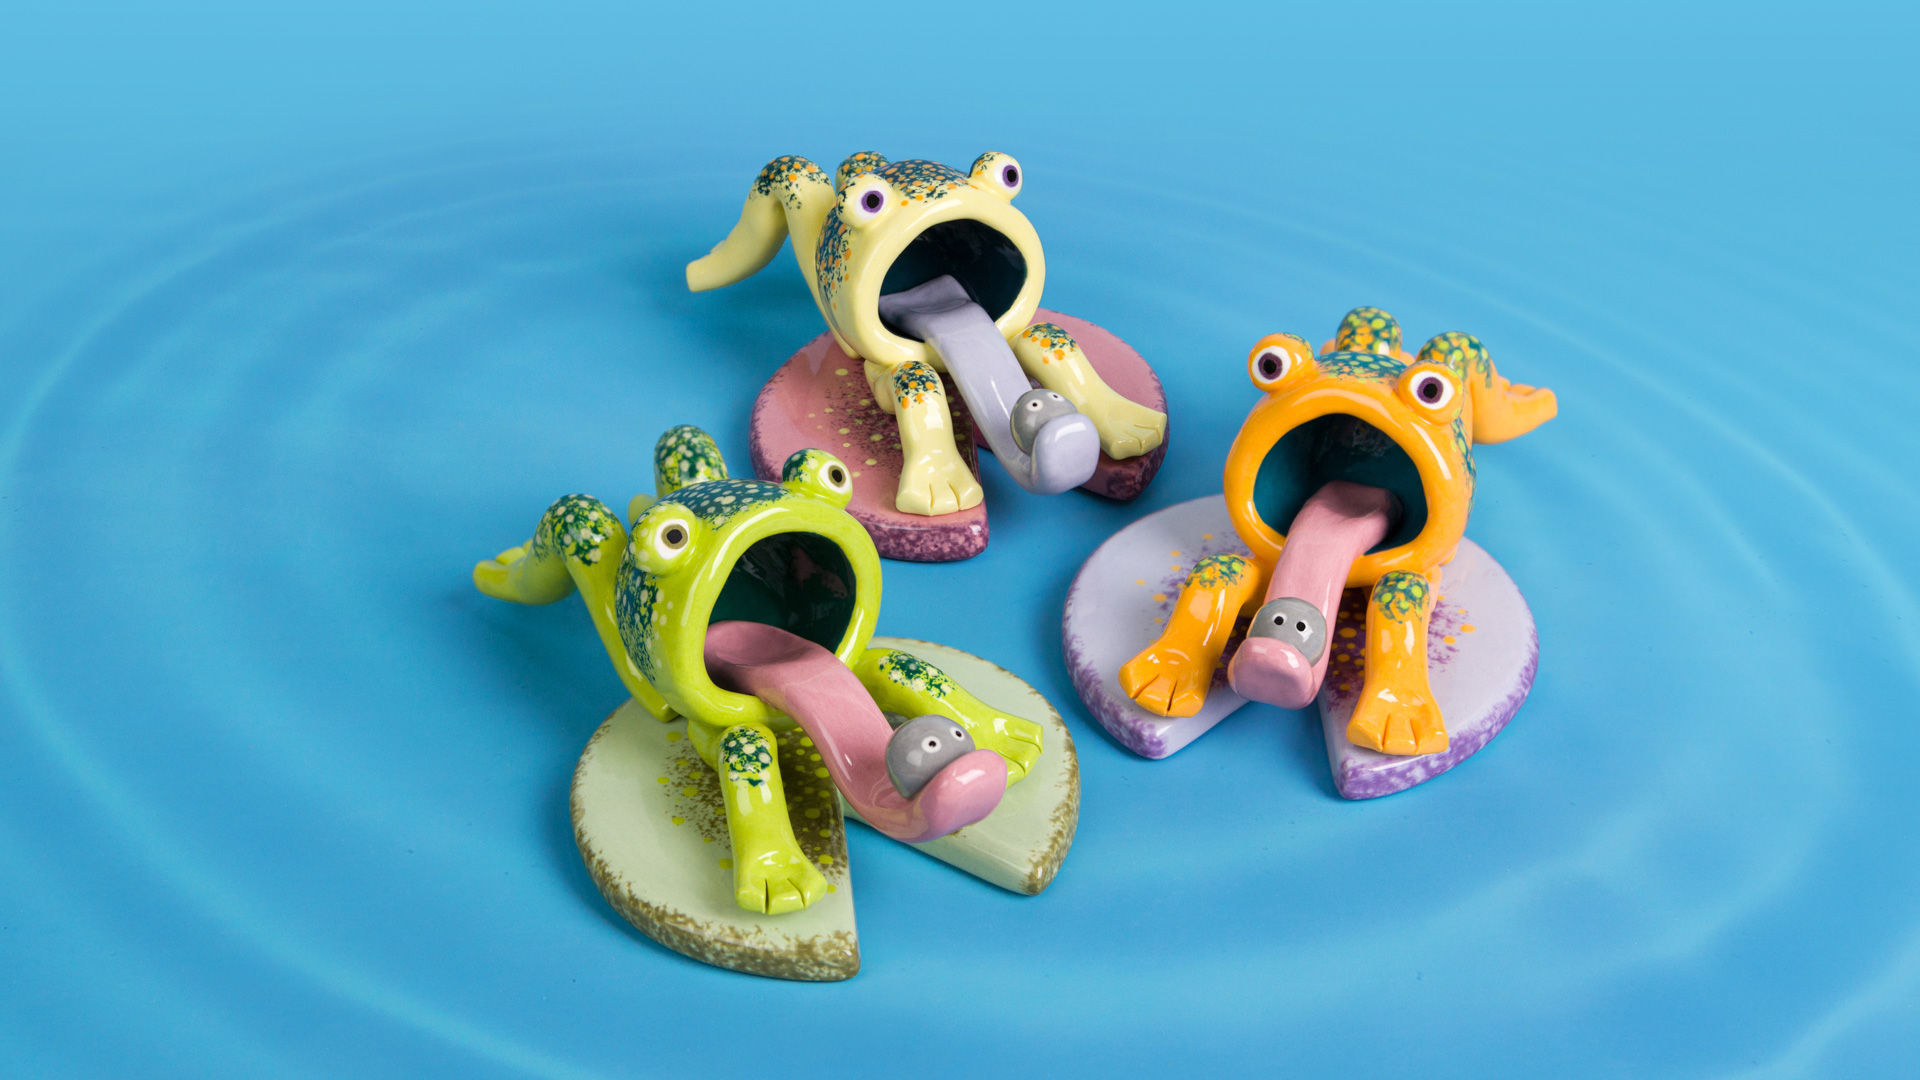
Glazing with the Green Frog with Mayco Fundamentals Underglaze.
Apply 2-3 coats of UG-216 Peach to the tongue of the frog using a CB-106 #6 Script Liner brush.
If using clay that is not white, apply 2-3 coats of UG-51 China White to the front of the eyeballs of the frog using the #6 Script Liner.
Apply 2-3 coats of UG-22 Spring Green to the body of the frog using a CB-602 #2 Soft Fan. Switch to a #0 Detail when painting a circle around the eyes of the frog.
Use a CB-200 #0 Detail to apply 2-3 coats of UG-209 Jade as irises in the eyes of the frog, then switch to a #2 Soft Fan and cover both sides of the lily pad with 2-3 coats of the same color.
Apply 2-3 coats of UG-91 True Teal to the inside of the mouth using a #6 Script Liner, switching to a #0 Detail brush to cover the edge where the tongue rests inside the mouth. Dampen a clean sponge and pat the same color around the edges and in the center of the lily pad.
Dampen a clean sponge and pat UG-21 Leaf Green onto the back of the frog, including the backs of the eyes, as well as on the bends of the legs.
Use the back of a brush to apply polka-dots of UG-68 Apple Green on top of the sponged UG-21 Leaf Green on the frog, and on top of the sponged UG-91 True Teal in the center of the lily pad.
Apply 2-3 coats of UG-50 Jet Black with a #6 Script Liner to the body of the fly.
Use the back of a brush to apply two dots of UG-51 China White onto the body of the fly for eyes.
Add pupils into the eyes of the frog and the fly with UG-50 Jet Black using a #0 Detail brush.
Bisque fire both pieces to Cone 04.
Clear Glazing
Dampen a clean sponge and wipe bisque to remove debris.
Using a #2 Soft Fan, apply two coats of S-2101 Crystal Clear Brushing to all surfaces of both the frog and lily pad.