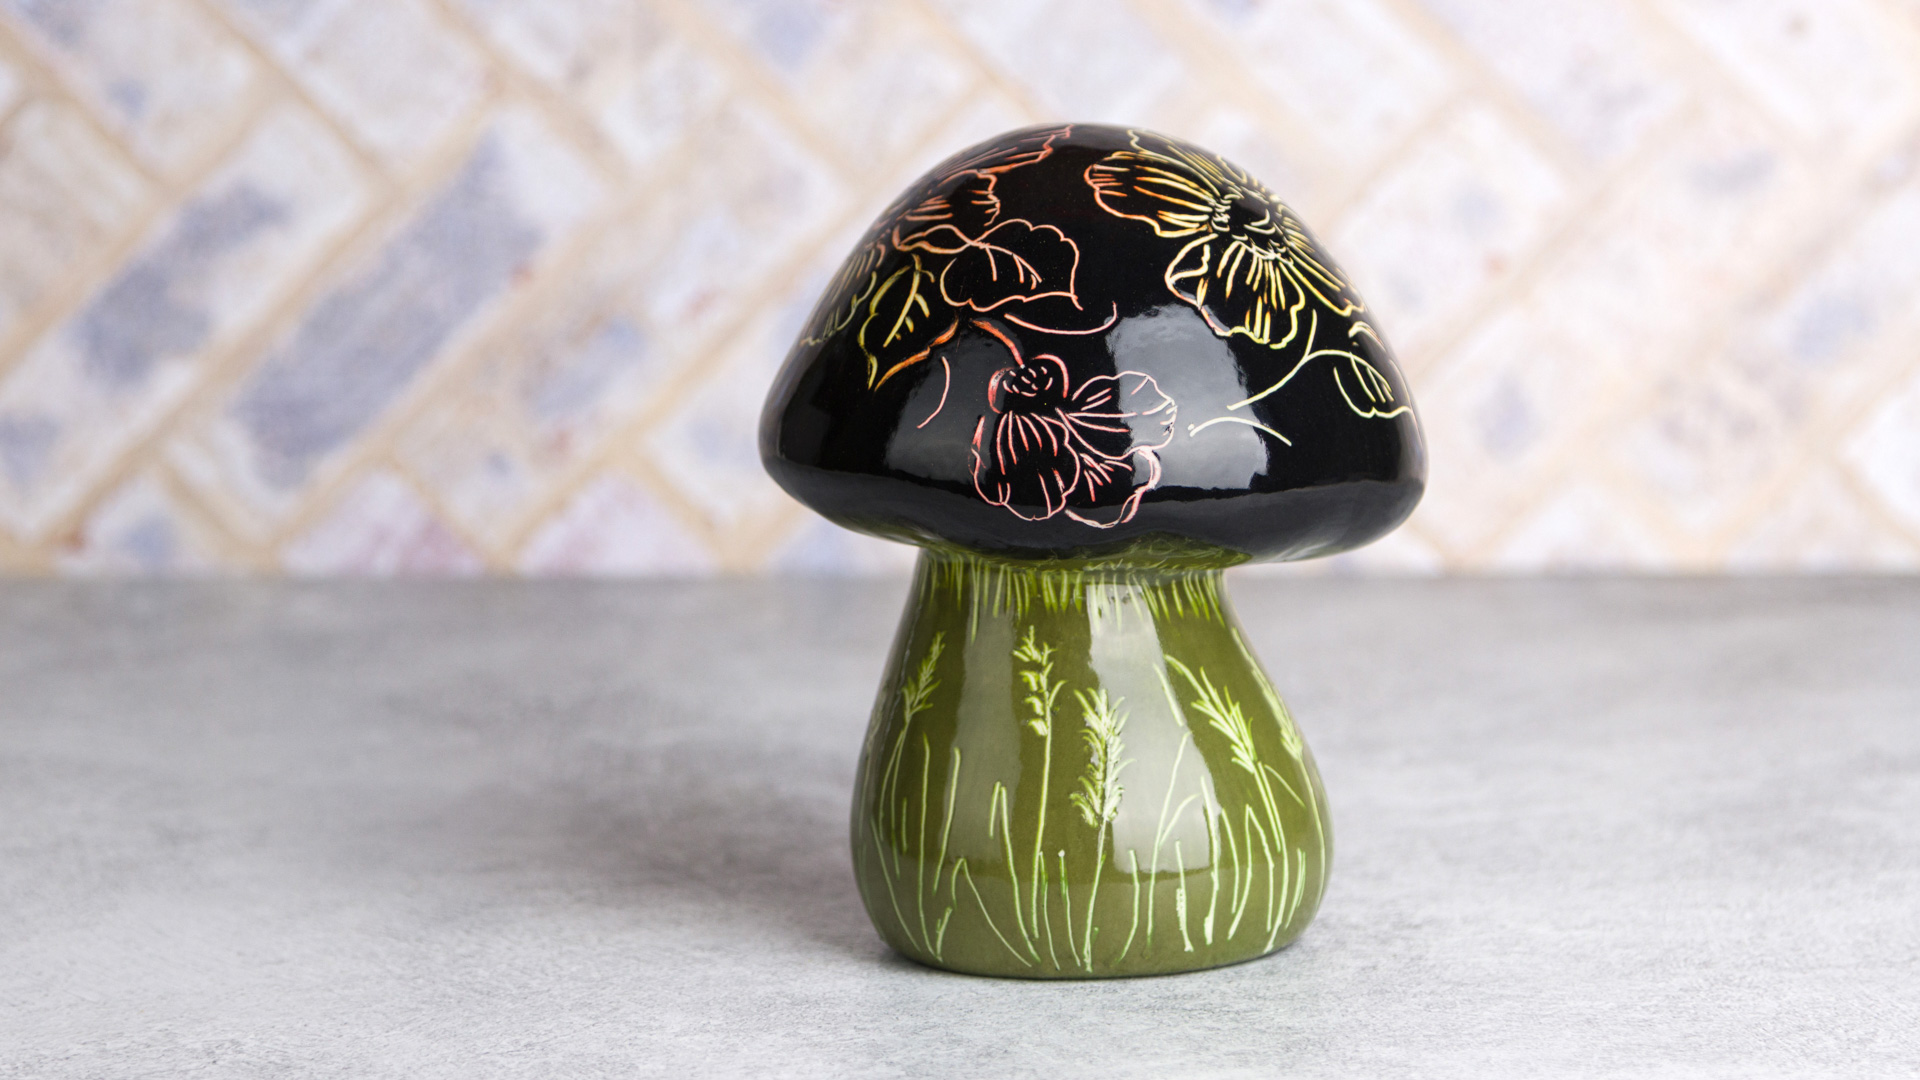
Form
- MB1420 Garden Mushroom 6”
Colors
- UG046 Bright Yellow
- UG050 Jet Black
- UG068 Apple Green
- UG204 Orange
- UG207 Flame Red
- UG231 Lime Green
- UG232 Olive
- S2101 Crystal Clear Brushing
Decorating Accessories
- Palette Knife
- Sponge
- CB-408 #8-Pointed Round
- CB- 434 ¾” Oval
- RB-144 #4 Soft Fan
- Sgraffito Tool of choice
Miscellaneous Accessories
- Standard Pencil and paper
- Paper Towel
- Palette
- Water Bowl
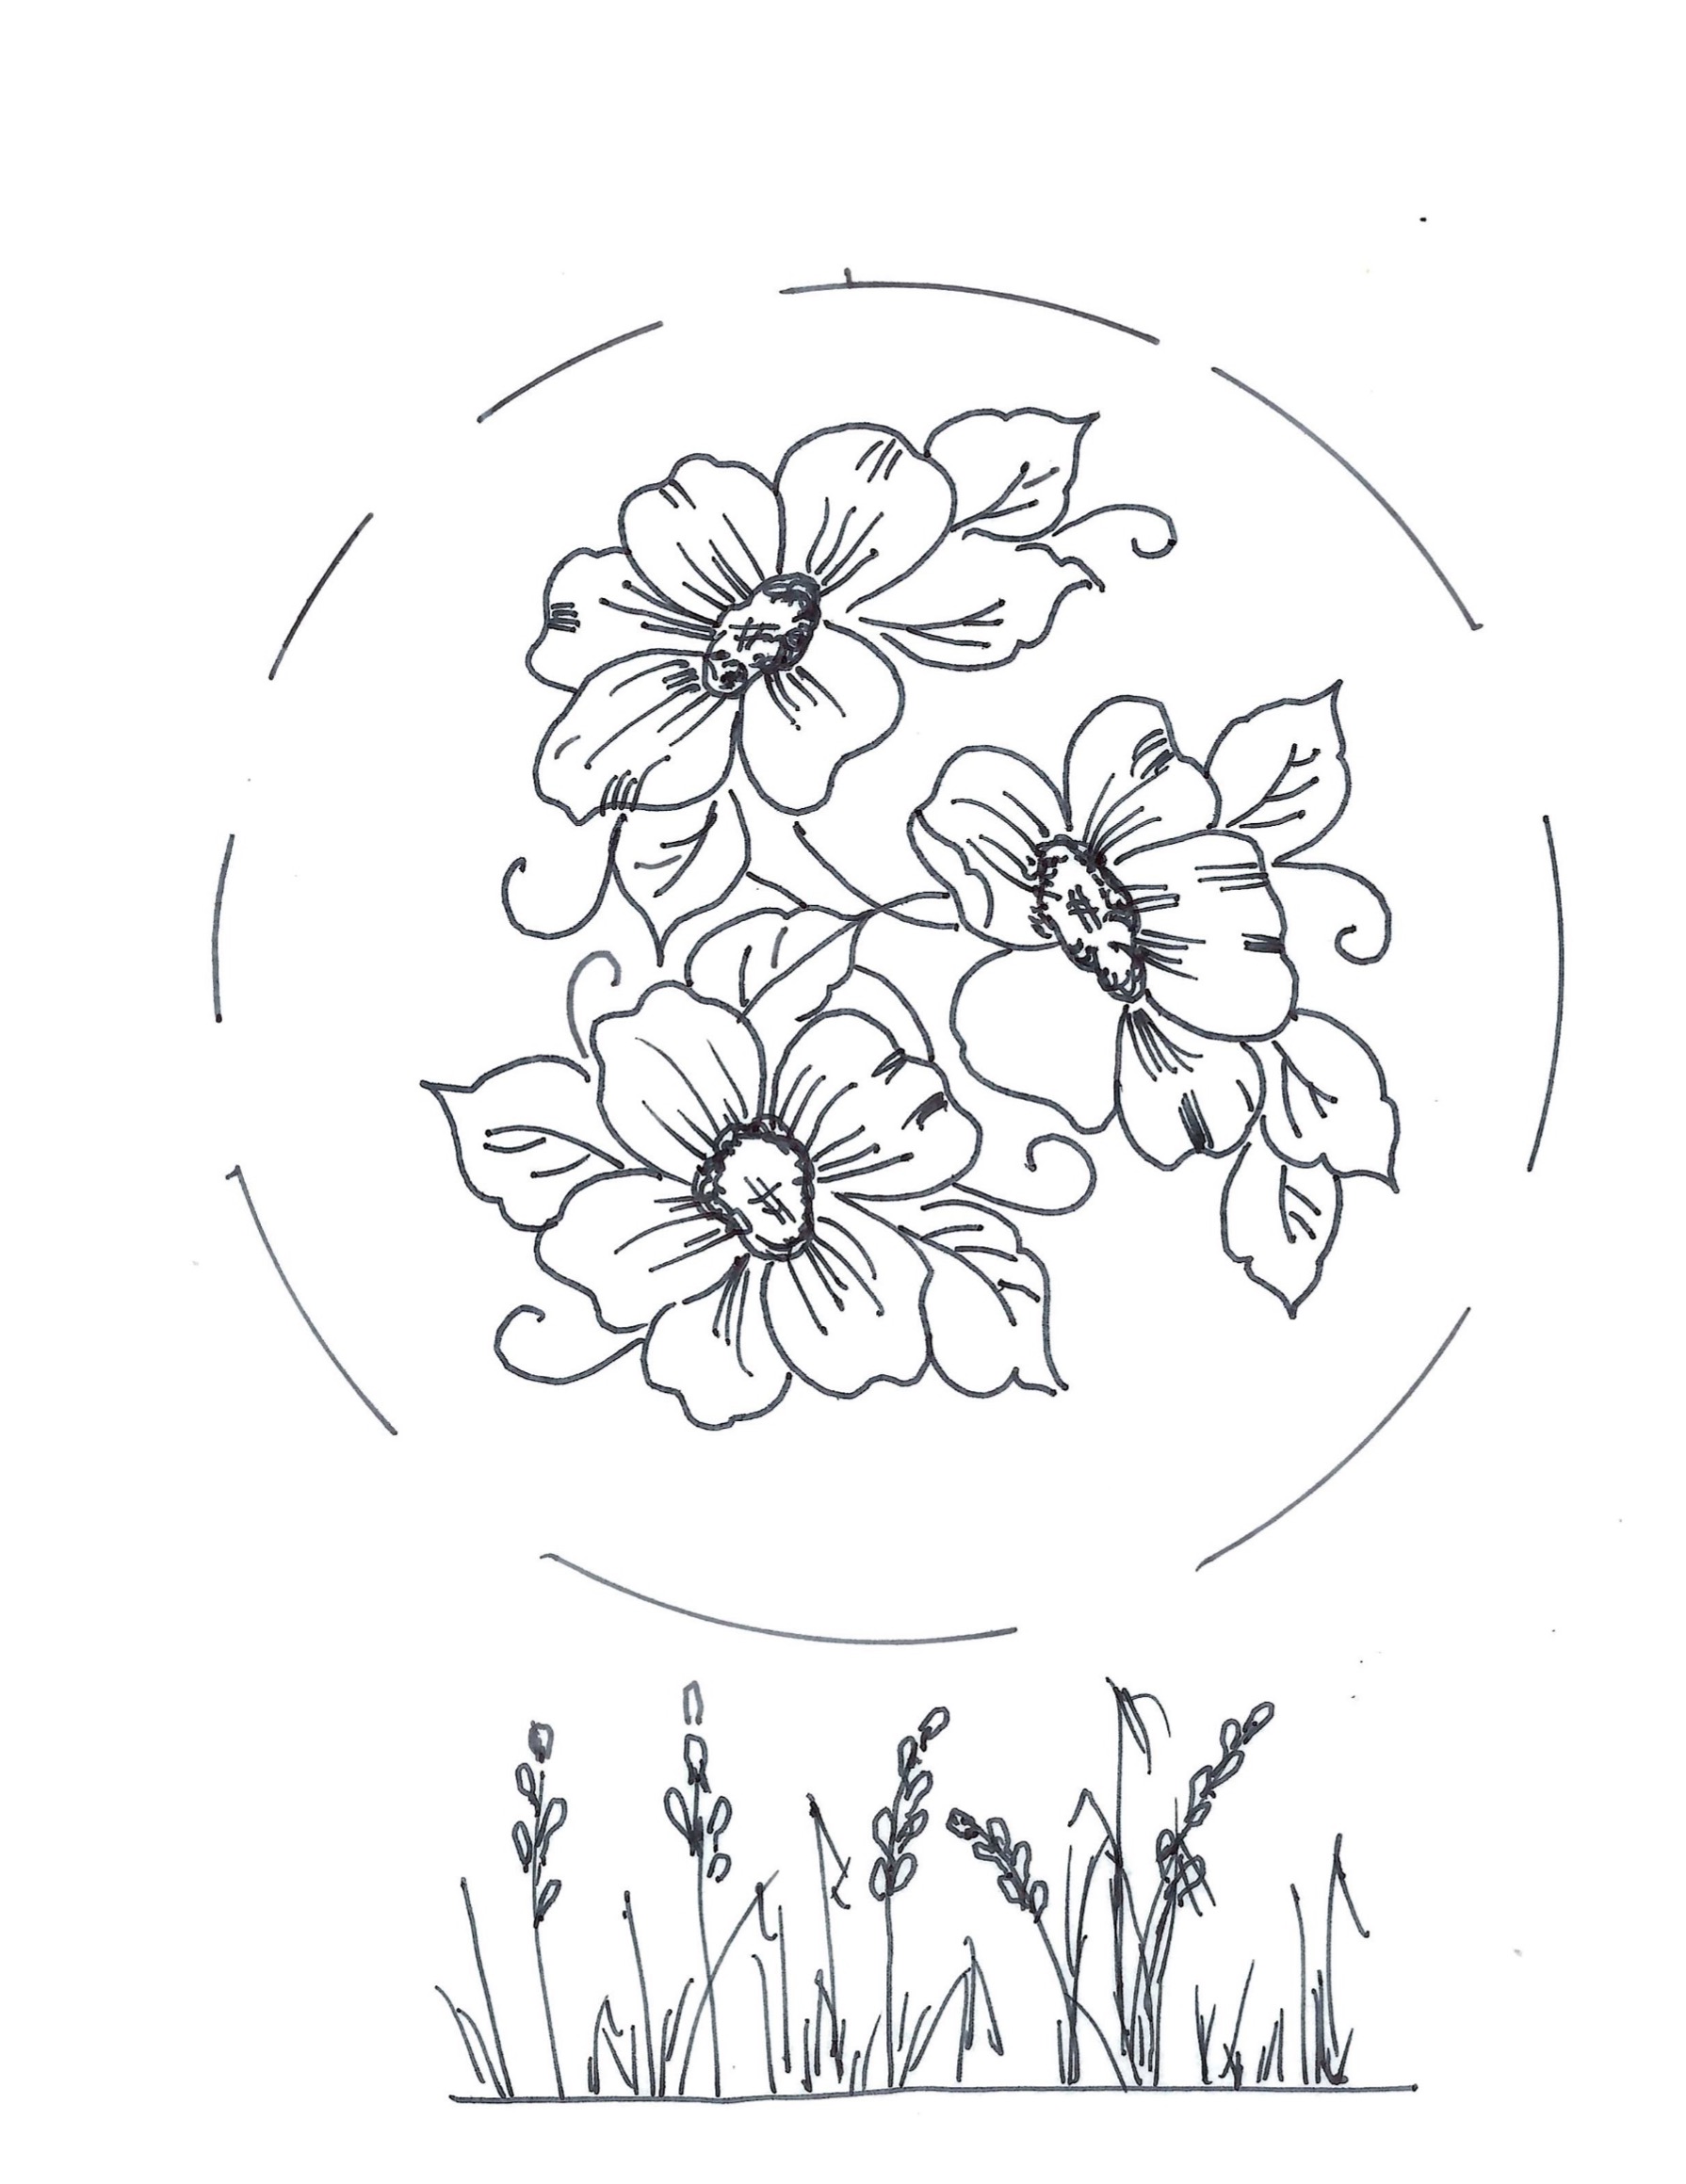
- Pattern