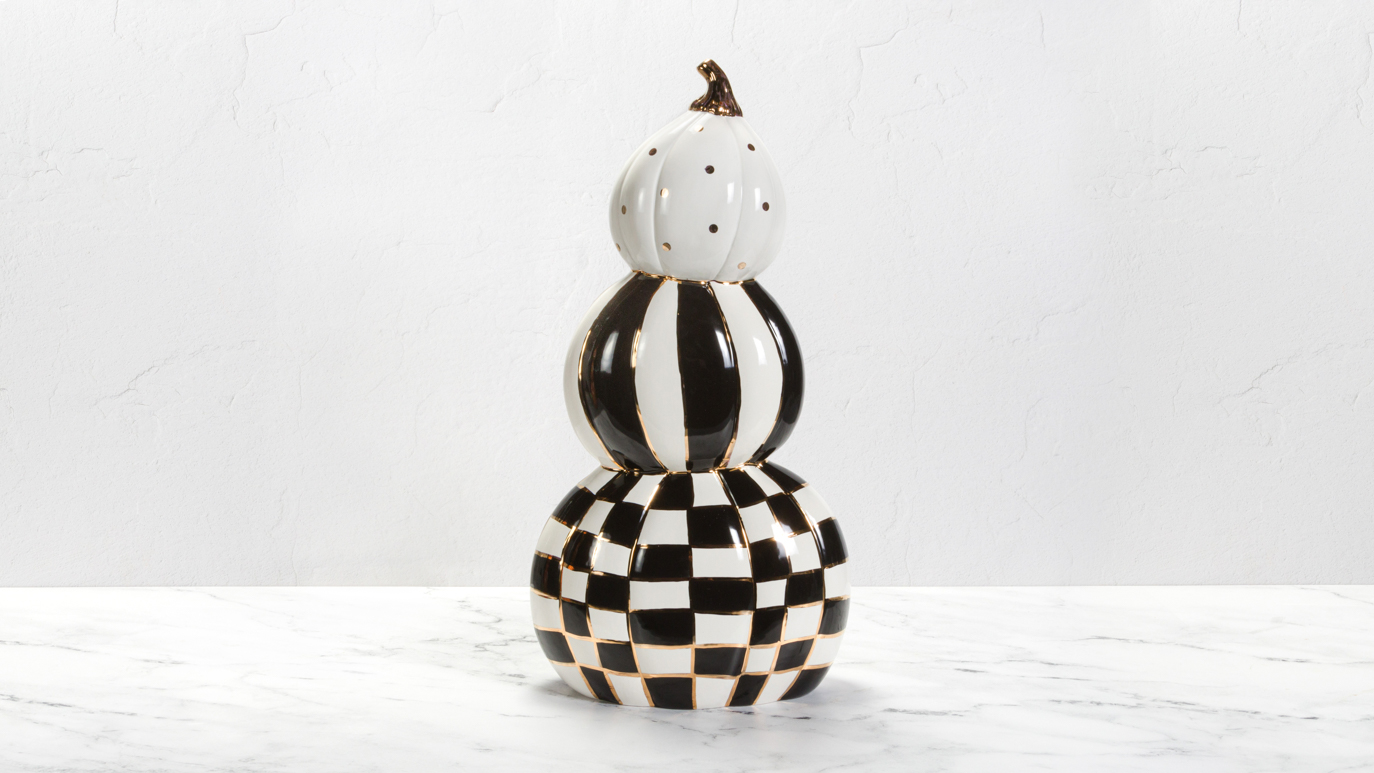
Black, White and Gold Stacked Pumpkin

Designer: Elizabeth Carey

Share

Instructions

  1. Pour CD-028 Stack O’ Lantern mold ¼” thick. Refer to casting instructions.
  2. Once it is firm enough to handle, use the sponge to smooth down the faces and casting lines.
  3. Fire to cone 04.
  4. Using the Soft Fan with FN-001 White, apply 3 coats to the outside of the pumpkins. Allow glaze to dry between coats.
  5. Use the pencil to sketch the pattern. Bottom Pumpkin: Make a line down each vertical section of the pumpkin. Make a second vertical line, dividing each section in half. Make 6 evenly spaced horizontal lines. They do not have to be exact. You should now have a checkered pattern. Middle Pumpkin: Make a line down each vertical section of the pumpkin. Make a second vertical line dividing the front, back and side sections. Top Pumpkin: None.
  6. Using the Script Liner with FN-009 Black, apply 2 coats to every other stripe on the middle pumpkin. Allow glaze to dry between coats.
  7. Using the Flat Shader with FN-009 Black, apply 2 coats to every other square on the bottom pumpkin. Allow glaze to dry between coats.
  8. Fire to cone 06.
  9. Place the Self-Adhesive Reinforcement Labels, ¼” Round on the top pumpkin.
  10. Using the Detail Liner with Gold Overglaze, apply a thin, even coat to the stem on the top pumpkin. Apply 1 coat to the inside of the circles. On the middle pumpkin, outline the stipes. On the bottom pumpkin, outline the squares.
  11. Fire to cone 018.

Supplies

Form

  • CD028 Stack O’Lantern

Colors

  • FN-001 White
  • FN-009 Black
  • Gold Overglaze

Decorating Accessories

  • AC-302 Wax Resist
  • RB-144 #4 Soft Fan
  • CB-220 Detail Liner (White Gold)
  • CB-310 Size 10 Flat Shader

Miscellaneous Accessories

  • Sponge
  • Water
  • Pencil
  • Self-Adhesive Reinforcement Labels, ¼” Round (1 sheet)
Top