Click ‘Download Printable PDF’ to download the step-by-step instructions and photos for this project.
The Pattern
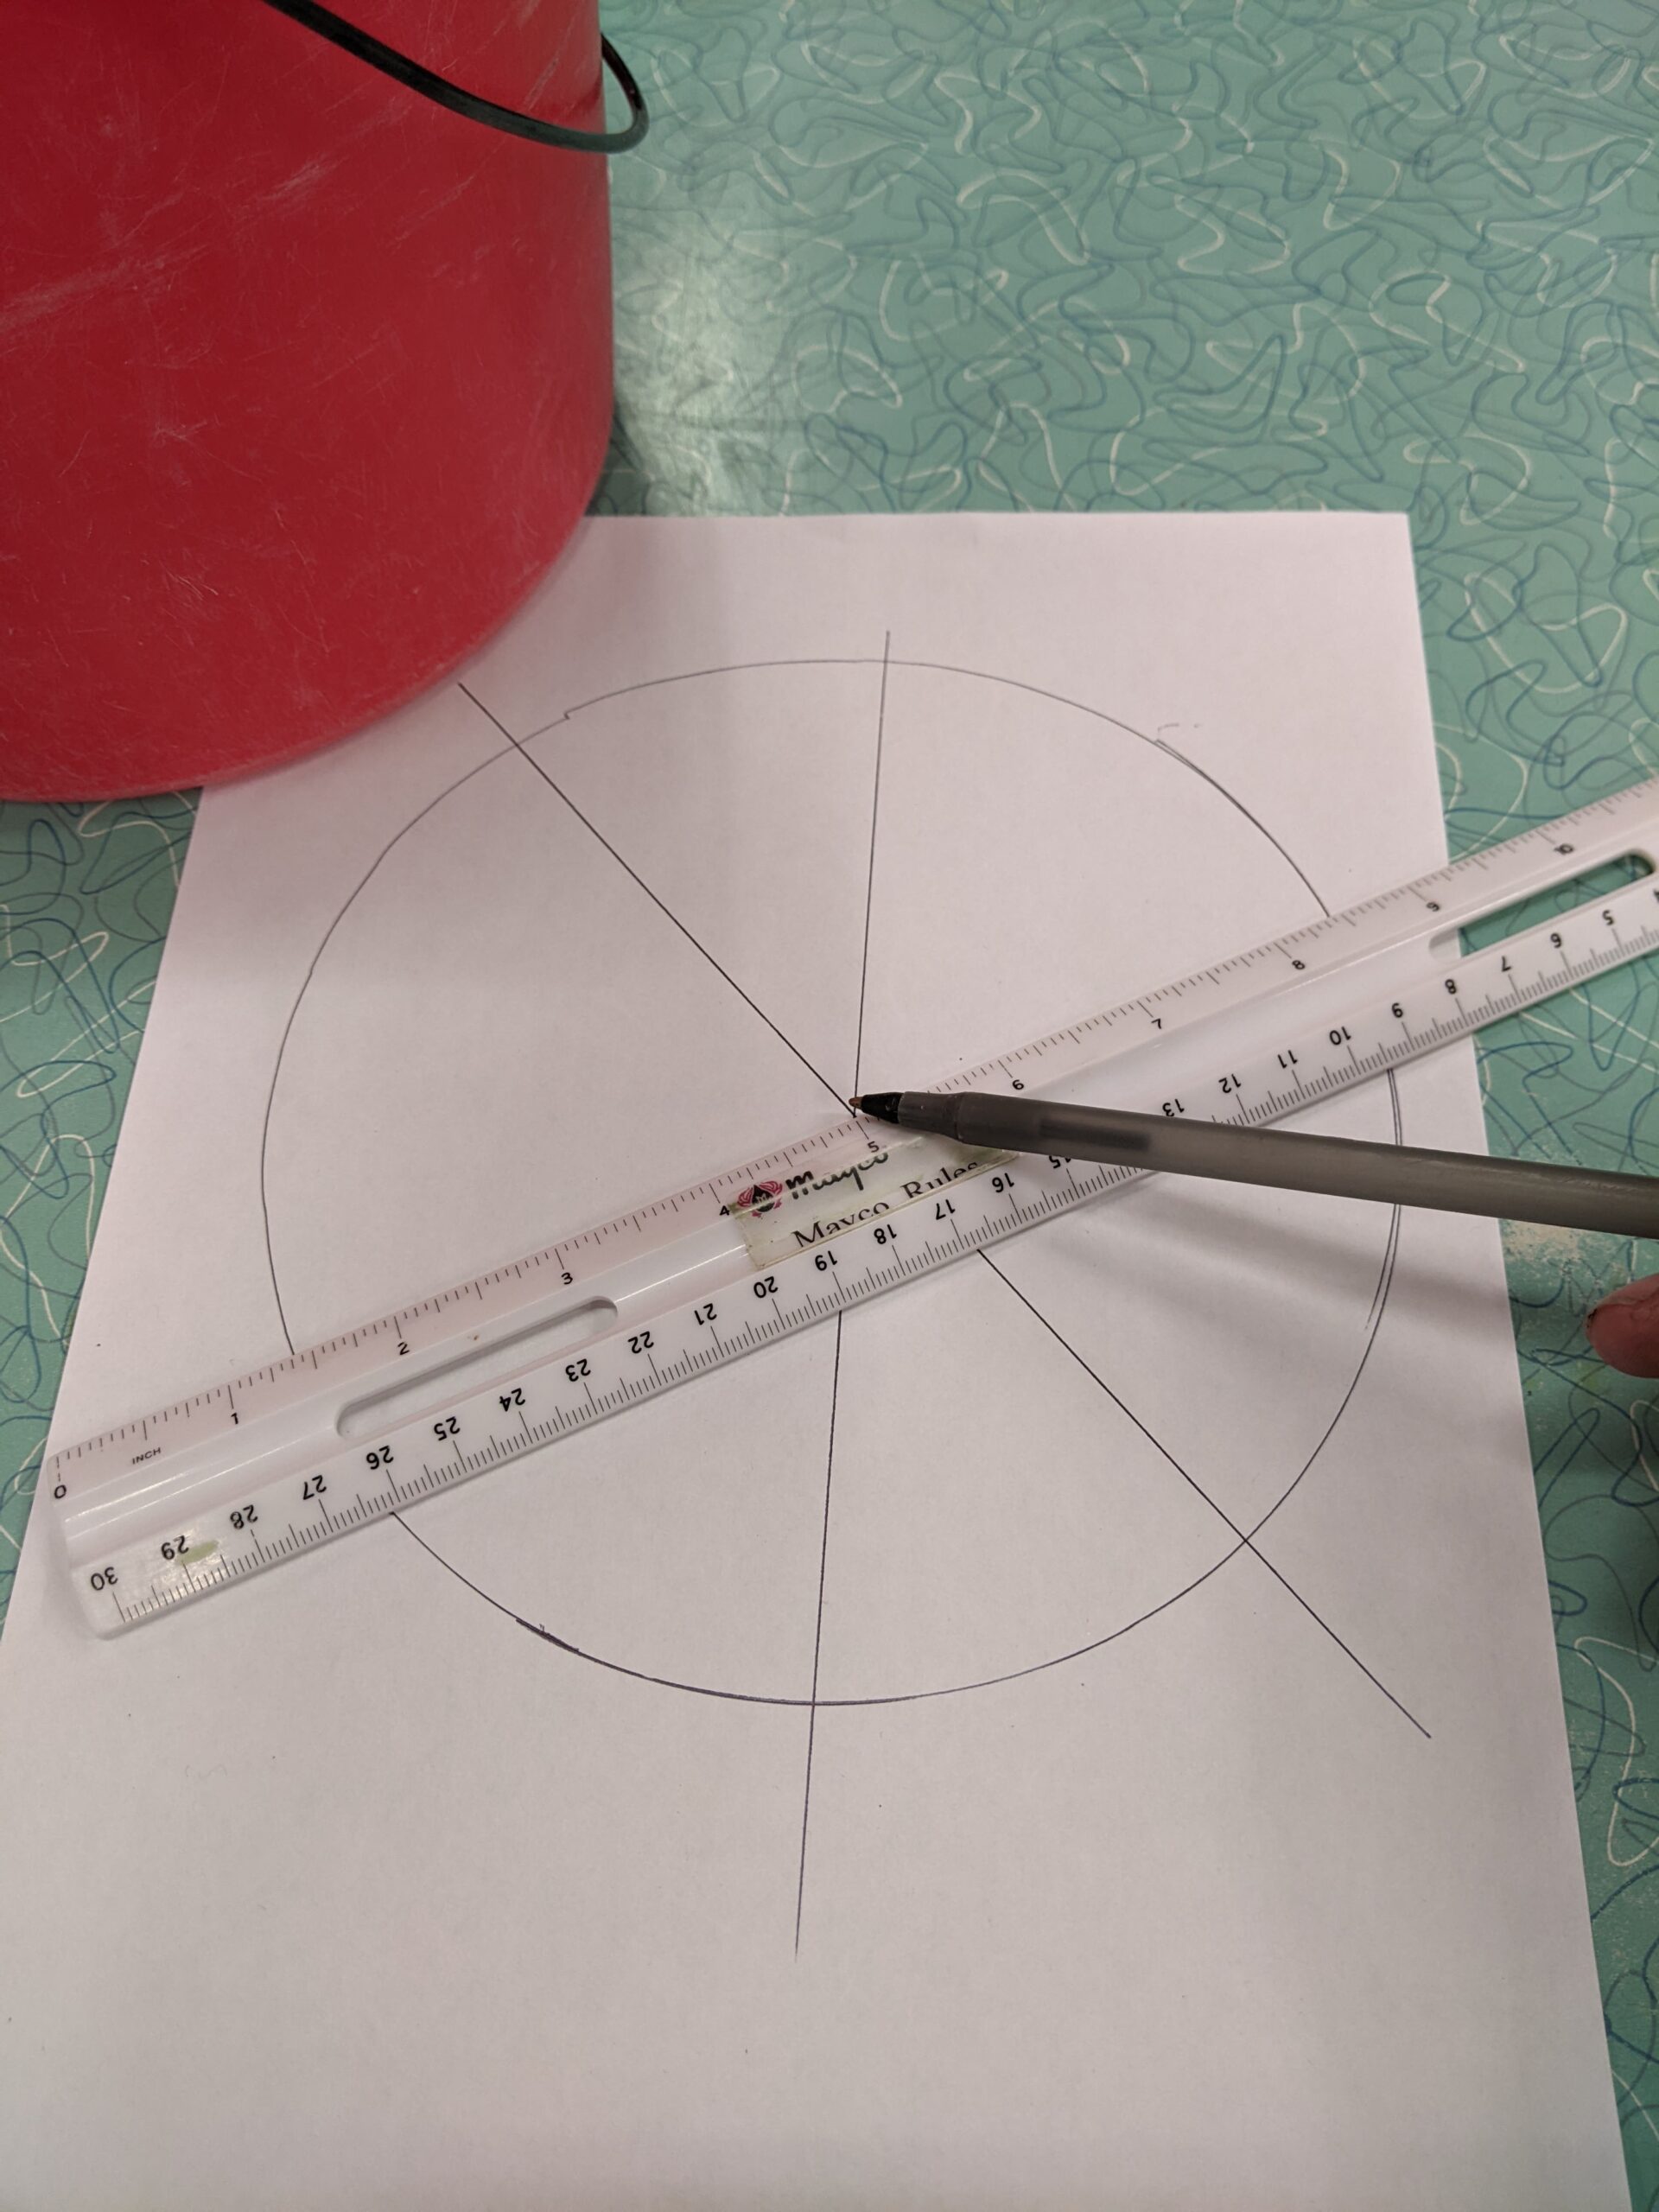
- Use a plate or other larger round object to trace a circle on a large sheet of paper.
- With a ruler, divide the circle into even “pie” sections. The pattern seen here uses three lines to create six pie sections. (Fig. 1)
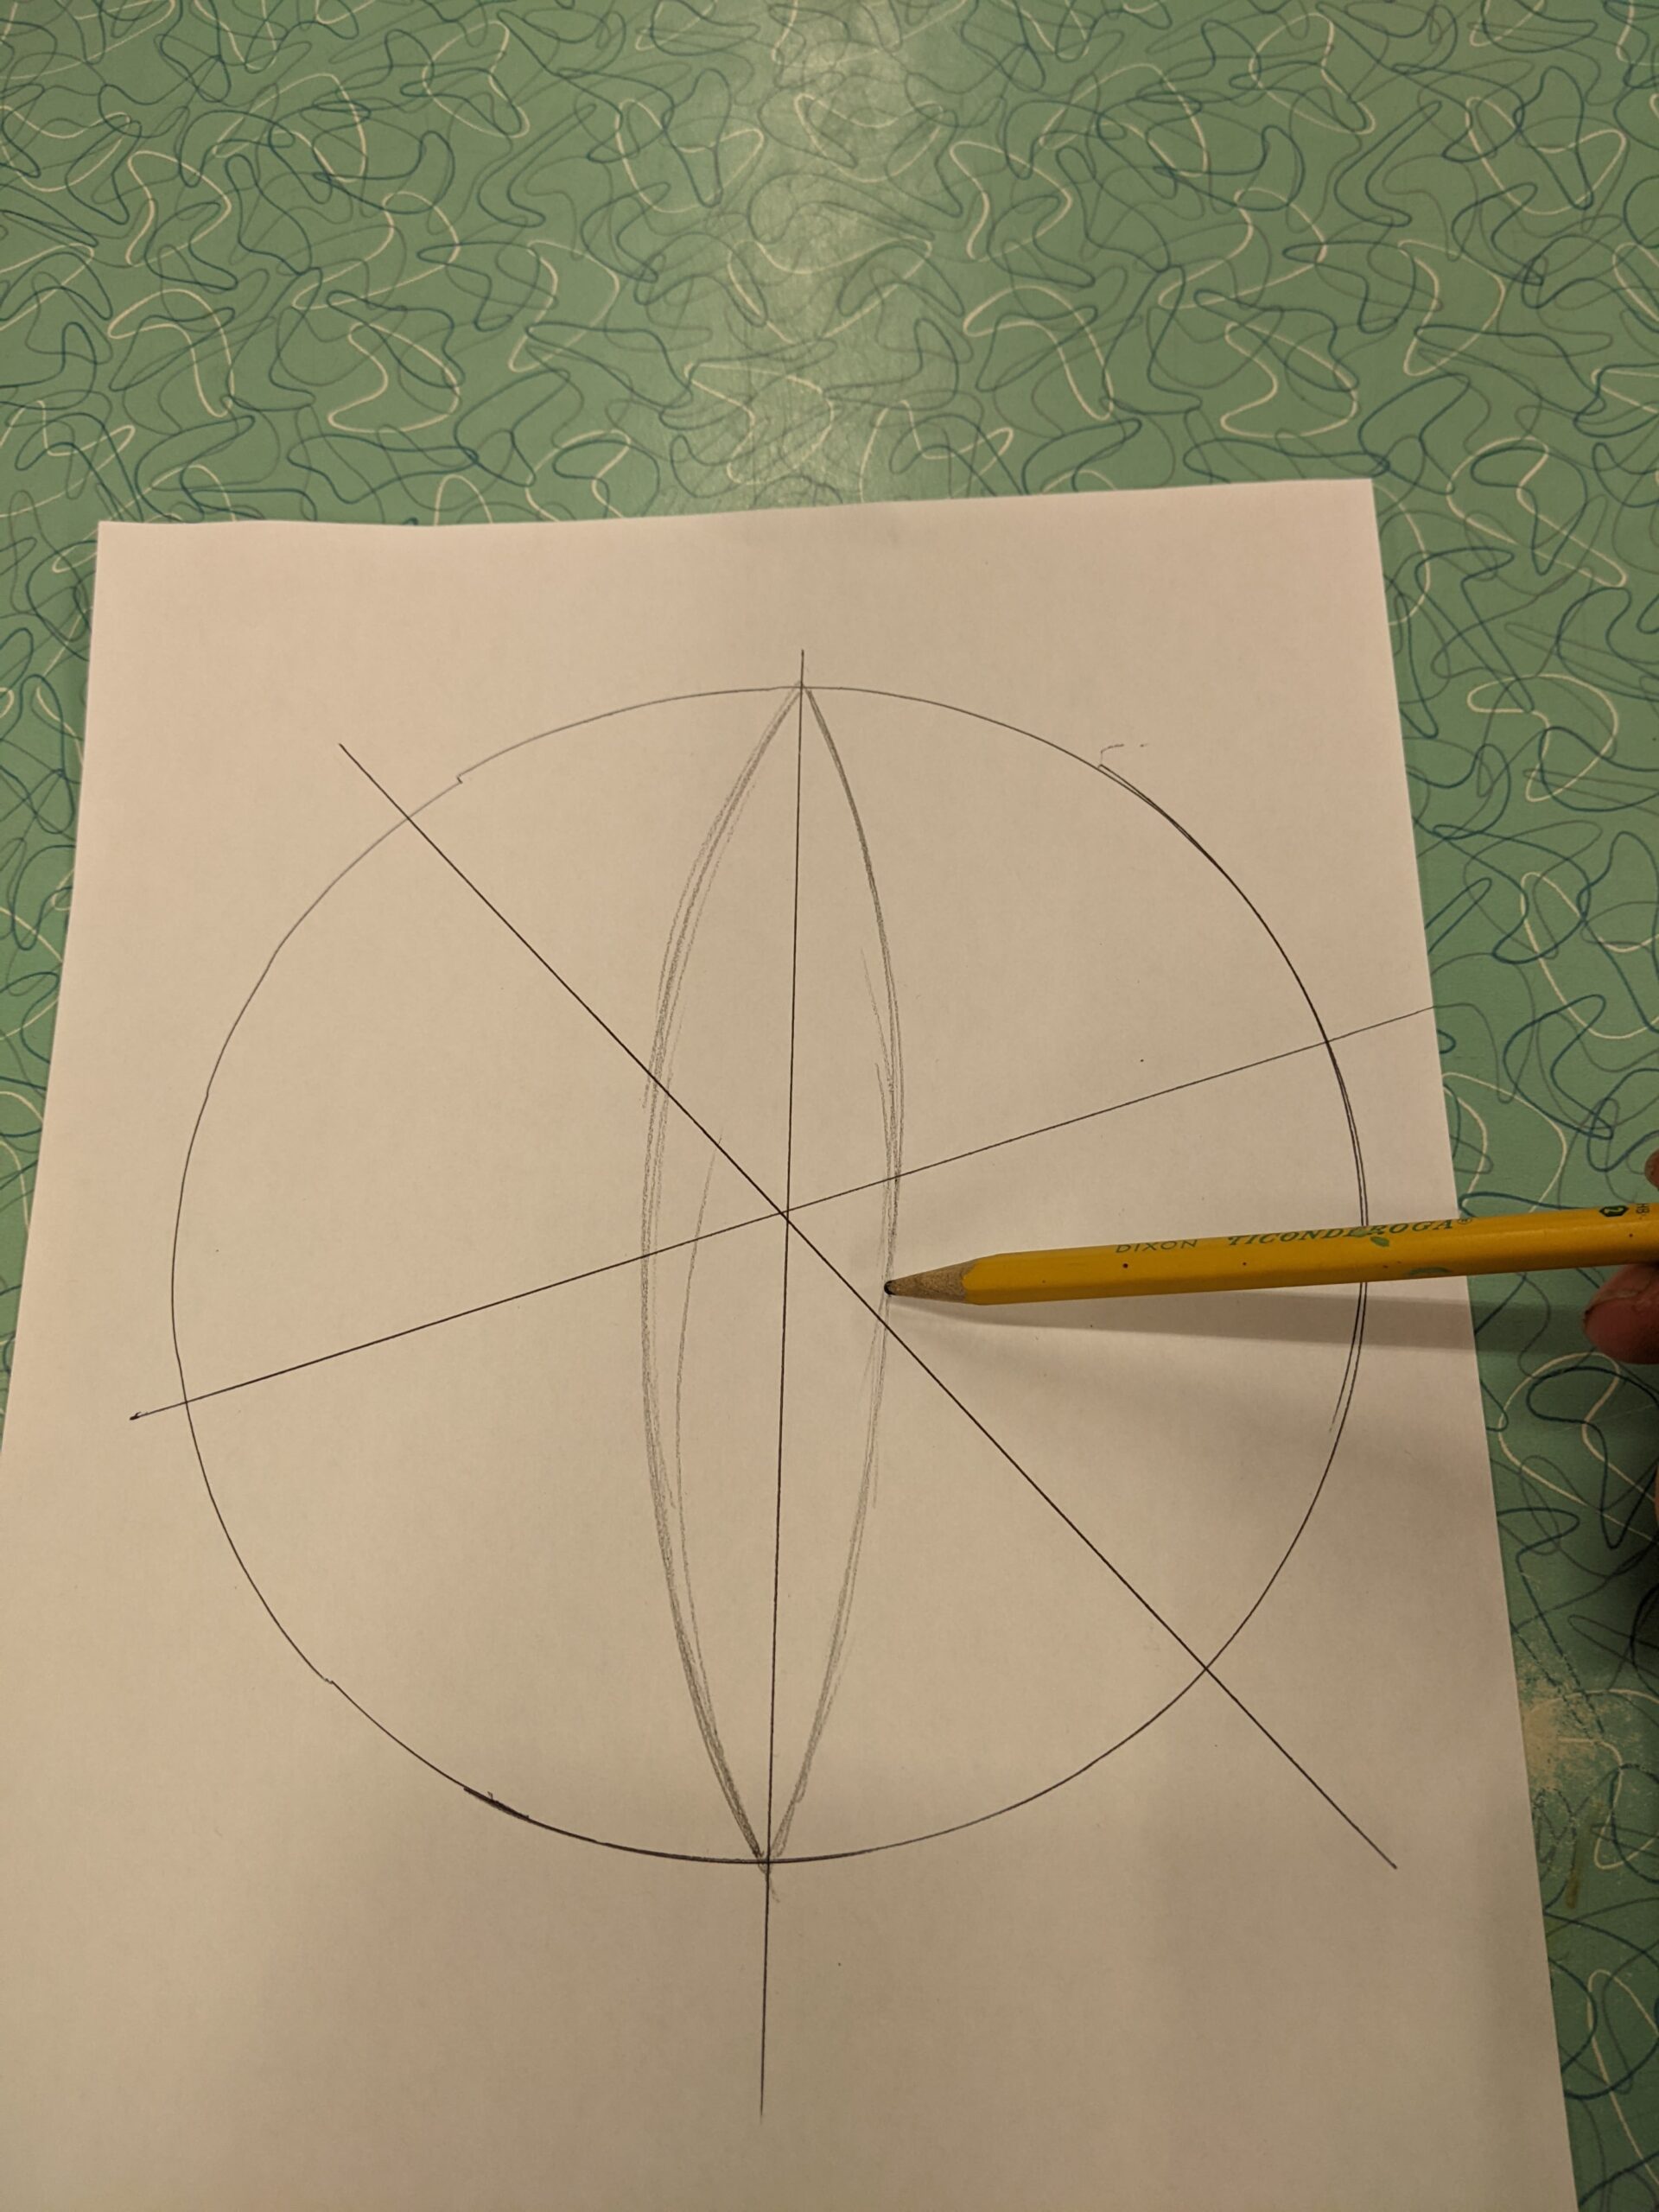
- Draw an arc from one end of a line to the other and repeat on the opposite side to draw a shape like a long football. (Fig 2.)
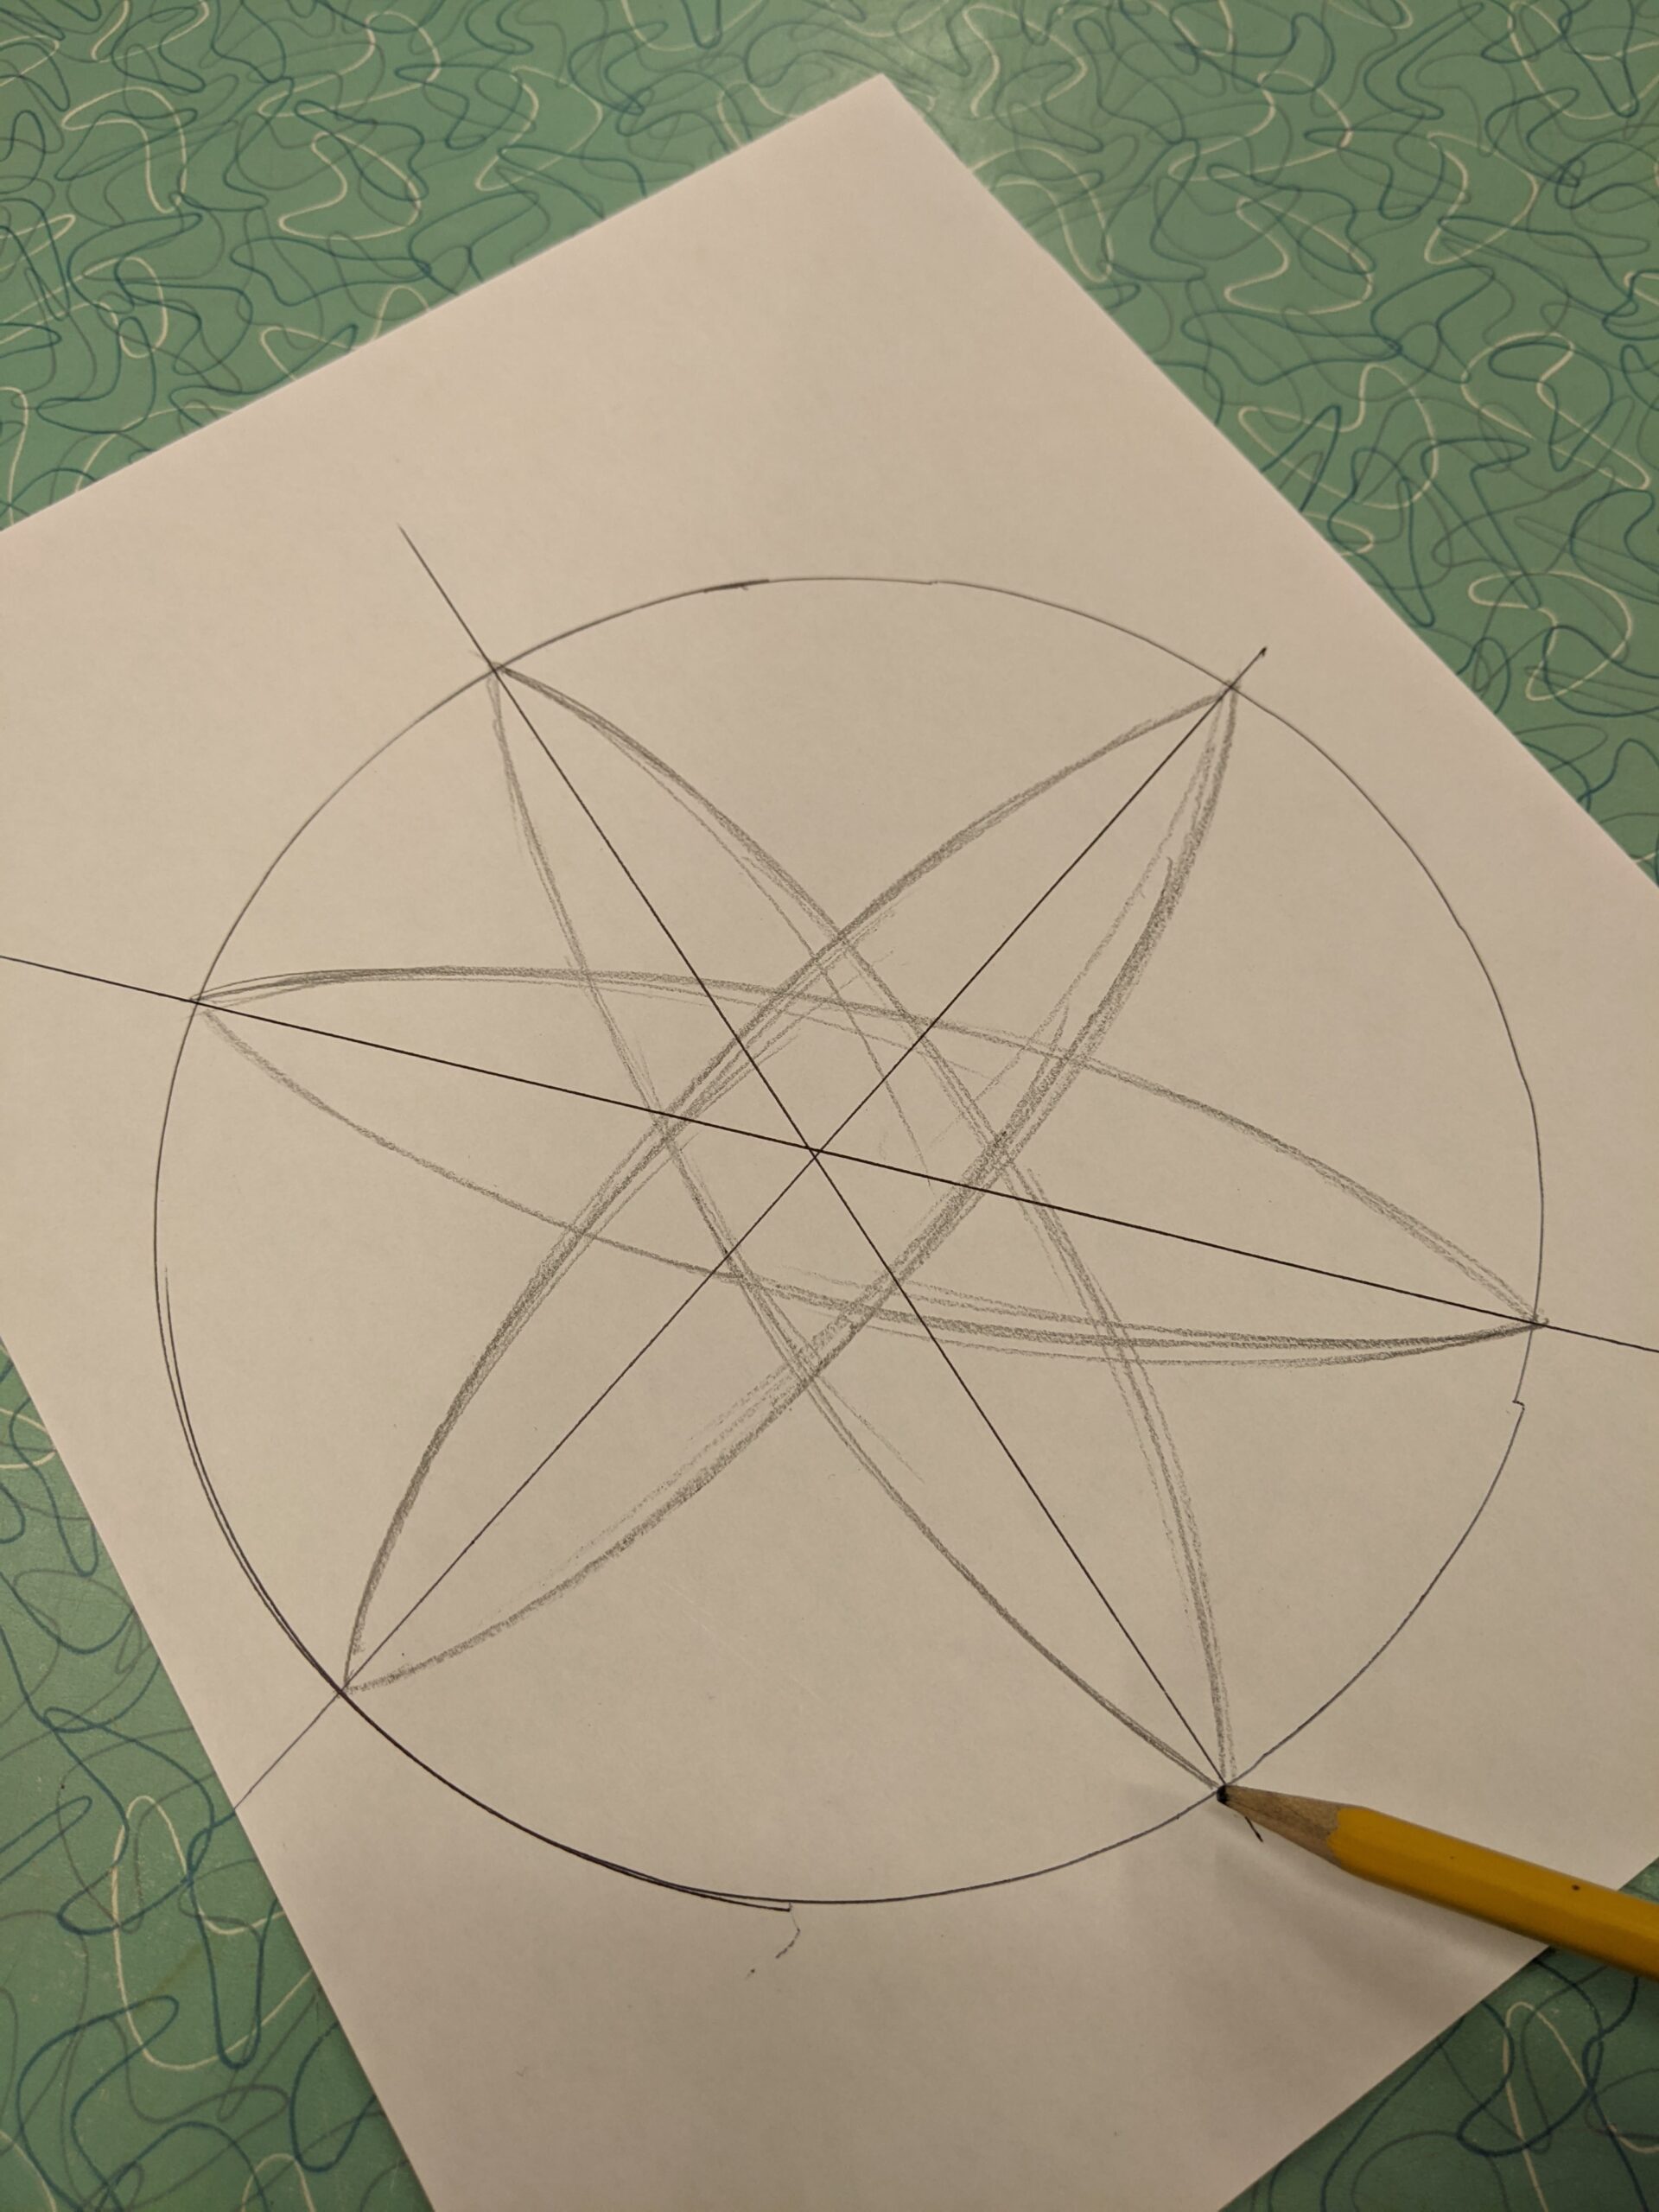
- Repeat on each line. All the lines should now resemble a flower shape in the center of your traced circle. (fig.3)
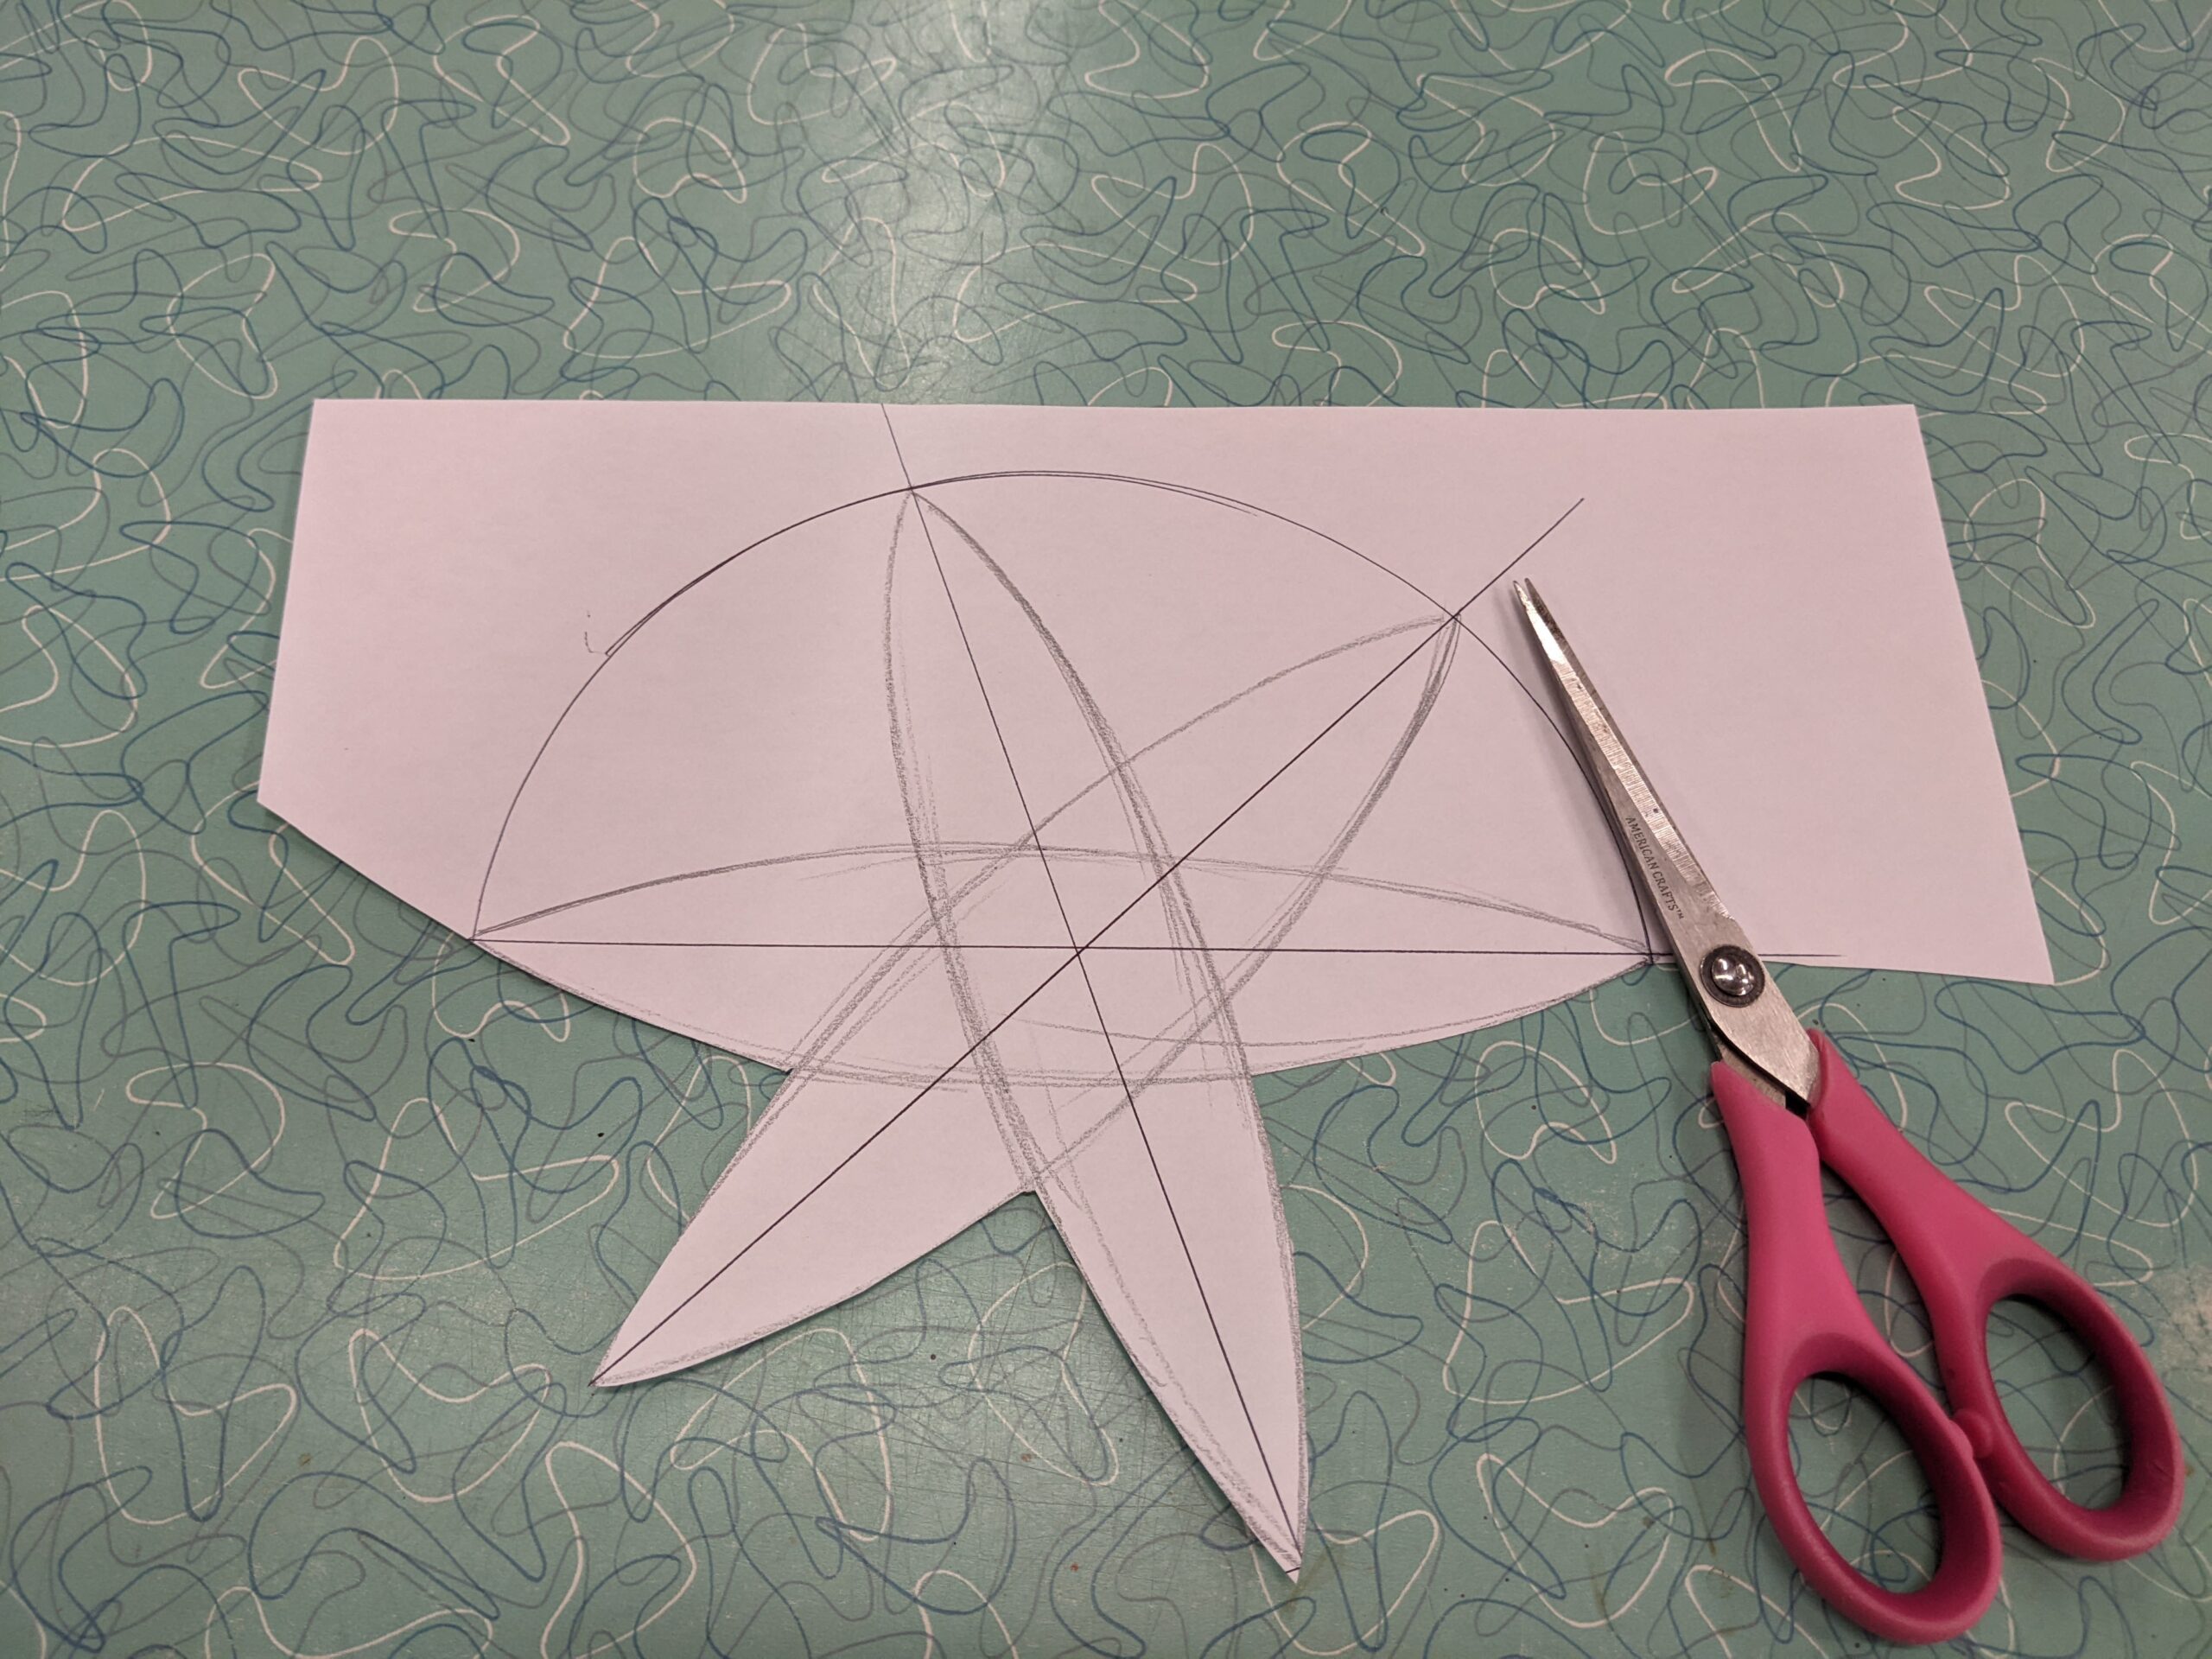
- Cut out the flower shape by following the outside of the arcing lines. (Fig. 4)
Accommodations: Make one pattern and copy. Let students cut with scissors or precut the shape for them. For older/advanced students, allow them to decide the size of the circle and the number of “petals” they would like their pattern to have.
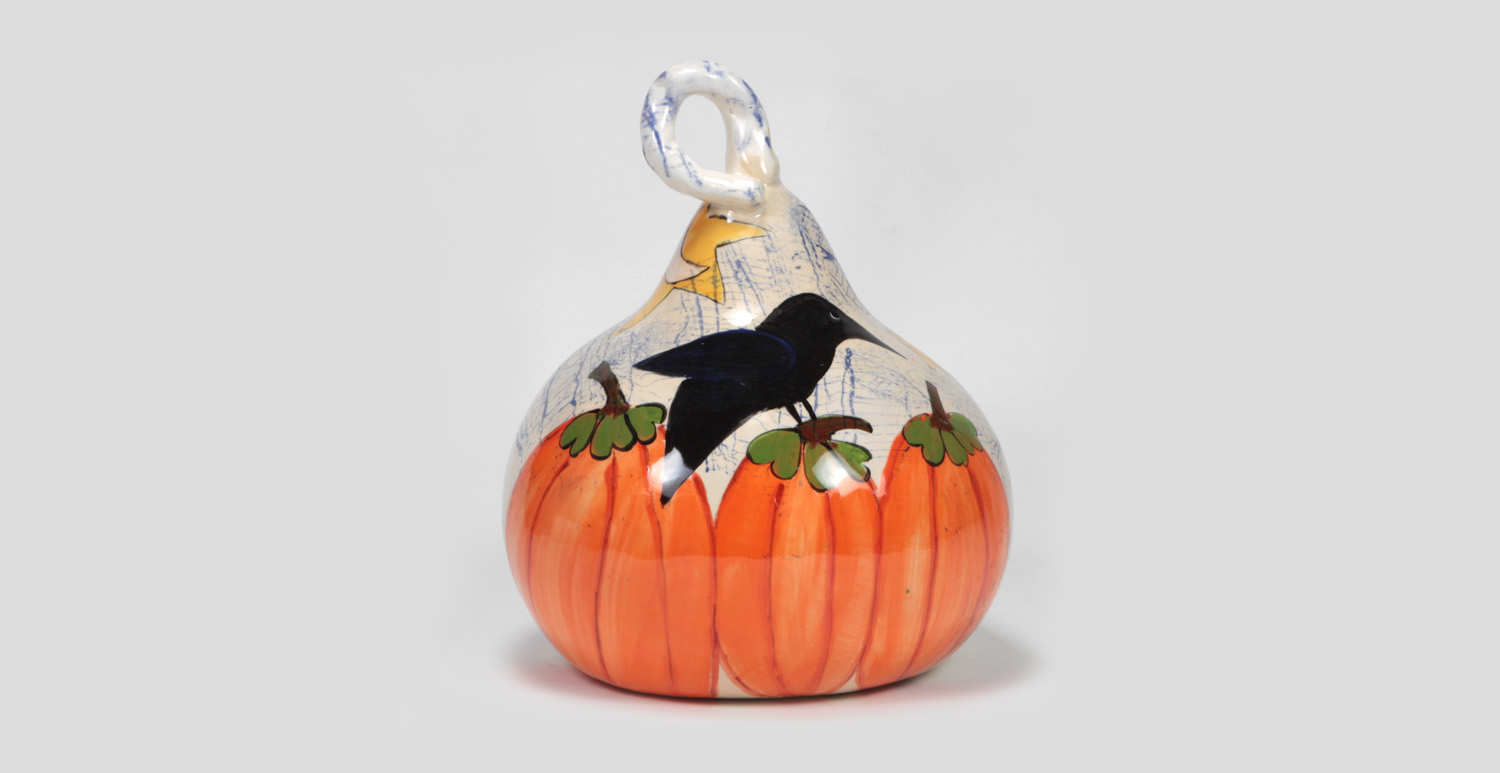
The Pumpkin
- Using a rolling pin, roll a slab about 1/8th inch thick that is large enough for your petal pattern to fit into.
- Compress your clay slab using the plastic card.
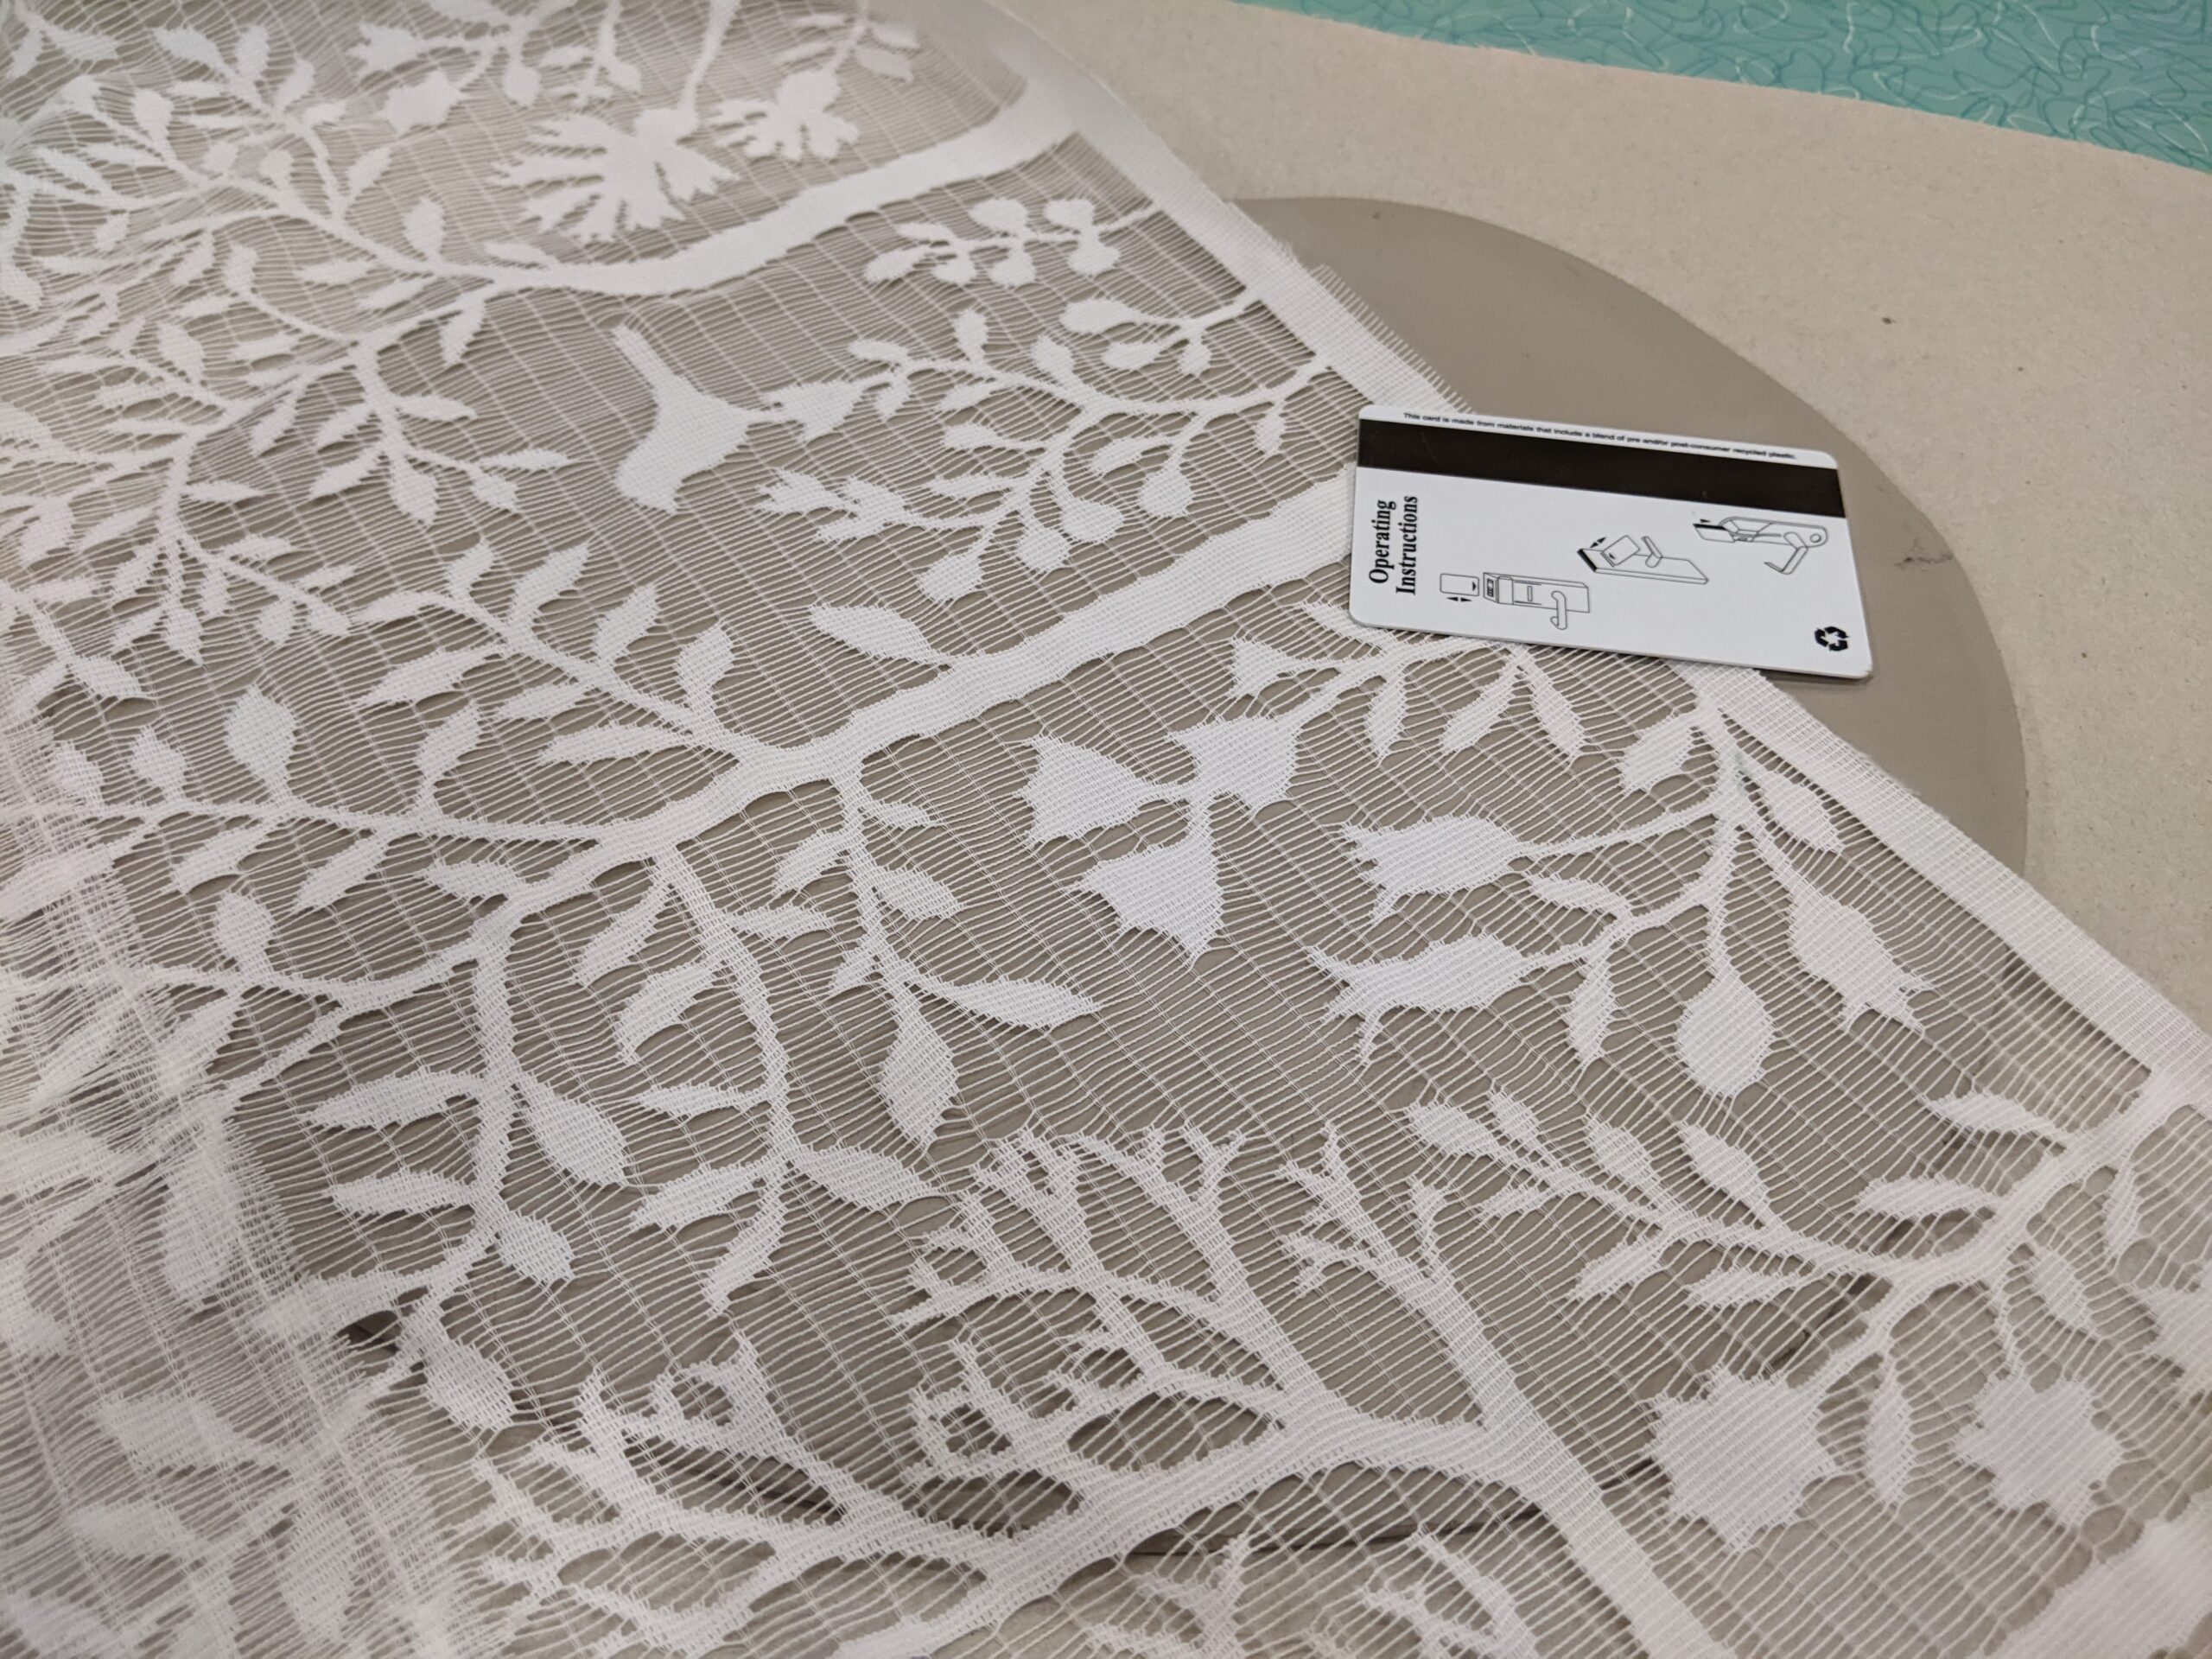
- Texturize the slab using found objects, lace, or stamps. This pumpkin uses lace pressed into the glaze with the plastic card. (Fig 6)
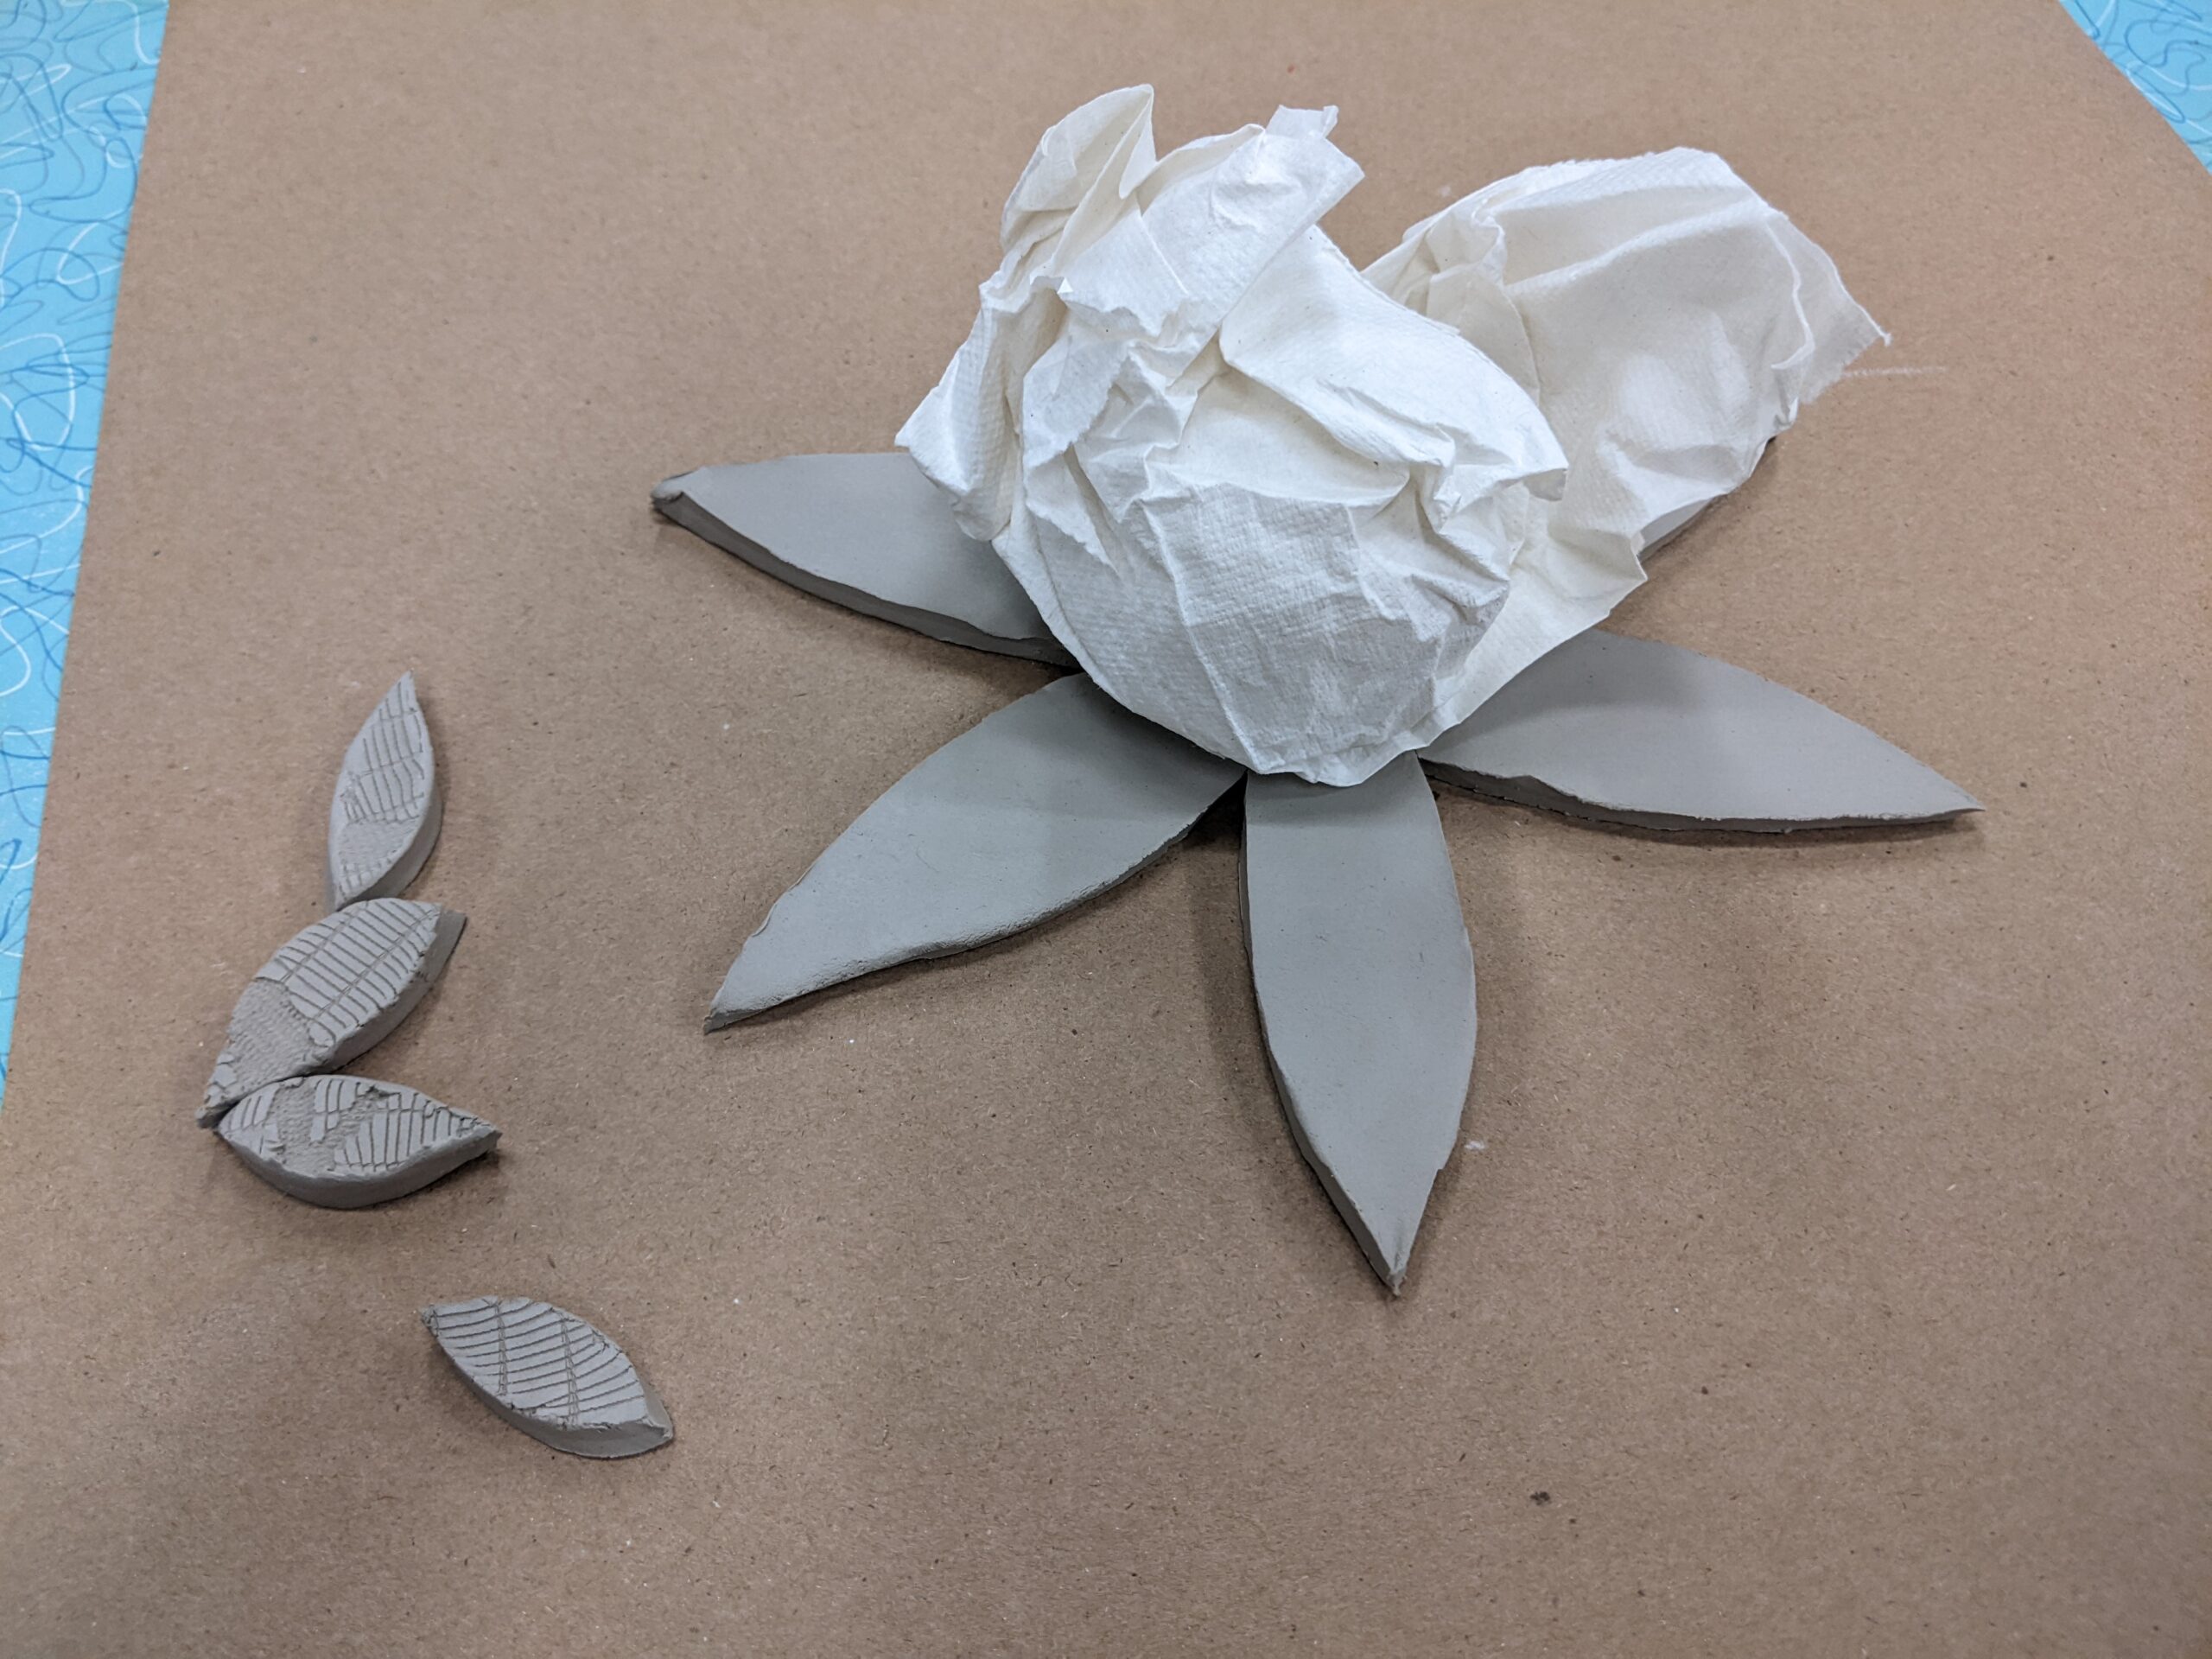
- Place your petal pattern on the slab and cut around the pattern with your needle tool. (Fig 7)
- Cut out two small freehand oval shapes to use as the leaves. (Fig 7)
- Set aside and cover the remaining clay
- Flip the clay cutout upside down so the texture faces the table.
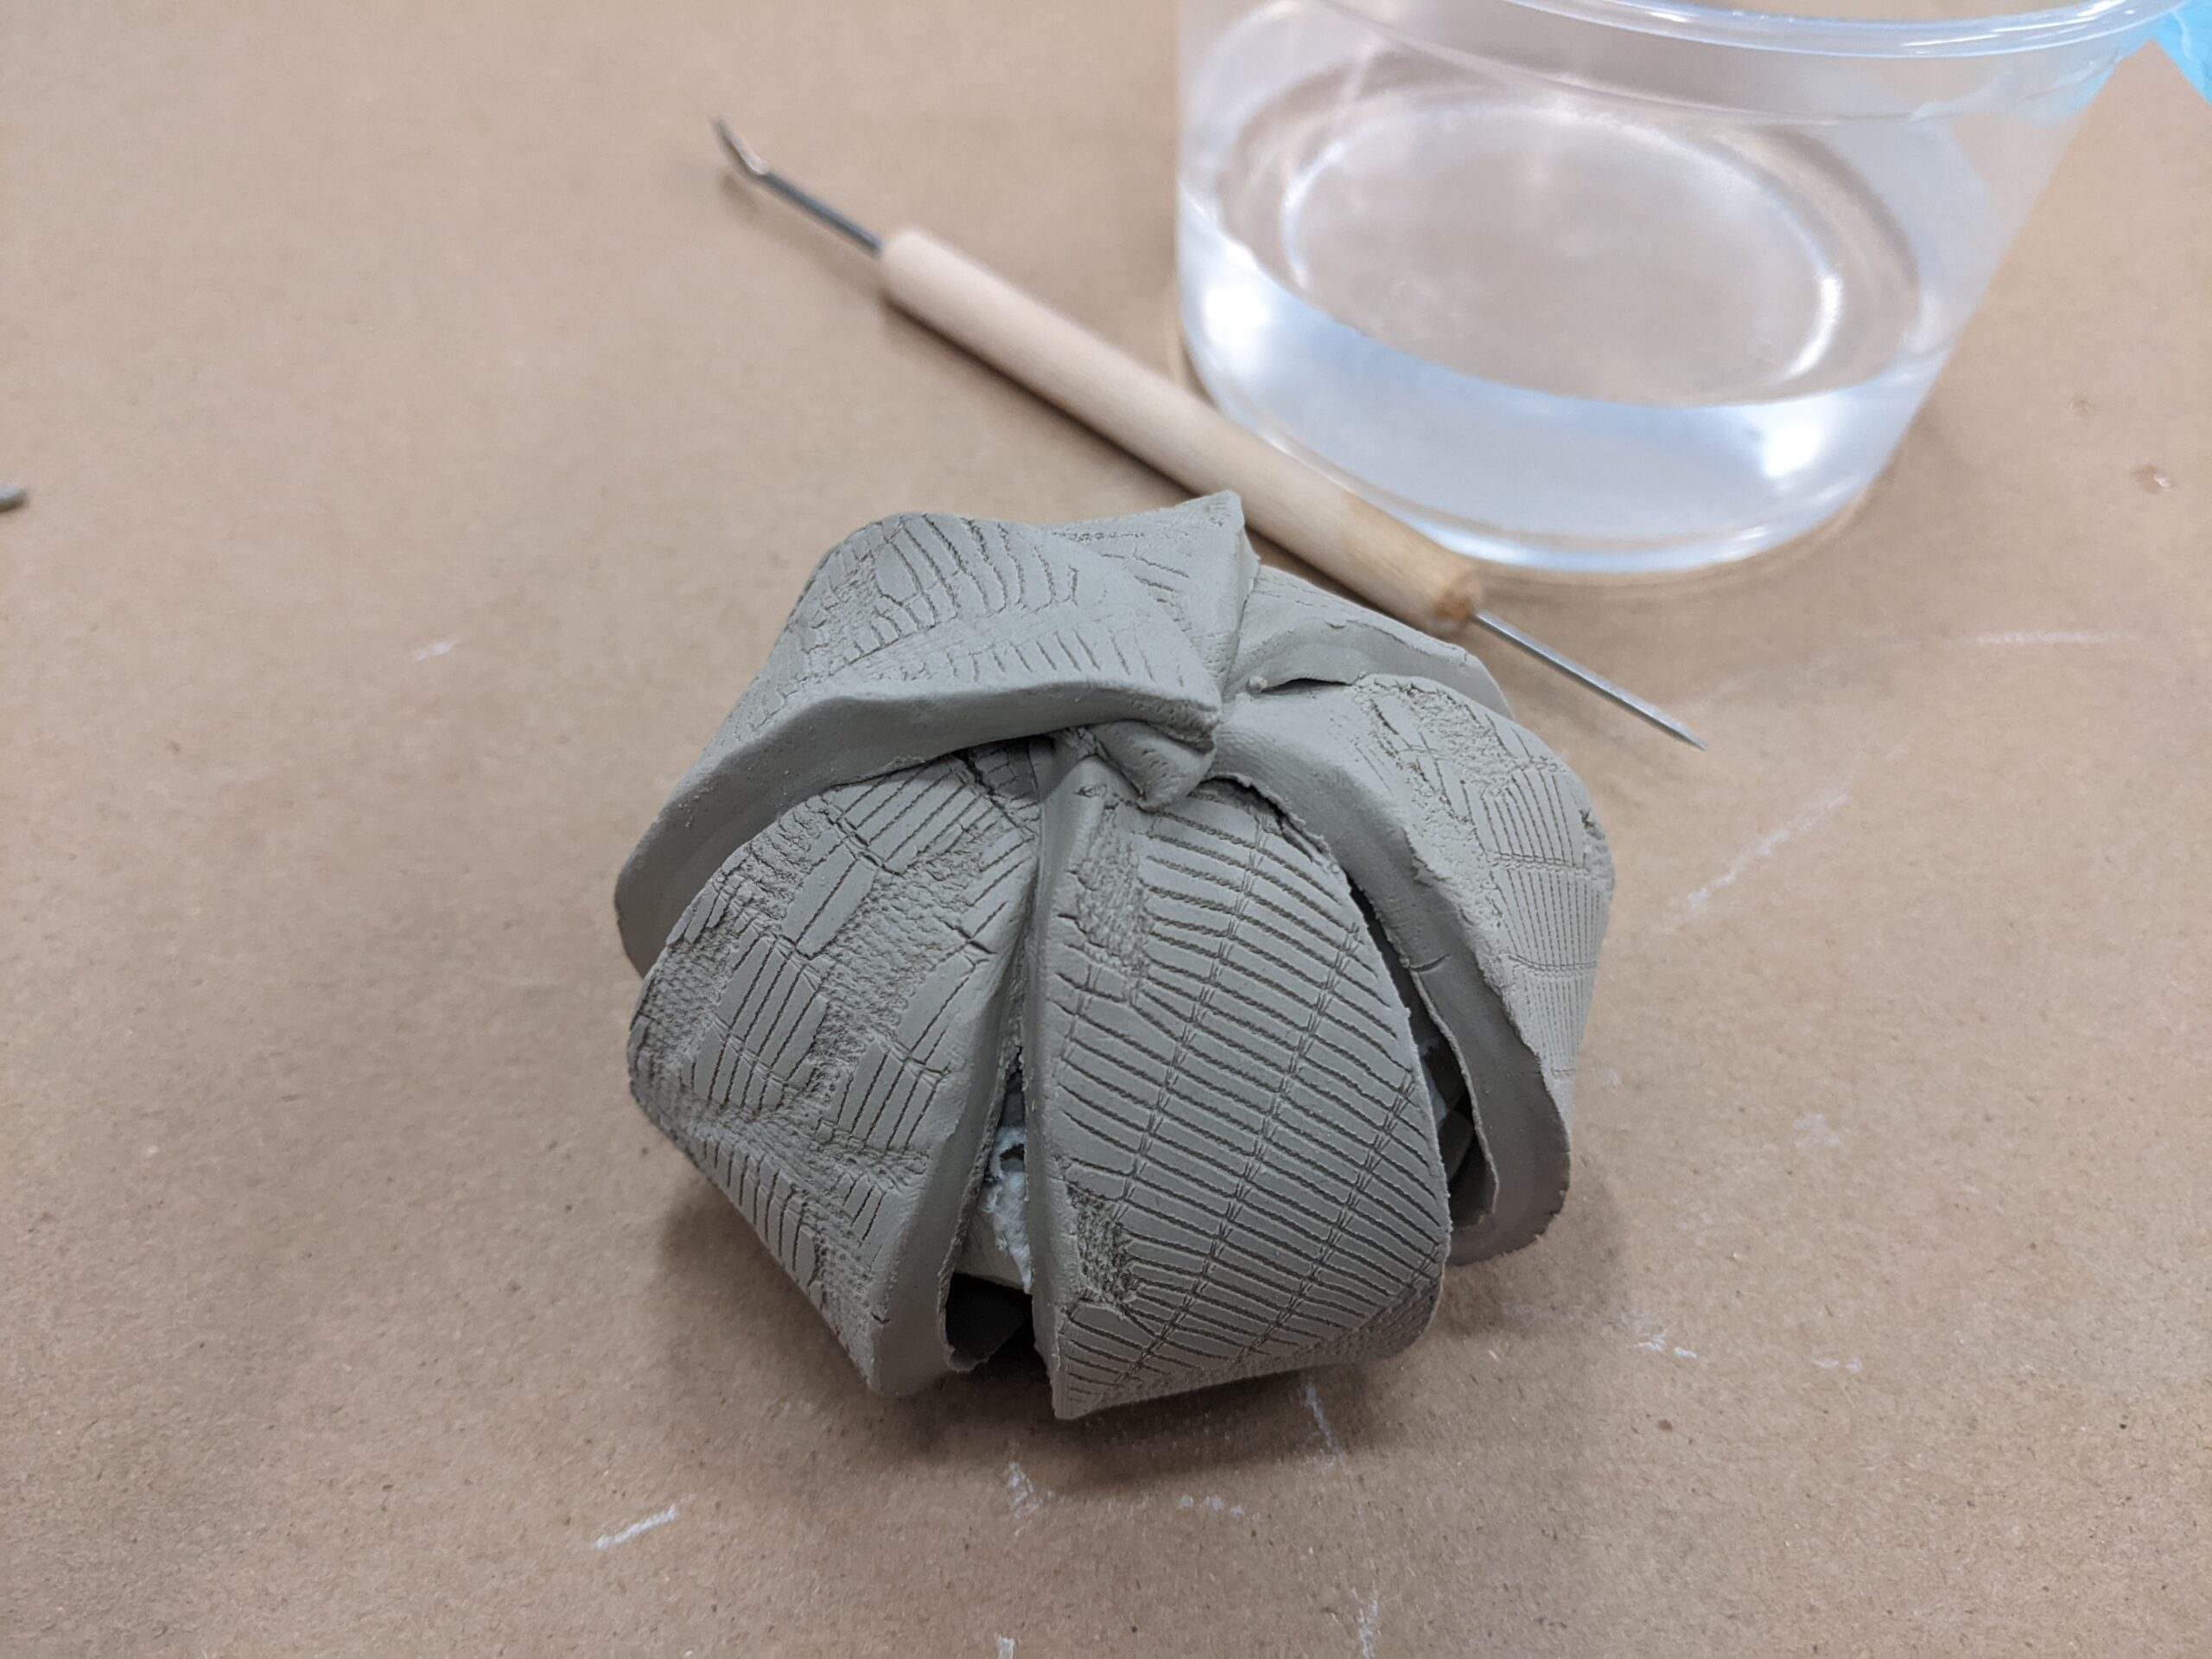
- Wad up a small amount of paper towel and place in the center of your clay cutout. (Fig 8)
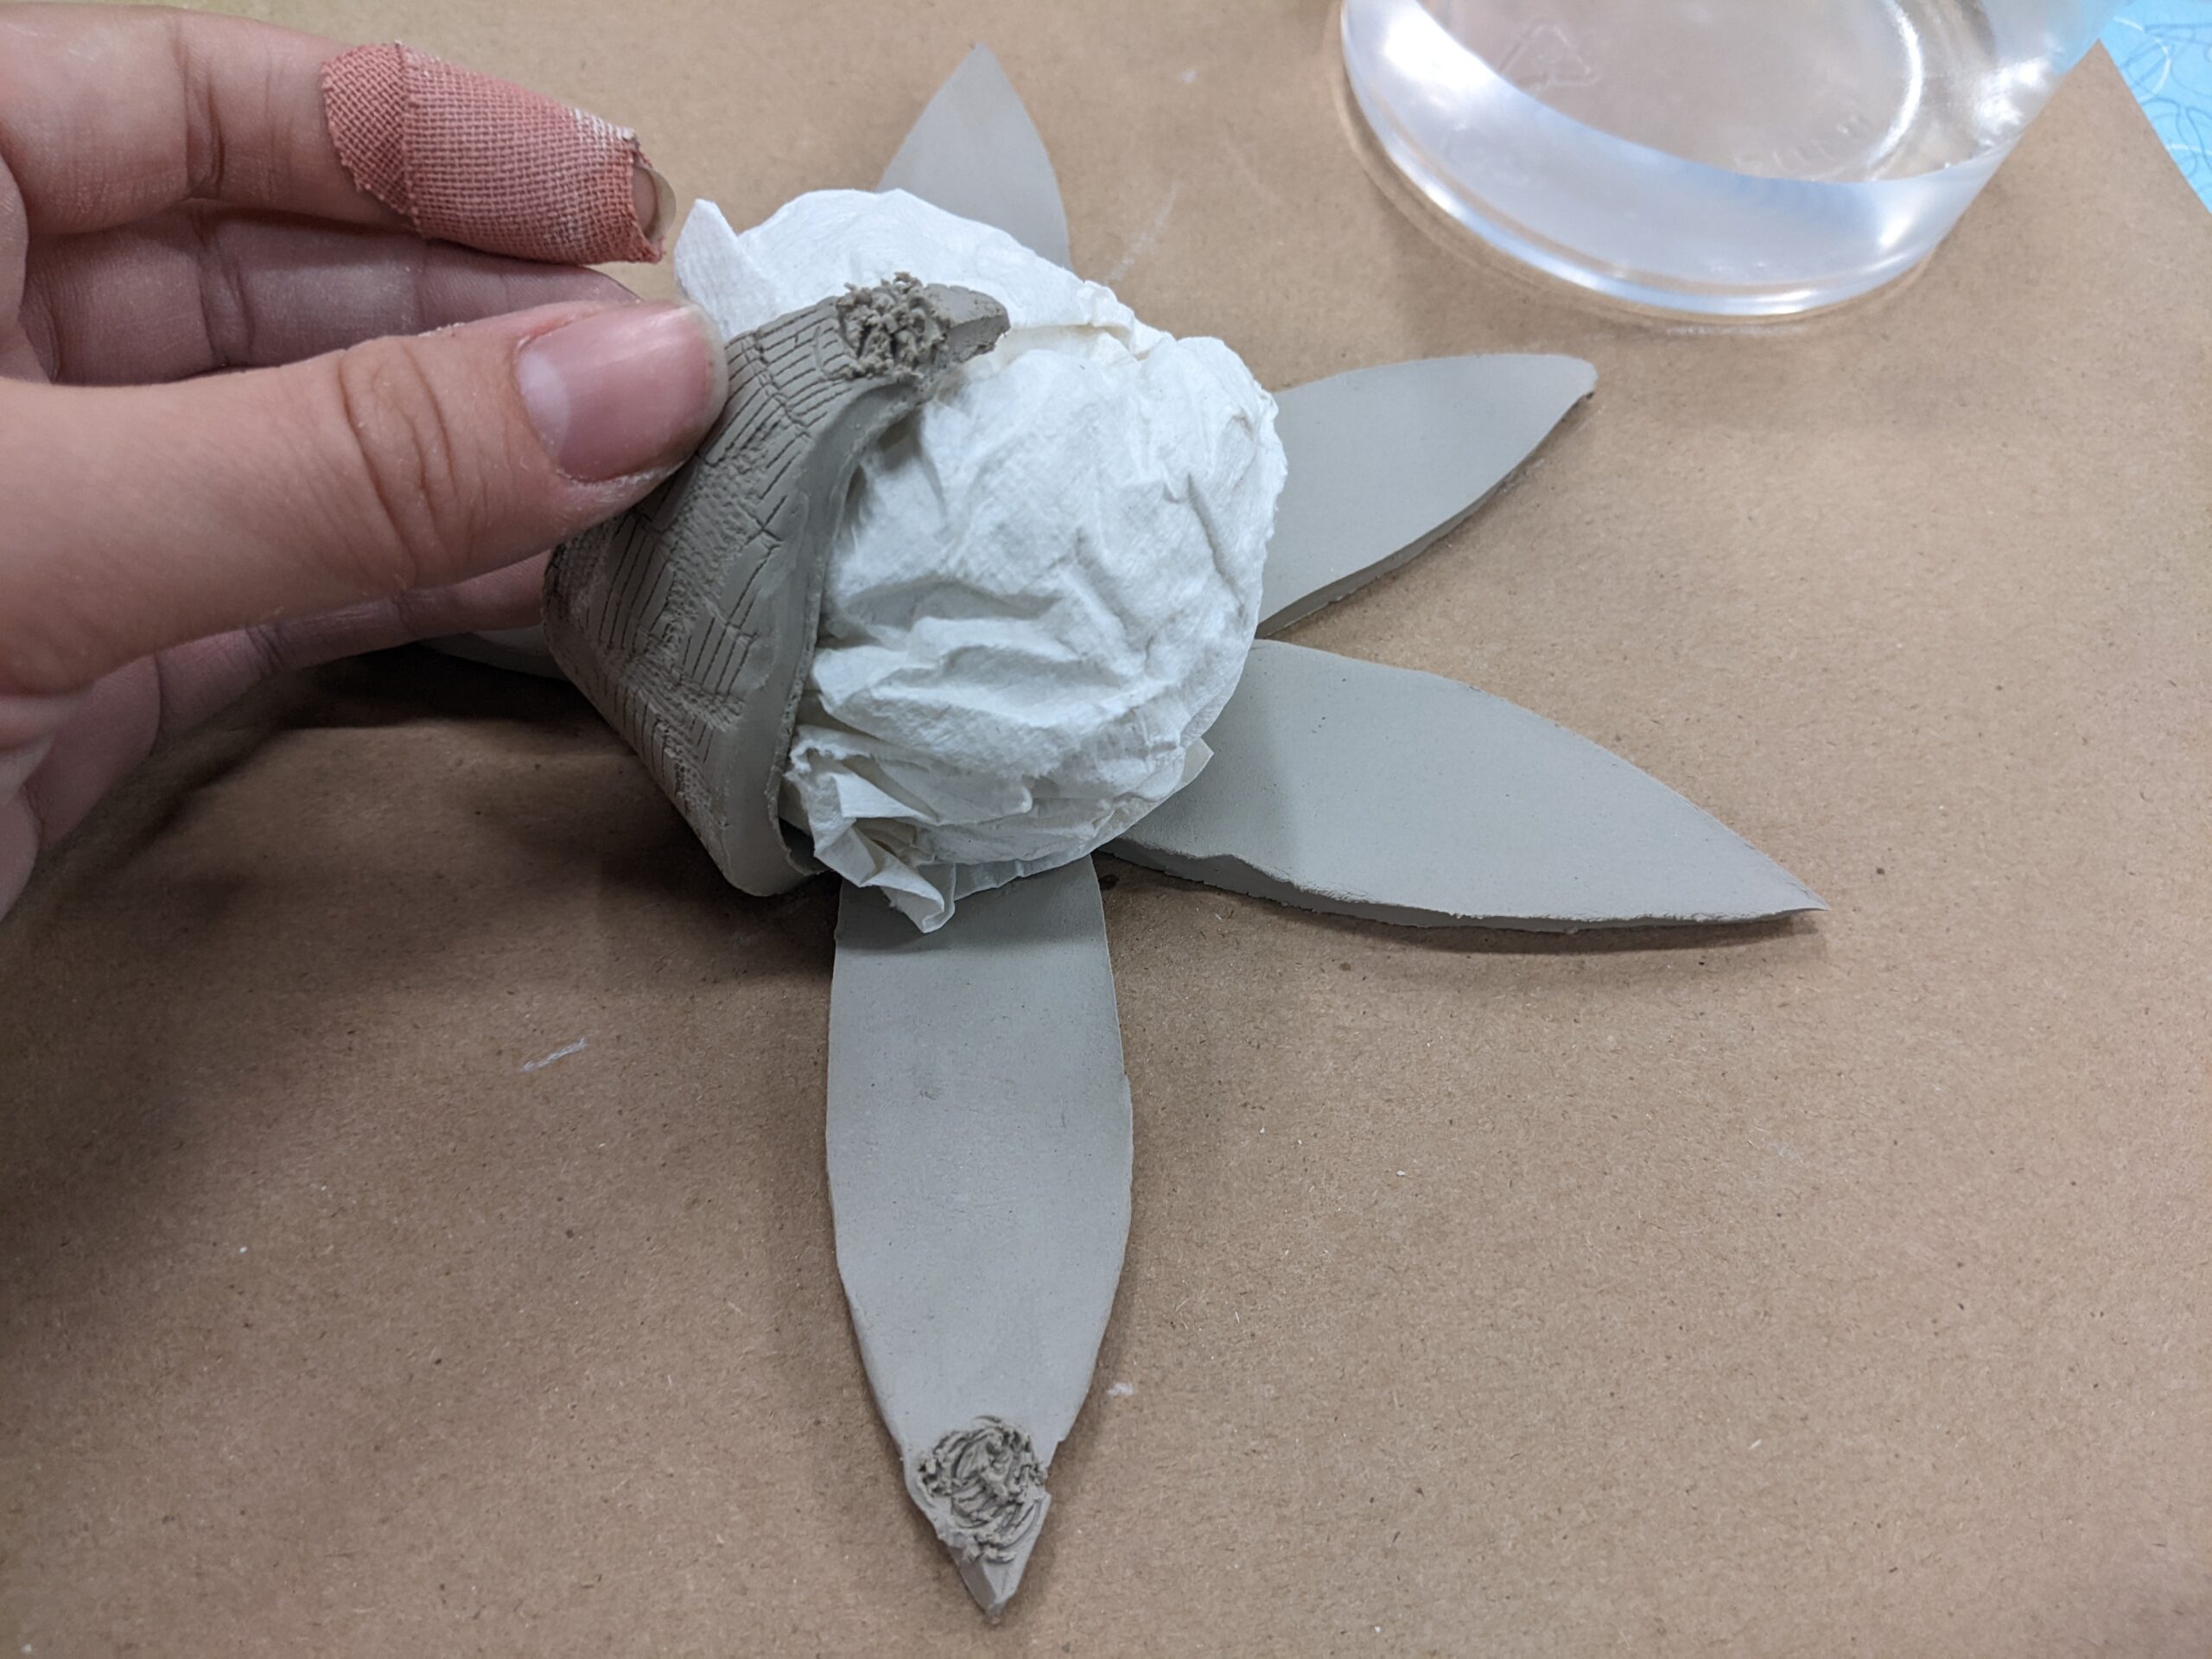
- Fold one of the petals up over the wadded paper towel. The tip of the petal should fold over the top of the paper towel ball. Add or subtract paper towels as needed until you reach the correct size. (Fig. 9)
- Score the tip of the petal and add a small drop of water.
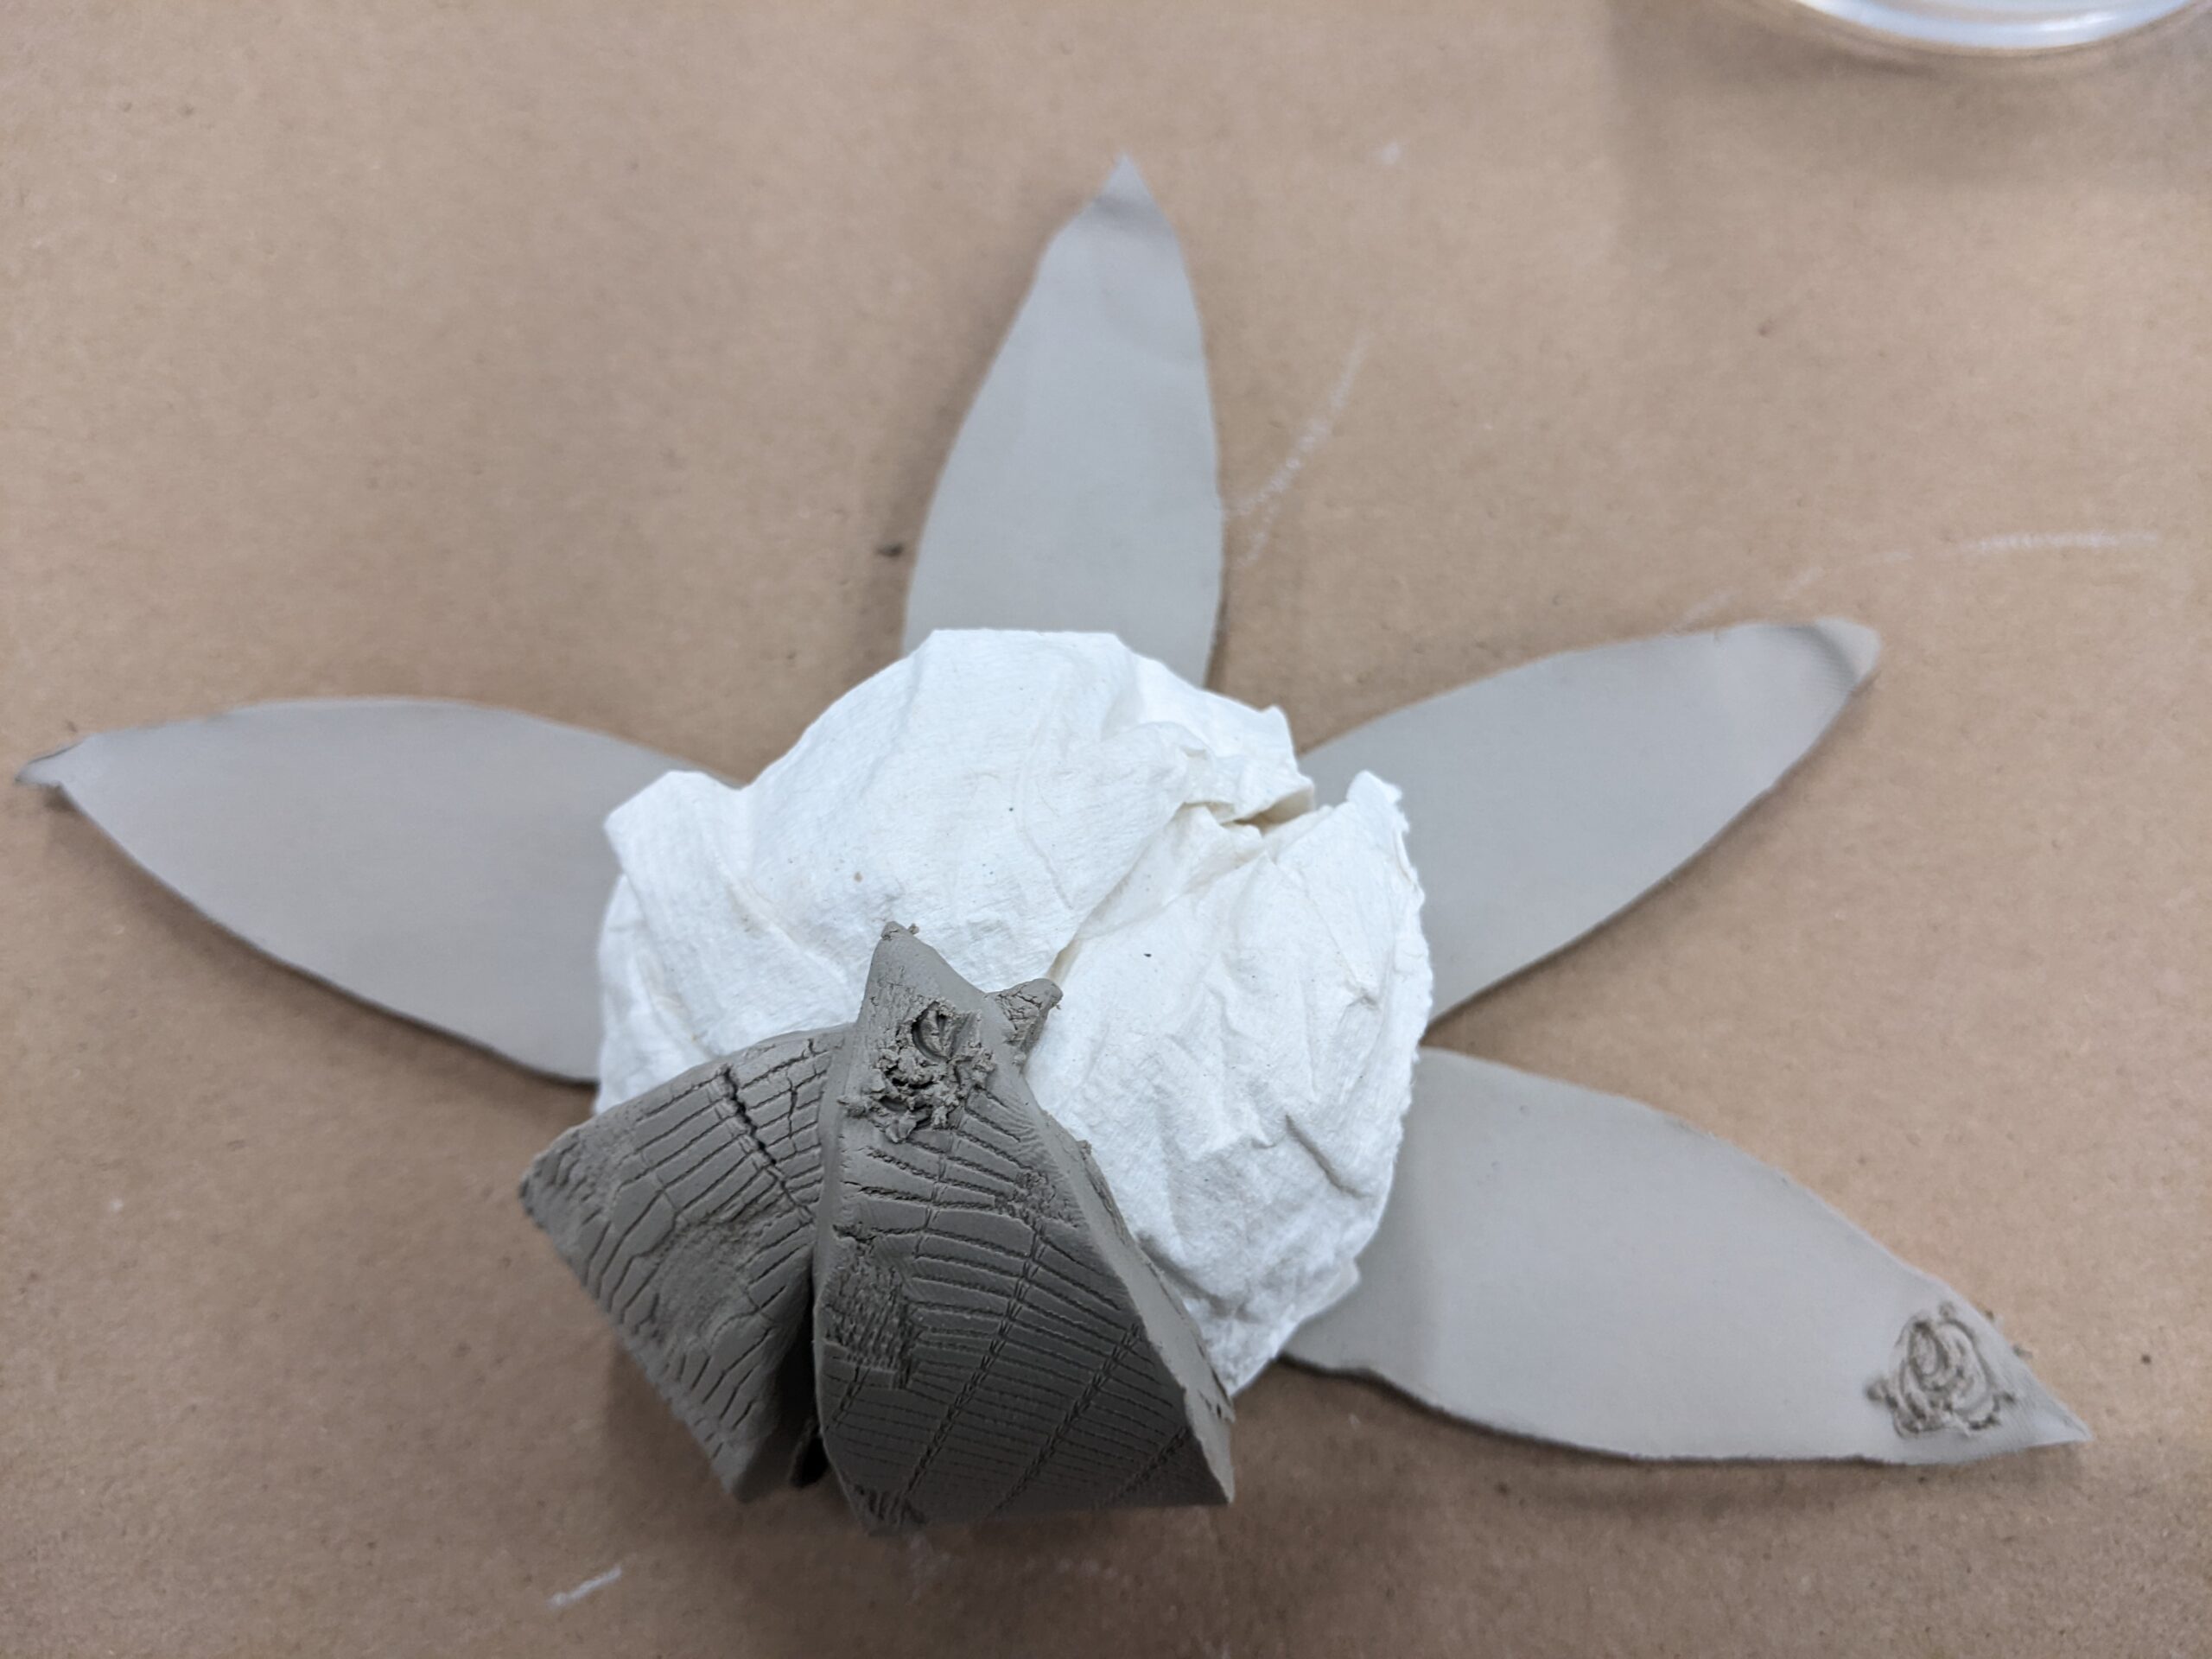
- Score the tip of the next petal and overlap the tip of the previous petal. (Fig. 10)
- Continue steps 10 and 11 until all petals are connected at the top. Note: Do not be afraid to squish the top of the pumpkin a bit as you go to help the petals fit over the top of each other.
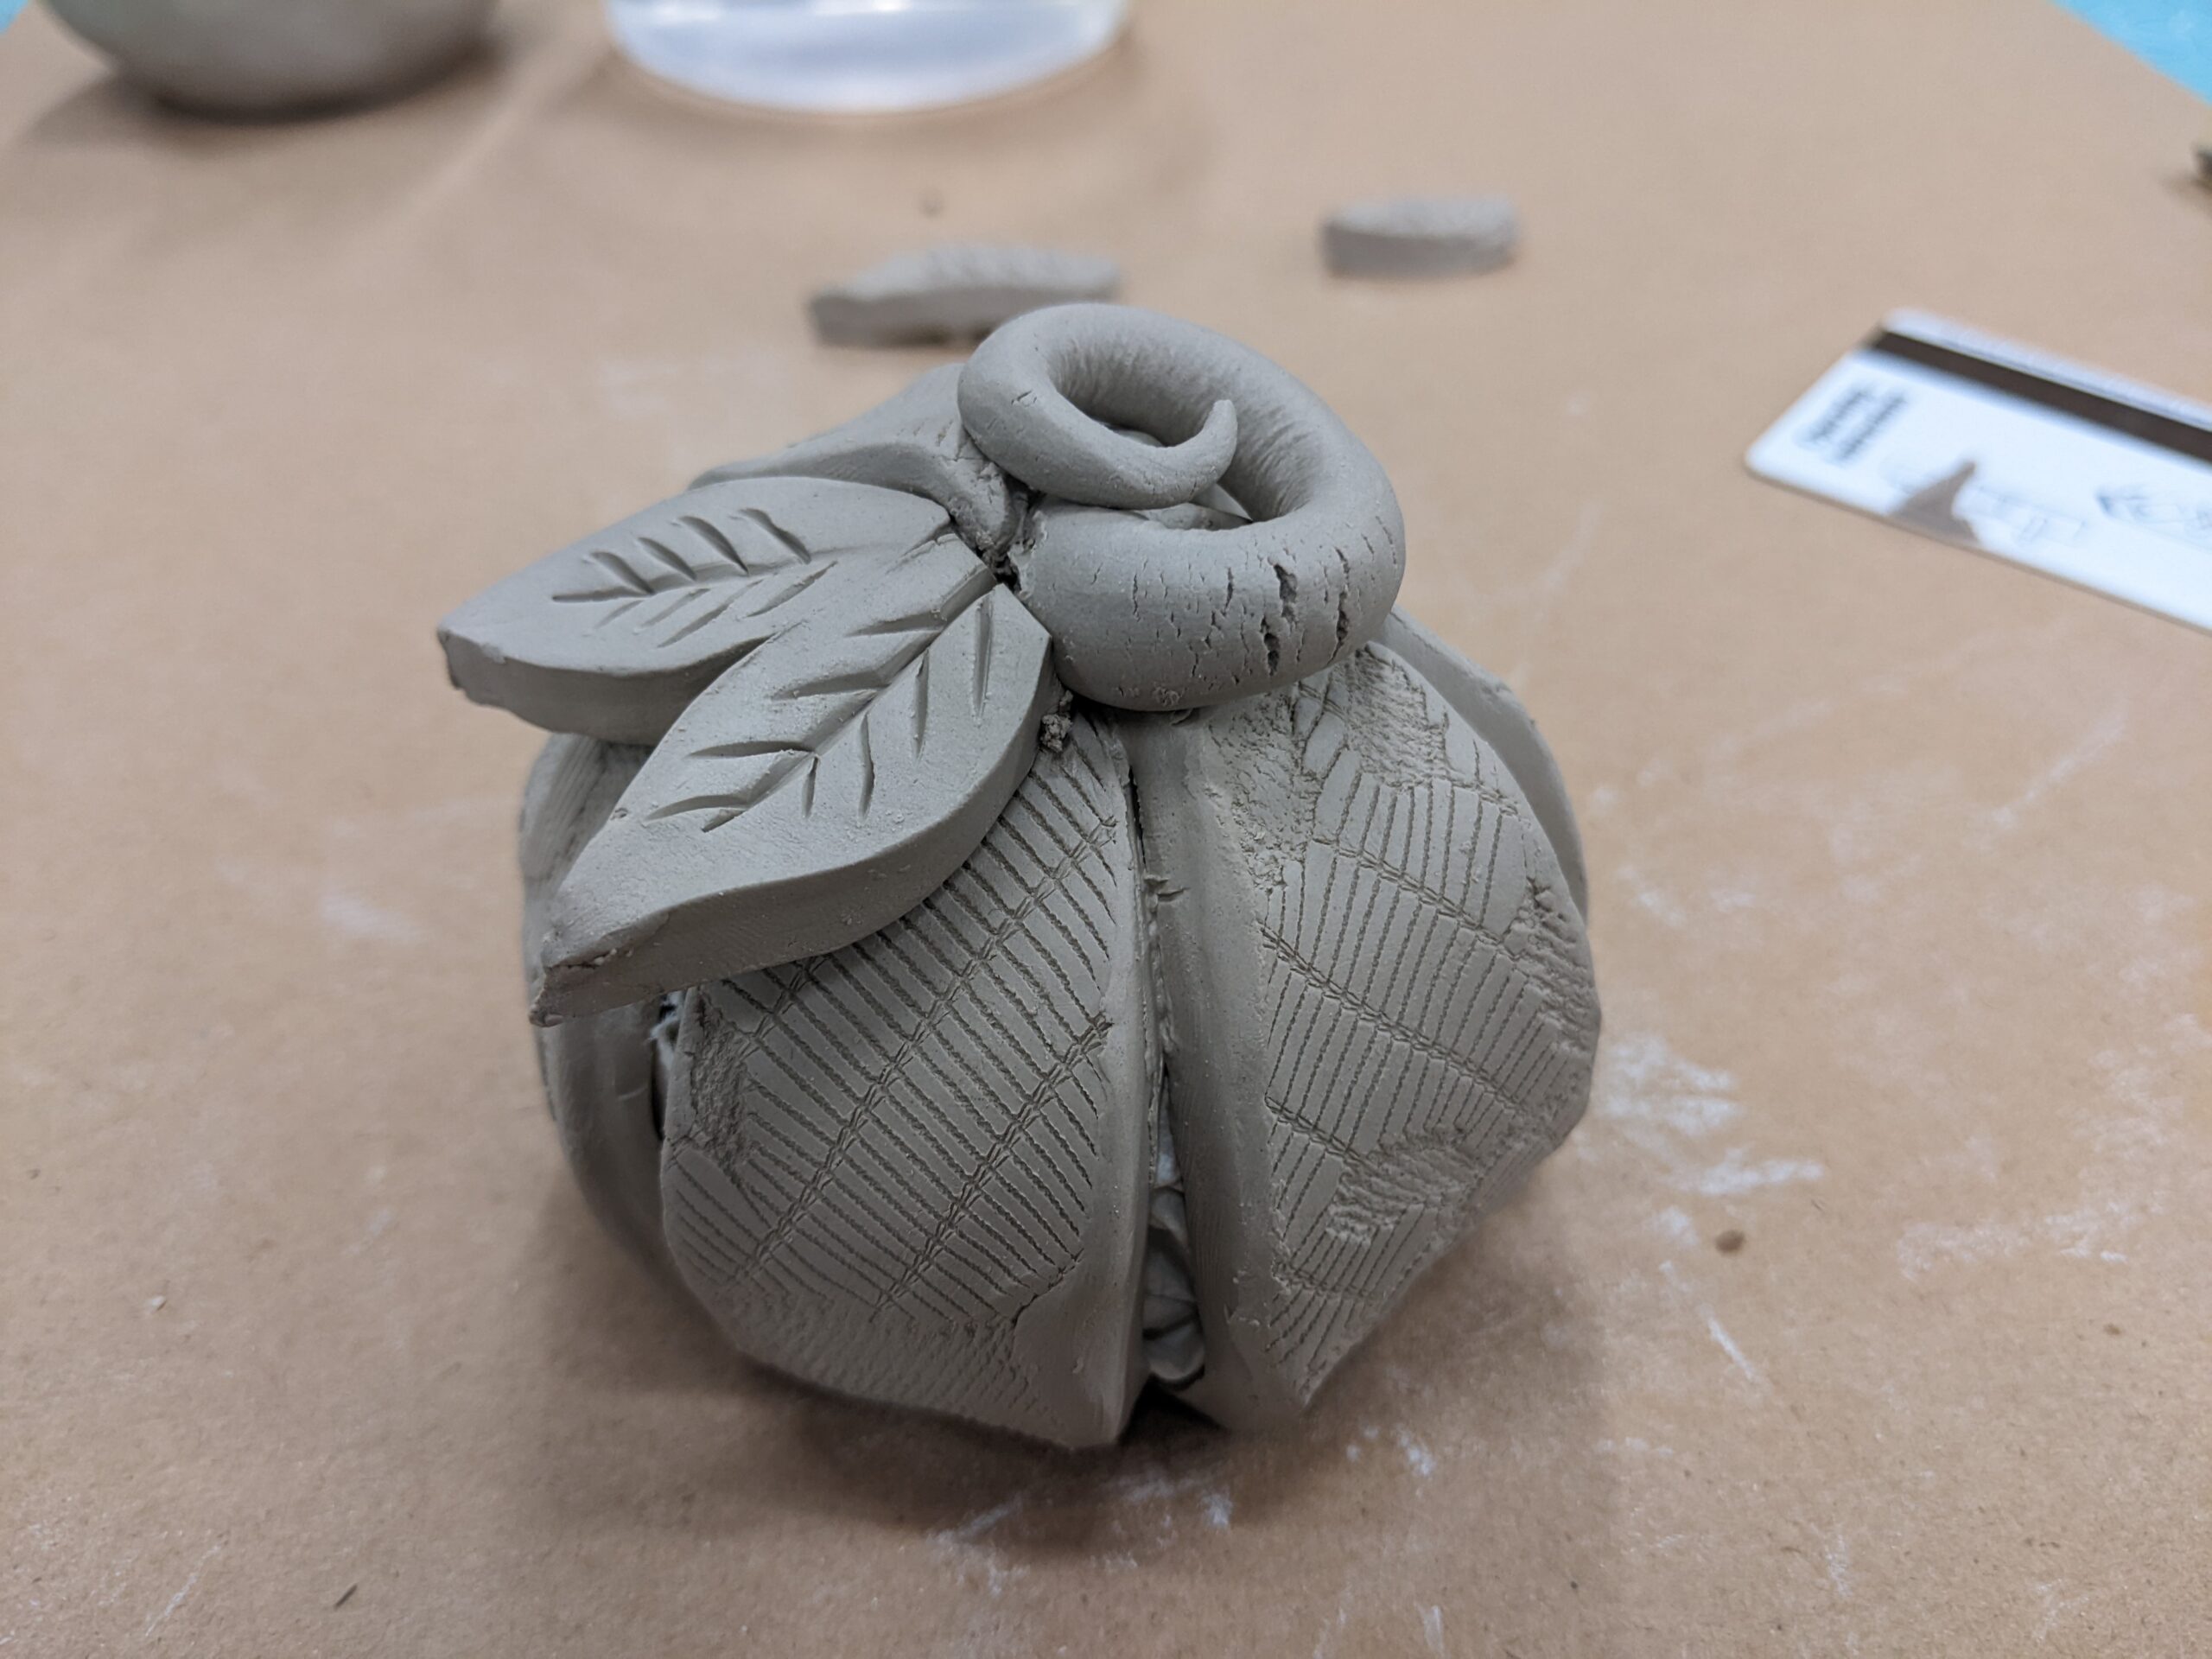
- To make the stem, uncover the leftover clay and use a bit to roll a coil that is thin on one end and thick on the other. (Fig.11)
- Score the underside of the stem and two leaves, plus the location where you would like to attach them on the pumpkin.
- Add a little drop of water to the scored areas of the pumpkin and attach the stem and leaves. Give them a little wiggle to lock them in place.
- Let dry and Bisque fire to cone 04. Note: do not remove the paper. It will safely burn out in the kiln.
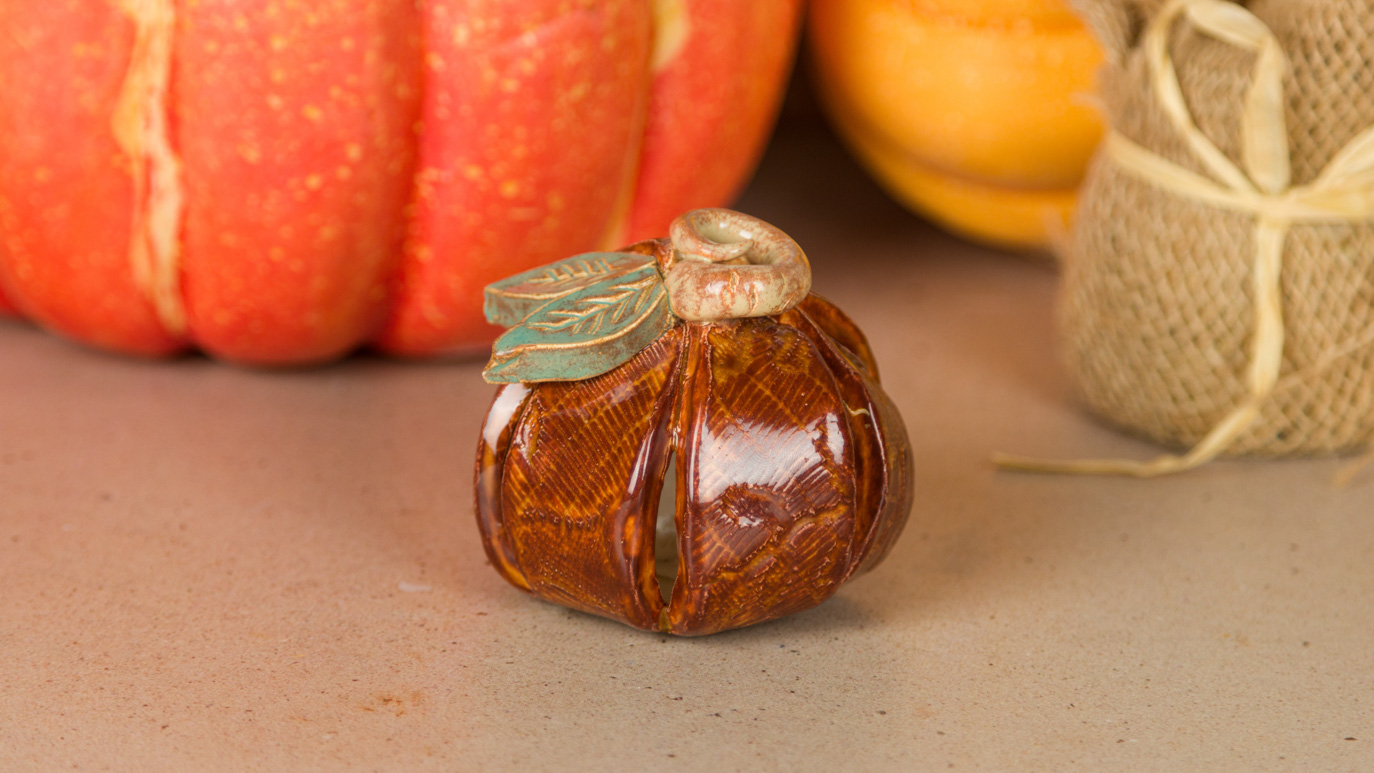
- Apply 3 coats of EL-133 Autumn to the body of the pumpkin, letting the glaze dry between coats.
- Repeat step 17 with EL-130 Sea Green glaze for the leaves, and EL-125 Sahara Sands glaze for the stem
- Stilt and fire to cone 06
Accommodations: Pre-roll the slabs for your students. Make sure they are covered so as not to lose any moisture before the students start working. Pre-cut the petal pattern and leaves, and texture can be added after the pattern is cut out.