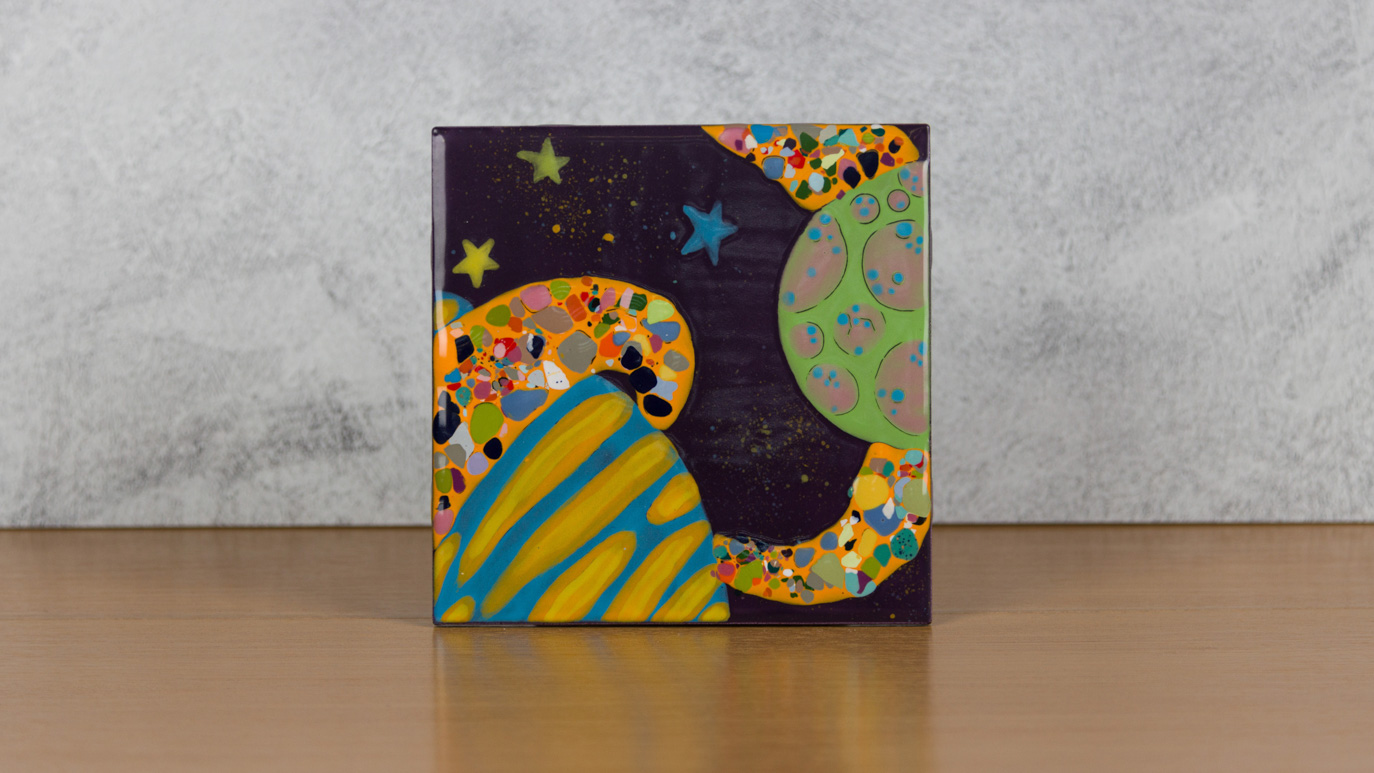
Galaxy Tile

Designer: Bailie Benson

Instructions

  1. Clean your properly fired 6×6 bisque tile with a damp sponge.
  2. Base coat the tile with three coats of SC-104 Grape Expectations using a fan brush.
  3. When the glaze has lost its shine, lay the pattern over the top of the tile.
  4. Trace the pattern lines with a pencil using gentle pressure.
  5. Remove the pattern. You should see an impression of the pattern lines in the glaze.
  6. Using a toothbrush, dip and splatter SC-11 Blue Yonder, SC-6 Sunkissed, and SC-97 Cant-elope on the tile, trying to avoid the planet outlines.
  7. Fill in the stars using 3 coats of a glaze color of your choice with a detail liner brush.
  8. Mix SC-6 Sunkissed and SC-11 Blue Yonder to create a green. Fill in the smaller planet with 3 coats using the script liner brush. When the green has lost its shine add dot details with SC-70 Pink-A-Dot and SC-11 Blue Yonder.
  9. Apply 3 coats of SC-11 Blue Yonder to the larger planet. When the glaze has lost its shine, add stripes of SC-97 Cant-elope and SC-6 Sunkissed.
  10. Fill in the ribbon around the planets with SC-97 Cant-elope. While the 3rd coat is still wet, add the crushed-up chips of dry Stroke & Coat.
  11. Allow the tile to dry.
  12. Stilt and fire to shelf cone 06.

Supplies

Form

  • 6” tile

Colors

  • SC-104 Grape Expectations
  • SC-97 Cant-elope
  • SC-11 Blue Yonder
  • SC-6 Sunkissed
  • SC-70 Pink-A-Dot

Decorating Accessories

  • RB-106 Script Liner brush
  • CB-604 fan brush
  • CB-202 Detail Liner brush

Miscellaneous Accessories

  • Sponge
  • Toothbrush
  • Pattern
  • Water Bowl
  • Crumbled dry Stroke & Coat glazes from leftover projects
Top