- Roll a ball of clay
- Split the ball in half and set aside one of the halves.
- Form the mushroom cap by pinching the edges of the cut side.
- Pinch up the center of the top of the half sphere to form a rounded point.
- Carve gills into the underside of the mushroom cap with a toothpick. Set aside.
- Roll the remaining half of the sphere into a thick coil slightly thicker on one end to form the base of the stem.
- Cut the stem to size and hollow out the stem.
- Fit stem to underside of the mushroom cap.
- Remove stem, slip and score the area where the stem connects to the cap and attach the two pieces together.
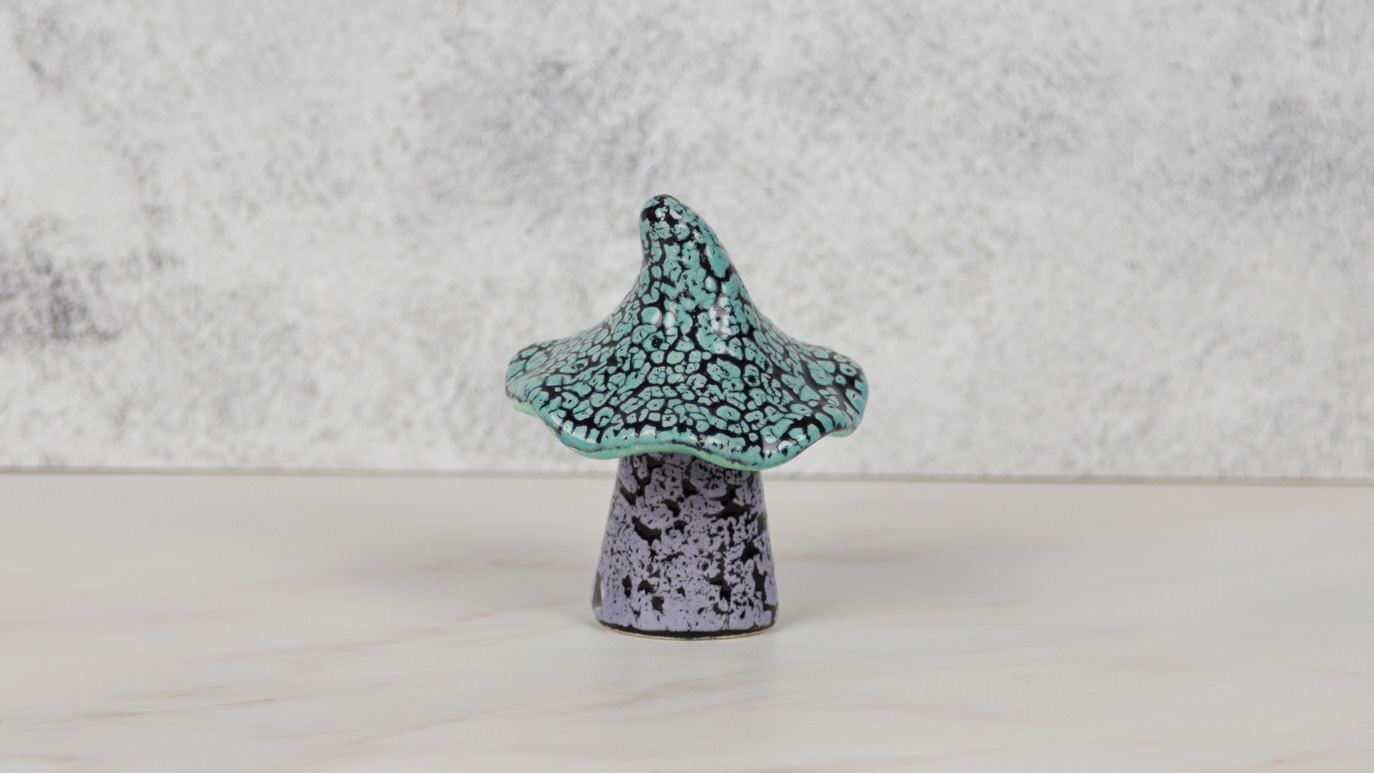
- Using the Soft Fan with FN009 Black, apply 2 coats to the whole mushroom. Allow glaze to dry between coats.
- Using the script liner brush, apply two coats of SC104 to the underside/gills of the cap.
- Using a drybrush technique with the script liner brush, apply 1 coat of SC103 to highlight the ridges of the gills.
- Using the Script Liner with SG202 White Cobblestone, apply 2-3 coats to the cap of the mushroom. When the final coat loses its shine, apply 1 coat of SC101 to the main portion of the cap and SC103 to the dots.
- Using the Script Liner with SG202 White Cobblestone, apply 2-3 coats to the stem of the mushroom. When the final coat loses its shine, apply 1 coat of SC103.
- Allow to fully dry, leaving the bottom and inside of the mushroom unglazed.
- Fire to cone 04.
VARIATIONS AND ADAPTATIONS: Uneven coats of White Cobblestone will give more variation in your cobblestone effect after firing.