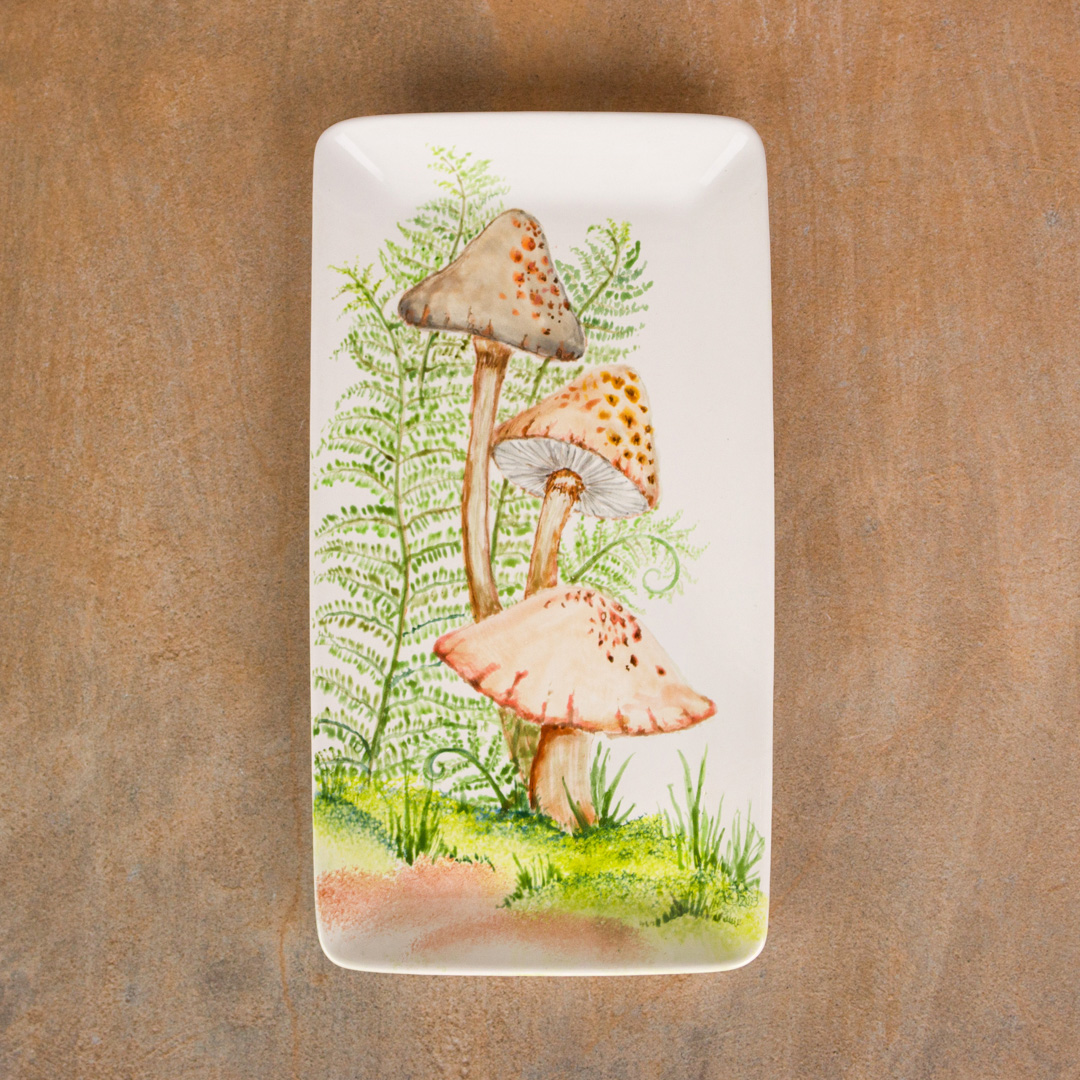
Mushroom Tray

Designer: William Pulse

Share

Instructions

  1. Begin with properly fired cone 04 bisque. Moisten a sponge and wipe the bisque to remove any dust.
  2. Using CB604 Soft Fan to apply 3 coats of FN001 White. Let dry.
  3.  Trace the pattern of the basic mushrooms and fern stems only using AC230 Clay Carbon and a pencil
  4. Place the EZ-Strokes out onto a tile.
  5. Thin EZ-022 Beige to a milk consistency and fully load the CB-602 Soft Fan with color and flood in the large mushroom and stem, the middle mushroom and stem and only to the tallest mushroom stem.   Add some EZ047 Thundercloud Grey to the Beige color to darken and apply to the tallest mushroom cap.  Let dry.  It is important to let the color dry before continuing with the floating of the other EZ-Strokes over the previous color.  If the color is still damp, the color can be lifted off.
  6. Use some of the same darkened Beige/Thundercloud Grey mixture to shade the stems of the mushrooms using CB404 Pointed Round towards the lower sections where they go behind the large mushroom.
  7. Slightly thin some EZ055 Brick.  When applying thinned color to shade and area, you can always add more layers of color to darken than trying to remove to heavy of color to an area.   Load the CB-404 Pointed Round with water and tip the brush with the thinned color.   Apply it to the sides of the mushrooms to give dimension.  While the color is still wet, rinse the brush, reload it with water and soften the inner edges of the color.  Shade the mushrooms stems in the same manner.  The shading is darker where the stems go behind the larger mushroom.   Under the large mushroom, shade the left side and up under the cap.   Shade the bottom edges of the mushrooms in an uneven manner.   Let dry.
  8. Use CB110 Liner to apply thinned EZ47 Thundercloud Grey to the gills on the middle mushroom.
  9. To add depth to the bottom edges of the mushrooms use EZ055 Brick and further darken the indentations with thinned EZ010 French Brown.   Add some detail to the stems with both colors.
  10. To the spots in the mushroom caps apply very thin EZ055 Brick and thin EZ034 Orange.   Darken with more thinned EZ055 Brick and EZ010 French Brown.
  11. Use a damp Silk Decorating Sponge (not the Synthetic Sponge) loaded with EZ018 Chartreuse tipped with EZ042 Teal to pounce in the grass areas near the mushroom stems and the towards the right side of the ground.   Rinse the sponge and load with some thinned EZ055 Brick to sponge in the two lower left areas of the ground.
  12.  The stems to the ferns are thinned EZ071 Dark Olive using CB110 Liner.  To paint in the leaves to the fern use EZ018 Chartreuse to the smaller leaves towards the top of the ferns.  As you move down on painting the leaves use EZ003 Irish Green and towards the bottom leaves, use thinned EZ028 Leaf Green.  You can vary the strength of the color and intersperse some thinned EZ071 Dark Olive and thinned EZ042 Teal to give variety the green leaves.
  13. Use CB-110 Liner loaded with the EZ018 Leaf Green, EZ071 Dark Olive and EZ042 Teal to paint in the grass blades in the pattern. Vary the height and colors when painting in the grass blades.
  14. Stilt and Fire the piece to Shelf Cone 05-06.

Supplies

Form

  • MB882 Rectangle Tray

Colors

  • FN001 White
  • EZ003 Irish Green
  • EZ010 French Brown
  • EZ018 Chartreuse
  • EZ022 Beige
  • EZ028 Leaf Green
  • EZ034 Orange
  • EZ042 Teal
  • EZ047 Thundercloud Grey
  • EZ055 Brick
  • EZ071 Dark Olive

Decorating Accessories

  • CB110 Liner
  • CB404 Pointed Round
  • CB602 Soft Fan
  • CB-604 Soft Fan

Miscellaneous Accessories

  • AC230 Clay Carbon
  • Pencil
  • Scissors
  • Tile or Pallet
  • Synthetic Sponge
  • Silk Decorating Sponge
  • Pattern
Top