Winter Dawn Plates

Designer: David Hoff

Share

Instructions

  1. Check the bisque over for any blemishes and remove any by lightly sanding with fine sandpaper.
  2. Using the provided pattern, the clay carbon and a pen/pencil trace the design onto the ware.
  3. Damp sponge the ware to remove any fired dust and to condition the piece for decorating. The damp sponging will not harm the traced design.
  4. Make a copy of the simple pattern. Using this copy cut out the mountain range along the top edge that meets the sky.
  5. Place the Stroke ‘n Coats as needed on the palette and thin if needed if color is extremely thick.
  6. Complete the sky area as follows with Cotton Tail, My Blue Heaven, Peri-Twinkle and Blue Dawn.
    1. Align the top of the cutout mountain range with the traced pattern. Dampen the area under the paper cut out and dampen the piece of paper. The wetness will help secure the paper mountain range to the bisque. Thus, protecting the traced mountain range from color.
    2. Dampen a sponge and remove all excess water.
    3. Pick up Cotton Tail with sponge, pounce two coats to the denoted circle on the pattern. Sponging creates a slightly textured surface. Do not rinse the sponge out.
    4. Pick up My Blue Heaven, proceed to sponge color around the Cotton Tail and along the edge of the cutout pattern. Work this color from papers edge upward about 1/3rd of the way into the sky area. Apply two coats Do not rinse sponge. Proceed to pick up Peri-Twinkle and blend this color down into the My Blue Heaven and upward another 1/3rd. Keep sponging the color onto the ware, blending out all sharp lines of color. Again, two coats will be needed. Do not rinse sponge.
    5. The remaining sky area is completed by sponge Blue Dawn from the top of plate downward into the My Blue Heaven. Again, the color is blended into the previously applied color and two coats are needed.
    6. Allow the sky colors to set.
  7. Carefully resketch in the large tree with pencil.
  8. With a Sgraffito Tool or Cleanup Tool remove the sky colors form the sketched tree, thus exposing the bisque.
  9. The mountain range is applied next using the following colors Cotton Tail, Silver Lining, Gray Hare and Char-ming. Use the #8 Shader and #2 Detail Liner. If having difficulty with the #8 Shader use the #6 Pointed Round.
    1. Following the contour of the individual mountain section, block in a basecoat of Silver Lining. Apply the color so that you can determine the individual segments or the range. Do not paint the mountains over the sketched in tree.
    2. Proceed to fully load Silver Lining and corner load with Cotton Tail on to the #8 Shader Keeping the Cotton Tail to the upper edge of the Mountain, blending over the previously applied Silver Lining. Repeat the highlighting here and there along the mountain’s top and outer edges. Work out all ridges of color.
    3. Again, fully load the #8 Shader with Silver Lining and side load with Gray Hare. Blend the two colors on a clean area of palette. Pull in shading along the bottom edge of the mountain range and upward along one or two sides of the mountain. Refer to the provided detailed pattern for placement of this darker color. Please note: This shading will help define the mountain segments.
    4. Keep working the shading colors over the entire mountain range.
    5. Water dampen the #8 Shader and remove excess water. Corner load with Char-ming and blend on clean area of palette. . Again, referring to the provided detail pattern, float in additional shading to the mountain, thus enhancing the ridges and peaks of the mountain range. Note: make sure all the colors look blended and soft when finished.
    6. Thin the Char-ming down and fully load the Mini Liner with the thinned color. Proceed to detail the mountains with thick and thin fine broken lines.
  10. To complete the snowfield, use Cotton Tail, Peri-Twinkle and Blue Dawn and the #8 Shader.
    1. Work the fields in by sections. The sections are numbered for reference with their application. Start with snowfield to the left of the design, #1. Work across the plate and downward. As each section is applied. Be sure to keep the tree free of color.
    2. Fully load the Shader with the Cotton Tail and smoothly block in the section.
    3. Let the Cotton Tail set for a minute or two.
    4. Fully load the Shader again with Cotton Tail, side load with Peri-Twinkle and corner load the same side of the Shader with Blue Dawn. Pat blend on clean area of palette. Begin to add shading to the lower edge of each section. As the shading is applied reload as needed and proceed to apply a full second coat of Cotton Tail above the shaded area. If color appears too pronounced soften with Cotton Tail.
    5. When all the snow has been applied, thin Blue Dawn, fully load the Mini-Liner and with fine broken lines accent detail the individual section of the snow field.
  11. On the Palette place Tiger Tail, Cracker Jack, Camel Back and Down to Earth. These colors may need thinning. It seems that the families of brown have a tendency to thicken. Therefore, they may need thinning. The large tree, and the branches of the two berry bushes will be completed in brown tones. Complete the tree as follows with #6 Pointed Round, #2 Detailed Liner and Mini Liner.
    1. Block in the tree with a smooth solid coat of Tiger Tail.
    2. Fully load the Round with Tiger Tail and side load with Cracker Jack. Proceed to apply colors to both sides of the tree trunk and to lower side of the larger branches
    3. The same shading can be deepened with Camel Back. As shading colors are added try to achieve a bark like appearance.
    4. With thinned Down to Earth fully loaded on the Mini-Liner proceed to detail the tree on both sides, pull out tinier wispy branches from the bolder larger branches.
  12. Liner of choice, pull in the branches to the two berry bushes with one to two coats of the thinned Down to Earth.
  13. With the thinned Down to Earth and Mini Liner pull in the various clusters of dried grass through out the design. Grass should be of varying lengths and thickness. Note the grass in the foreground should be much longer than the grasses that are represented closer to the mountains.
  14. Sign the piece with Down to Earth
  15. Place Tu Tu Tango and Candy Apple Red on the palette. Using the pointed end of a brush handle, a stylist or/and pencil point, tab in many dots of these two colors over the branches to the bittersweet berry bushes.
  16. Allow project to dry 24-hours before glazing.
  17. Place Crystal Clear Brushing into the paper cup. If need thin slightly with water.
  18. Using Soft Fan apply two to three flowing coats of the clear over the entire plate.
  19. Allow to dry thoroughly.
  20. Stilt ware and fired to shelf cone 06.
  21. With Stilt Stone or Dremel Tool remove stilt marks.

Supplies

Form

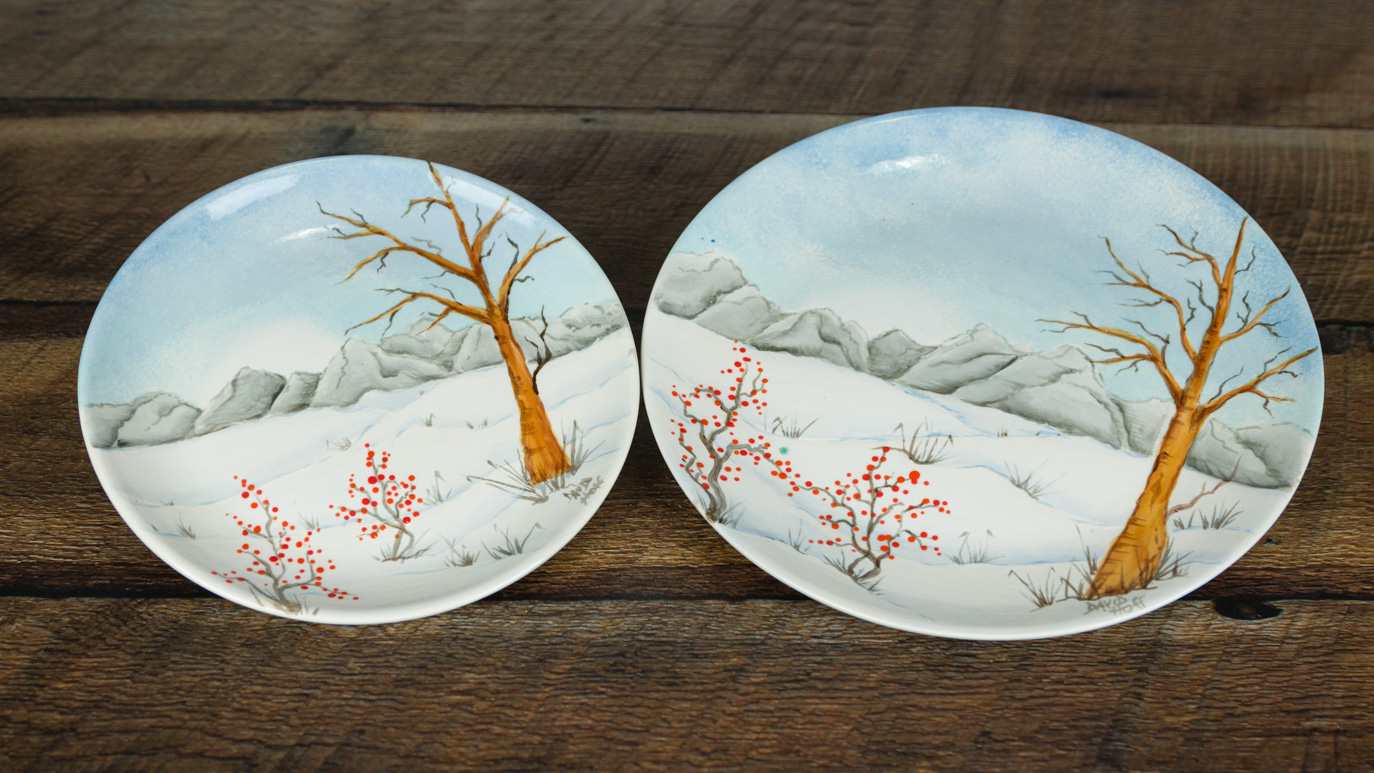
  • MB-102 Coupe Dinner Plate
  • MB-103 Coupe Salad Plate

Colors

  • SC-5 Tiger Tail
  • SC-16 Cotton Tail
  • SC-25 Cracker Jack
  • SC-30 Blue Dawn
  • SC-34 Down to Earth
  • SC-35 Gray Hare
  • SC-45 My Blue Heaven
  • SC-48 Camel Back
  • SC-60 Silver Lining
  • SC-65 Peri-Twinkle
  • SC-73 Candy Apple Red
  • SC-88 Tu Tu Tango
  • SC-99 Char-ming
  • S-2101 Crystal Clear Brushing

Decorating Accessories

  • CB-110 Mini Liner
  • CB-202 #2 Detail Liner
  • CB-308 #8 Shader
  • CB-406 #6 Pointed Round
  • CB-618 Soft Fan
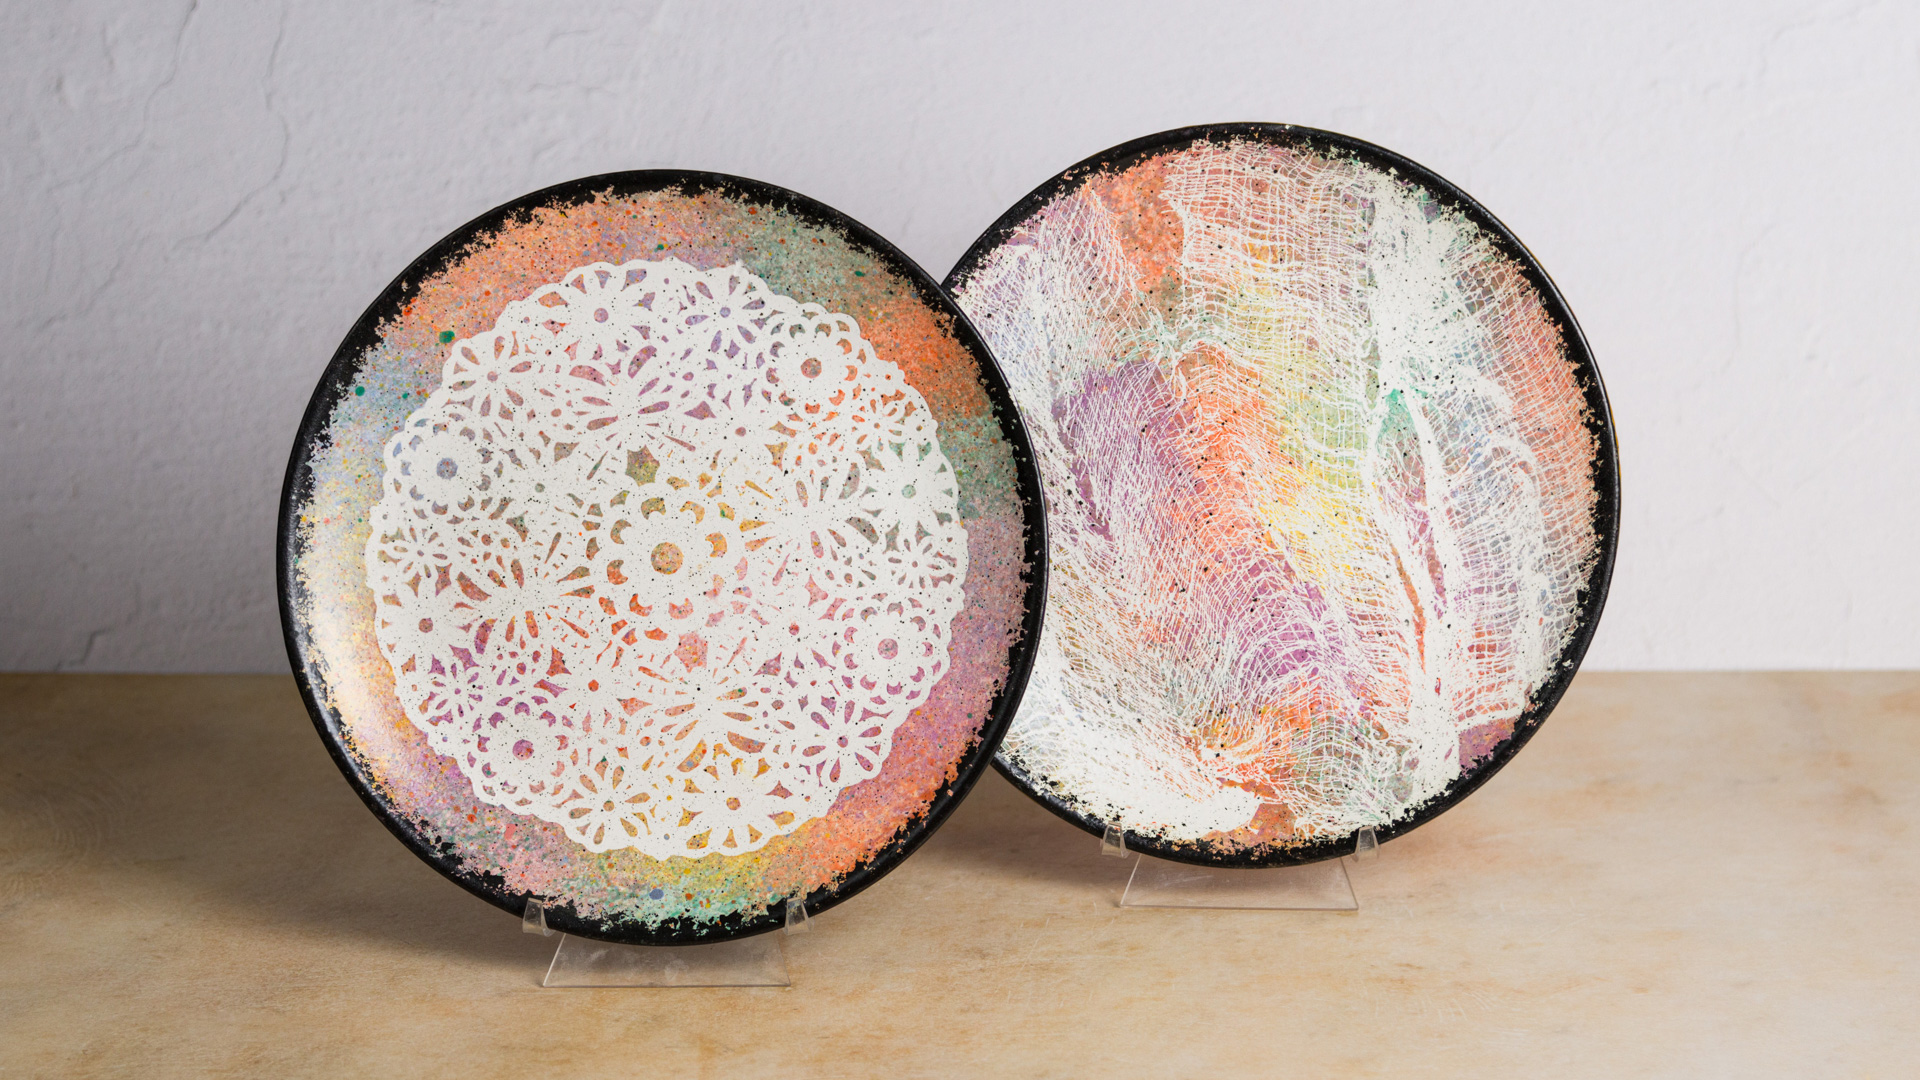
  • AC-230 Clay Carbon Transfer Paper

Miscellaneous Accessories

  • 3 oz. paper cup
  • Fine Sand paper
  • Glaze tile for Palette or Heavy Duty Plastic Page Protector
  • Paper Towels
  • Pen/Pencil
  • Scissors
  • Sgraffito Tool
  • Sponge
  • Water
  • Pattern
Top