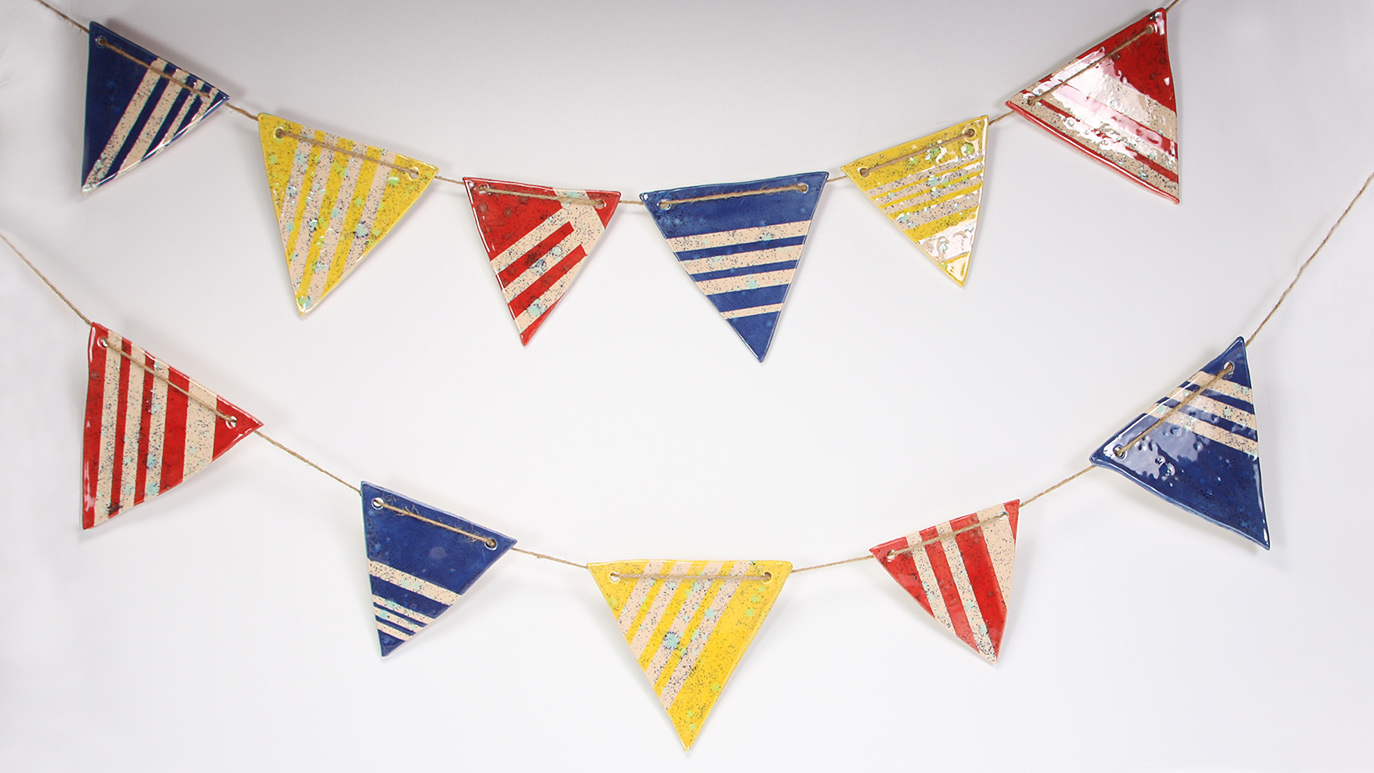
Handbuild:
- Draw out shape(s) of the banner flags on paper and cut out to use as a stencil.
- Roll out a slab about 1/8” thick.
- Compress slab on either side with rib.
- Using stencil, cut banner flag shapes out of the slab.
- Use straw to punch two holes in the top of each flag.
- Smooth corners and edges with a sponge.
- Lightly cover with plastic to dry slowly.
- Once dried fully bisque fire to Cone 04.
Glazing:
- Using masking tape, tape designs on each flag tile.
- With a soft fan brush, paint three coats of the foundations glaze of your choice (FN-004, FN-002 or FN-041).
- While third coat is still drying pull tape off to reveal masked areas.
- With your soft fan brush, paint two coats of Northern Lights (S-2702).
- Once dried fully fire to Cone 06.
Assemble:
- Line up flag tiles in desired order for banner.
- Cut your twine two feet longer than the length of your banner layout.
- Begin stringing your banner, tying knots at the backside of each hole as you go.
- Tie loops at each end for hanging.
- Hang and enjoy
Variations and Adaptations
- If used in a class setting, pre-slab and compress clay beforehand to save time.