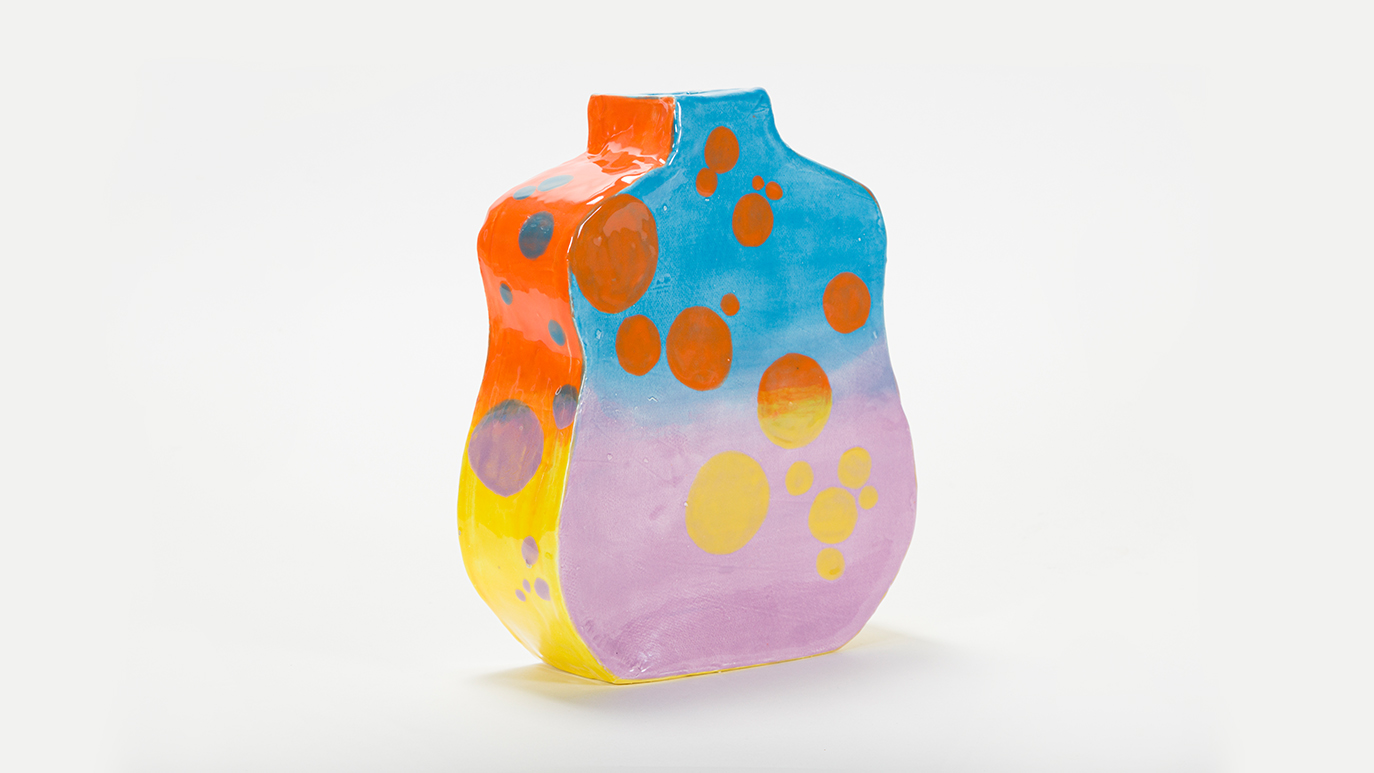
Complementary Color Vase
Designer: Kaitlyn Miller
Instructions
Handbuilding
- Fold paper vertically and sketch profile of vase form.
- Cut out design and unfold.
- Roll out a slab about 1/4” thick and compress with rib.
- Trace shape of vase onto slab twice and cut out so you have 2 identical pieces.
- Cut strips of clay from slab that are about 2 long enough to make the sides and bottom of vase. You can use a string to measure the length if needed.
- Place one side of the vase down and slip and score to attach sides and base.
- Option to add crumpled paper in the center of vase for support.
- Slip and score to attach other side.
- Once attached stand up on base and clean up seams.
- Allow to dry fully and bisque fire to Cone 04.
Glazing
- Wipe off bisque with a damp sponge to remove any dust.
- Pour about 1/3 cup of Bright Blue (FN-18) and thin slightly with a splash of water . Ratio about 5 parts glaze to 1 part water.
- Mix up thinned glaze and pour into the inside of the vase.
- Rock north, south, east and west to coat the whole inside and pour out access.
- Touch up missed spots with a brush if necessary
- Wipe any drips on the outside of the vase off with a damp sponge.
- Using a pencil, draw 2 horizontal lines around the middle of the vase, indicating the blend zone.
- Using a soft fan brush Bright Blue (FN-18) apply your first coat of glaze to the top half of the front and back faces of the face, stopping at the mid-point if the blend zone.
- Apply one coat of Lavender (FN-12) to the front and back faces of the vase from where the Bright Blue stops to the bottom.
- When applying the second and third coats of these glazes, begin to blend them together in the bled zone by brushing one over the other while the glazes are still wet to create an ombré effect.
- Apply glaze to the sides of the vase in the same way with Orange (FN-3) on the top and Yellow (FN-2) on the bottom.
- Continue the Yellow all the way to the bottom of the vase, covering the foot in glaze.
- Once color is dry use stencil and a detail brush to apply spot pattern on vase, using each color’s complement as the spot color on top.
- Bright Blue – Orange
- Lavender – Yellow
- Move the stencil around the vase to create a unique spot pattern, choosing spots of different sizes.
- Apply 2 more coats of the colors onto the spots, you may use the stencil again or continue to trace the shape free handed.
- Apply 3 coats of Bright Blue to the rim of the vase.
- Allow to dry fully and fire to Cone 06 using stilts.
Supplies
Form
Colors
- FN-18 Bright Blue
- FN-12 Lavender
- FN-3 Orange
- FN-2 Yellow
Decorating Accessories
- SL-441 Spots Stencil
- Paper
- Pencil
- Scissors
- Fettling Knife
- Rib
- Sponge
- Water
- Brushes for glazing
- Container for mixing and pouring glaze
Top