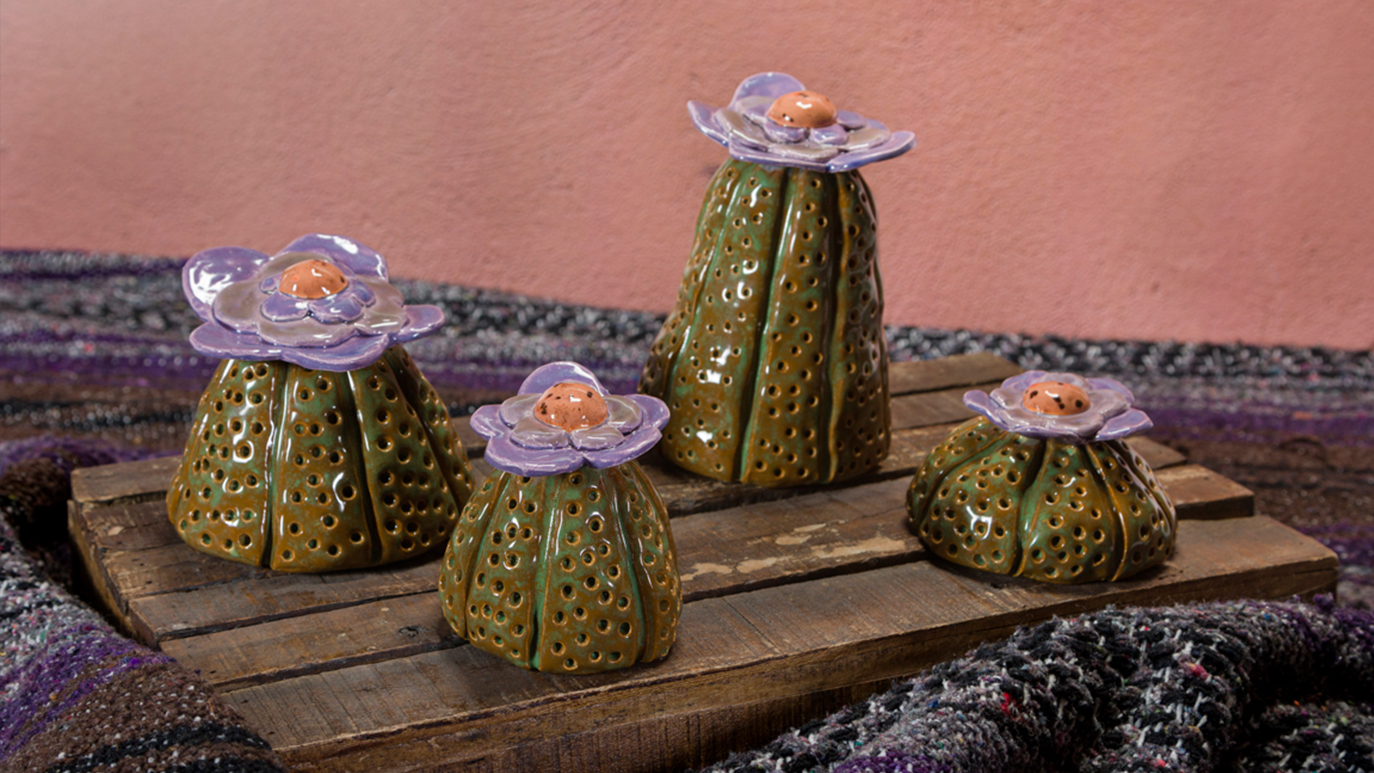
Elements Pinch Pot Cactus
Designer: Kaitlyn Miller
Instructions
Handbuilding
- Separate out ¼ of your clay and set it aside.
- Smack the remaining ¾ of your clay into a sphere.
- Push thumb into the center of the ball and start pinching, rotating your piece slightly each time you pinch to form walls all the way around.
- Continue rotating and pitching until the walls are slightly thicker than a pencil and your piece is twice the size of the original ball.
- Mold pot to sit open side down.
- Smooth out any cracks with your fingers, adding a small amount of water if needed.
- Create ridges of the cactus by pressing the side of your pencil firmly into your pot and rocking up and down until an impression is made.
- Draw out a flower pattern on a piece of paper and cut it out to use as a stencil.
- Flatten the remaining ¼ of your clay with your hand to be slightly thinner than your pencil, smooth out any cracks if needed.
- Trace flower onto clay with pencil tip and cut out with a knife. Set scraps aside.
- Roll a small ball out of your scrap clay for the flower center.
- Score on the back and center of the flower by making small hatch marks with a pencil tip.
- Add a small amount of water to the scored area with your finger and attach pieces by pressing down firmly.
- Mold flower petals with your hands.
- Attach the bottom of your flower to the top of your cactus with the same slip and scoring technique.
- Add texture to the center of your flower and around your cactus by making small holes with the tip of your pencil.
- Clean up your ridges and any imperfections by smoothing the clay with your finger or pencil eraser.
- Repeat the above steps to make varying height sizes.
- Allow to dry and fire to cone 04
Glazing:
- Apply three coats of EL-142 Grass to the entire cactus body.
- Using EL-148 Smoked Lilac and EL-149 Lavender Flower, paint the flower petals. Lavender Flower was used for the largest and smallest flower. Smoke Lilac was used for the middle flower.
- Apply EL-213 Painted Desert to the center of the flower
- Once dried fully fire to Cone 06.
Supplies
Form
- Low-fire white clay (EM 100)
Colors
- EL-142 Grass
- EL-148 Smoked Lilac
- EL-149 Lavender Flower
- EL-213 Painted Desert
Accessories
- Fettling knife
- Brushes for glazing
- Paper for stencil
- Pencil
- Scissors
- Sponge
Top