- Check the piece over for blemishes and sand with 100-grit sand paper if any are present.
- Damp Sponge ware to remove any fired dust and to condition for decorating.
- Into a paper cup pour about one to two ounces of UG-30 Sand. If the UG-30 Sand is extremely thick add water to thin to a smooth creamy brushing consistency.
- Fully load Glaze Fan with UG-30 Sand and apply over the front and backside of the ware. Allow color to set between coats and apply as smoothly as possible. Be sure to work out any ridges of color as the underglaze is applied.
- Allow to dry thoroughly before proceeding.
- Using the provided simple pattern, the clay carbon and red pen, trace the design to the front of the basecoated ware. If the painted ware has dried sufficiently, you will easily see the pattern and the ware will not be scored (indented) by the tracing with the pen. Note: the red pen helps keep track of the parts of the design that have been traced. Also, a red pencil may have too soft of lead for the tracing to be seen, therefore, the need for the red pen.
- Instructions for loading the Flat Shader for floating of color. For this project we will half load (side load) the Shader and corner load the Shader.
- Dampen the Flat Shader with water.
- Tap the wet brush onto a paper towel and allow the water to seep out the brush on to the towel. (This will remove excess water.)
- Side load the left side of the Flat Shader with desired color. In this case UG-213 Cinnamon. It is best to load the darker color to the left side of the Shader. By doing this you will always know the shading color is to your left. The brush can be turned over to shade in the opposite direction.
- Once side loaded and using the brush on the flat, blend on clean area of palette.
- If completed correctly the left side of the stroke will have color and gradually fade away on the right side of the brush.
- When doing the stroke, always use the brush on the flat to achieve a good soft float of color.
- When the instruction calls for a corner loaded float of color, the procedure remain the same as above, however, only about 1/8th of the left corner is loaded with color. In this case UG-31 Chocolate. Be sure and blend the color and water on the palette.
- Side load the #8 Flat shader with UG-213 Cinnamon and blend on palette. Using the detail pattern as a guide, begin to float in color throughout the design. Shading is being added to areas where one petal covers another petal or leaf. Note: The leaves also have a float of UG-213 Cinnamon down one side of the middle vein. Allow to dry.
- Be sure to add some floating of color to the center, thus creating some shadowing.
- Proceed to corner load the #8 Shader with UG-31 Chocolate and add an additional float of color over the UG-213 Cinnamon.
- On the palette thin EZ010 French Brown to light cream consistency with water and mix with palette knife.
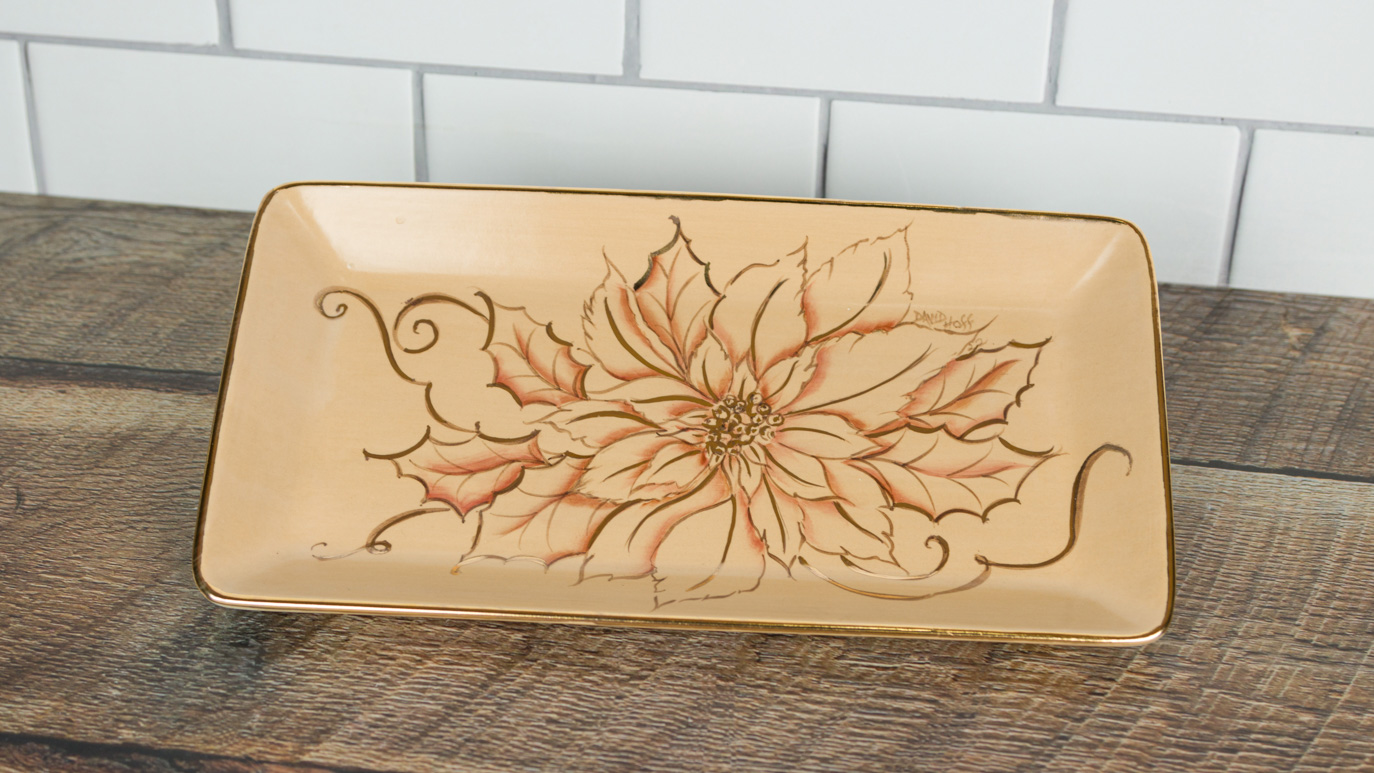
- Fully load #10/0 Liner with the EZ-010 French Brown and with a smooth flowing outline, detailing the entire pattern. The leaves have side veins; whereas the poinsettia petals only have a middle vein. Also, define detail in the small pistols and stamens to the center of the flower.
- Scroll work is pulled out from the edges of leaves as shown on the pattern using the EZ010French Brown.
- Sign the piece.
- Place on kiln shelf and fire to cone 04.
- Damp sponge ware to condition the piece for glazing and to remove any fired dust.
- Place one to two ounces of Matte Clear in a 3 oz paper cup and thin slight (if needed with water).
- With Glaze Fan apply two to three thinned coats of the Matte Clear to the entire plate.
- When dry, stilt ware and fire to shelf cone 06.
- Remove stilt marks.
Gold Overglaze Instructions
- Wipe the piece down with 91% rubbing alcohol and allow drying. This will remove any hand film from the ware.
- Place a small amount of the Premium Gold Overglaze on the glaze tile. Please, note the Premium Gold Overglaze is Red in color.
- Fully load the #0 Liner with the overglaze.
- Holding the loaded Liner straight up, add a single gold line down the center vein of all the petals and leaves. Slightly accent detail the pistols and stamen with fine gold out-lining.
- The leaves are partially accented with fine lines of gold here and there along their edges. The scroll work has accents of gold as well.
- To achieve an even band of color around the plate’s rim complete as follows.
- Use a cotton swab.
- Press any loose fibers back into the swab.
- Carefully dip the cotton swab into the gold.
- Firmly place the gold loaded cotton swab along the edge of the plate and slowly press and pull the cotton swap along the rim.
- Reload as needed and try to keep the pressure the same as the gold is applied to the rim. Take your time when applying the overglaze.
- Allow to dry
- Stilt ware and fire to shelf cone 019 -018
- Check for stilt marks.
- Clean the Gold Brush with essence