- Wipe bisque tile with a damp sponge to remove dust.
- Using the ruler, split the tile into three equal 2”x6” sections.
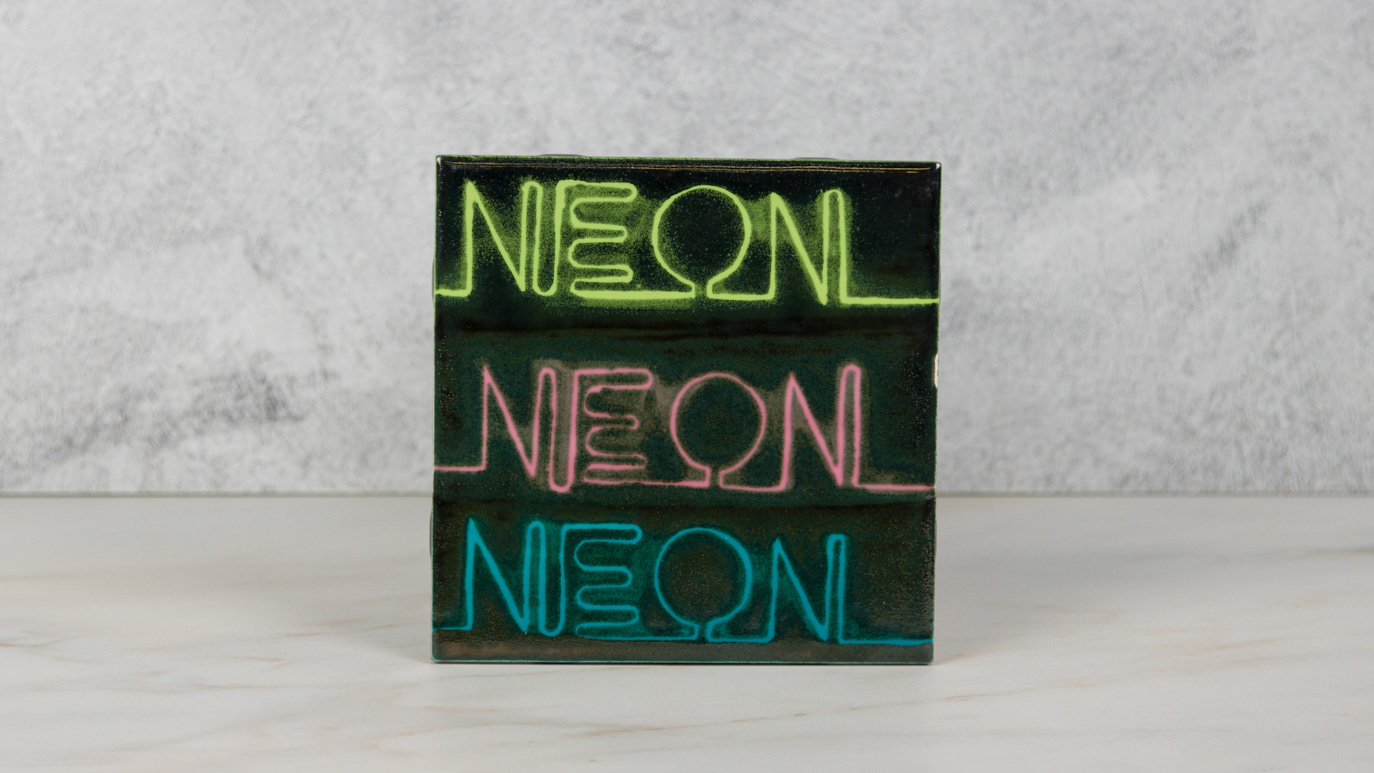
- Apply three coats of FN037 to the top section using a fan brush, allowing the glaze to dry between coats.
- Apply three coats of FN048 to the middle section using a fan brush, allowing the glaze to dry between coats.
- Apply three coats of FN018 to the bottom section using a fan brush, allowing the glaze to dry between coats.
- Once all three sections are dry, lay the clay carbon paper down over the tile with the “Neon” word pattern over the top and trace with a pencil.
- Remove the carbon paper and pattern.
- Trace over the “Neon” words with the detail liner brush and wax resist.
- Once the wax resist has dried, cover the whole tile with one layer of EL120 coming right up next to the wax lines.
- After the first layer has dried add a second layer of EL120, but back away from the lines about a quarter inch.
- When the second layer has dried, add the third layer by backing off another quarter inch. These stepped layers will create a haze effect around the neon letters.
- Allow to dry.
- Stilt and fire to cone 06.
VARIATIONS AND ADAPTATIONS: The harder you press with the detail liner brush and wax resist, the wider your line will be for the neon color to show through. Use the detail liner brush with a bit of water to wipe off any glaze that gets on top of the wax lines.