Peacock Feather Plate

Designer: William Pulse

Share

Instructions

  1. Wipe down the plate with a slightly moistened Synthetic Sponge to remove any dust and debris.
  2. Use AC-230 Clay Carbon and a Pencil to transfer the pattern onto the ware. Use the pattern twice to complete the full design of 8 feathers.
  3. Use the 1 ¼ “Sponge on a Stick to apply 2-3 coats of SC-11 Blue Yonder to the large portion of the peacock feather eye.
  4. Use the ½ “Sponge on a Stick to apply 2 coats of SC-32 Bluebeard to the top of the peacock eye (pupil) center. You can use a brush to make it a tear drop shape along the bottom edge of the eye (pupil).
  5. To the side portions on the peacock eye apply 3 coats of SC-97 Can’t-elope using CB-110 Liner. Completely load the brush to where the color is almost dripping off.
  6. Use CB-110 Liner loaded to where the color is almost dripping off the brush to apply 3 coats of SC-27 Sour Apple to the feather’s tear drop portions of the design. Also paint in the feather stripes that trail up and embrace along the peacock eye.
  7. Apply heavy dots of SC-32 Bluebeard along the lower tier on the rim of the plate. This may need to be done twice. Then apply heavy dots of SC-11 Blue Yonder above the previous dots. Along the rim of the plate apply heavy dots of SC-97 Can’t-elope.
  8. Fill the AC-219 Designer Bottle with Metal Tip with SW-303 Manganese Wash. Apply a line of Manganese Wash using the pattern as your guide. Detail the pattern with the Manganese Wash. A thicker line down the shaft of the feather up to the eye. Try to keep the center vein on the feather as straight as possible. The lines of color should be heavier along the center vein. The detail lines around the peacock eye and side feathers can be lighter/thinner. Detail the top rim of the plate with a fine line also. Empty and wash the bottle and tip after use.
  9. Fill the AC-219 Designer Bottle and the metal tip with SW-401 Light Flux. Make scallop half loops over and around the dots of Bluebeard and Blue Yonder along the rim of the plate. Let dry.
  10. Apply 2 coats of SW-173 Amber Quartz over the front and back of plate excluding the foot and inner portion of the foot. Apply and extra coat of glaze to the back of the plate keeping it about ½” from the foot.
  11. Wipe off any glaze from the foot of the plate before firing using a moistened Synthetic Sponge. This piece sits flat on the kiln shelf requiring no glaze be on the foot of the plate.
  12. Place the plate fully on a kiln shelf and Fire to Shelf Cone 6 (mid-range) with a 10 min hold.

Supplies

Form

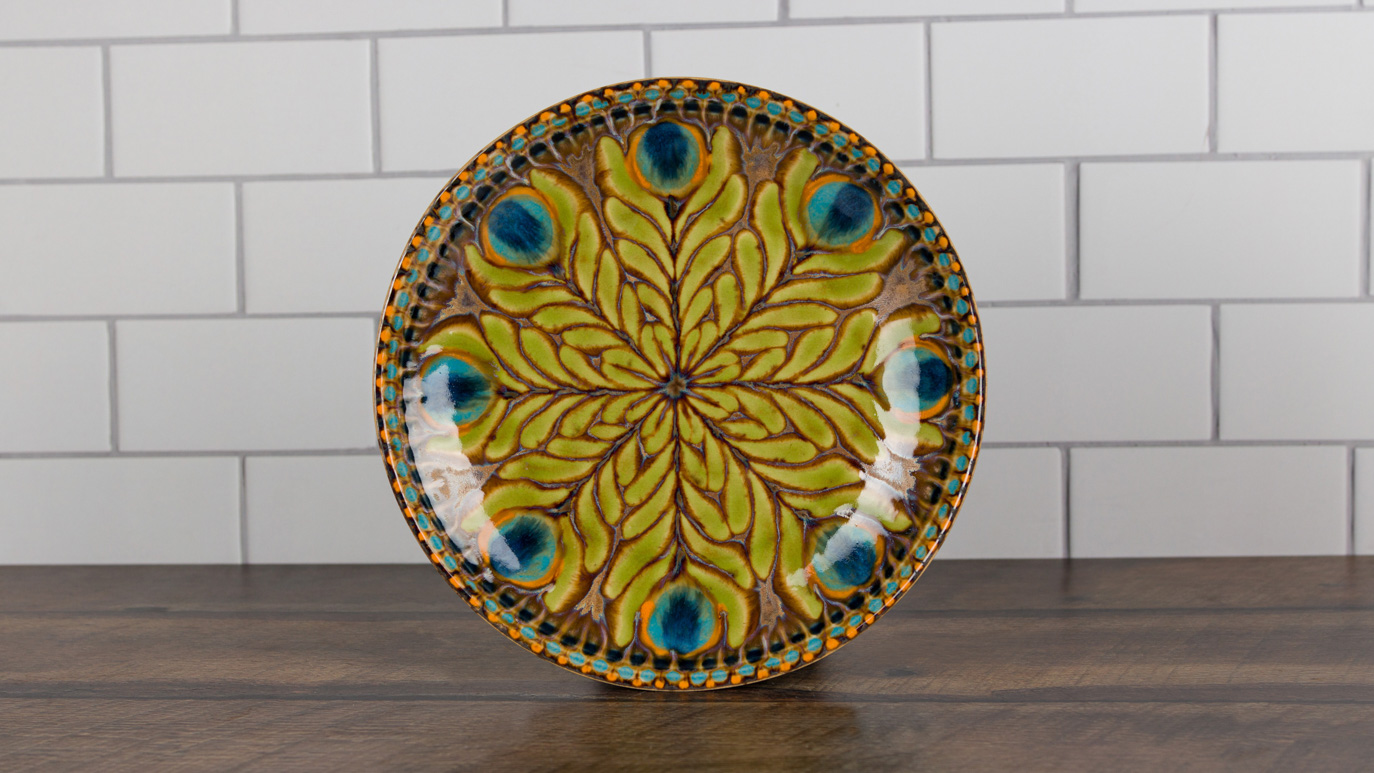
  • SB-104 Rimmed Dinner Plate

Colors

  • SC-11 Blue Yonder
  • SC-27 Sour Apple
  • SC-32 Bluebeard
  • SC-97 Can’t-elope
  • SW-173 Amber Quart
  • SW-303 Manganese Wash
  • SW-401 Light Flux

Decorating Accessories

  • CB-110 Liner
  • SW-604 Soft Fan
  • AC-230 Clay Carbon
  • AC-219 Detail bottle with metal Tip

Miscellaneous Accessories

  • Sponge
  • Water
  • Pencil
  • Scissors
  • ½ “Sponge on a Stick
  • 1 ¼ “Sponge on a Stick
  • Pattern
Top