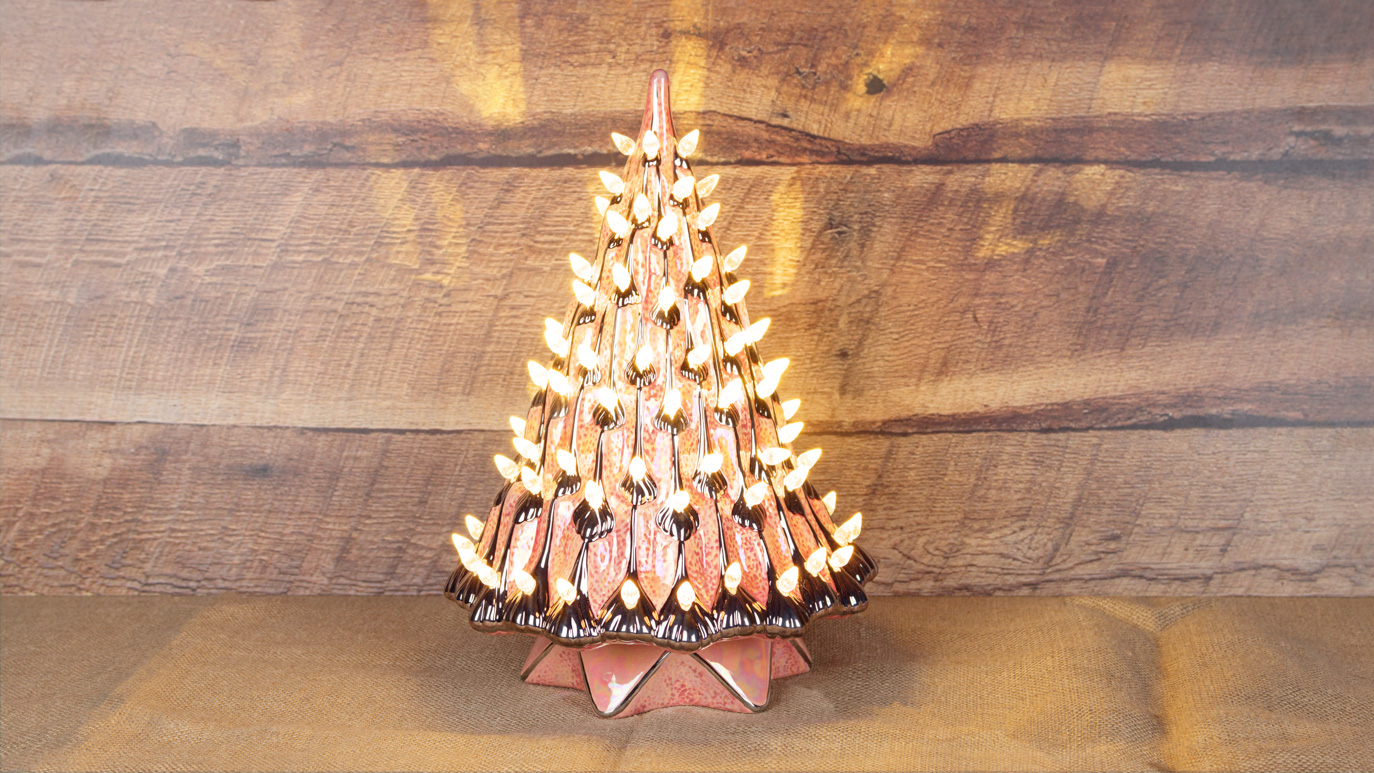
Pink and White Gold Retro Tree

Designer: Elizabeth Carey

Share

Instructions

  1. Pour CD048+ Retro Tree mold ¼” thick. Refer to casting instructions.
  2. Once it is firm enough to handle, use the sponge to smooth down casting lines.
  3. Use the ¼” punch to make holes for the lights.
  4. Use a damp sponge to smooth down any rough edges.
  5. Fire to cone 04.
  6. Using the Soft Fan with SC-18 Rosey Posey, apply 1 coat to the outside of the tree and base. Use a damp sponge to remove most of the glaze, leaving it only in the crevices.
  7. Using the Soft Fan with FN-209 Floral Pink, apply 3 coats to the outside of the tree and base. Allow glaze to dry between coats.
  8. After the piece is dry, make sure to clean out any glaze in the holes.
  9. Stilt and fire to cone 06.
  10. Using the Liner and Filbert with OG802 White Gold, apply 1 even coat to each of the smooth “drips” on the tree. Make a line going around base.
  11. Fire to cone 018.
  12. Using the Shader with OG803 MOP Brush-On, apply 1 coat to the tree and base. Try to avoid the white gold.
  13. Fire to cone 020.
  14. Glue the swirl lights into the holes using epoxy.
  15. Assemble the light kit and attach the light to the base.

Supplies

Form

  • CD048+ Retro Tree

Colors

  • FN-209 Floral Pink
  • SC-18 Rosey Posey
  • OG802 White Gold
  • OG803 MOP Brush-On

Decorating Accessories

  • RB-144 #4 Soft Fan
  • OB-901W #0 Liner Silver Overglaze Brush
  • OB-901 ¼ Shader Mother of Pearl Brush
  • OB-916W #6 Filbert Silver Overglaze Brush

Miscellaneous Accessories

  • Casting instructions
  • Sponge
  • Water
  • ¼” circle punch
  • Light Kit
  • Clear Medium Twist Lights
  • Epoxy
Top