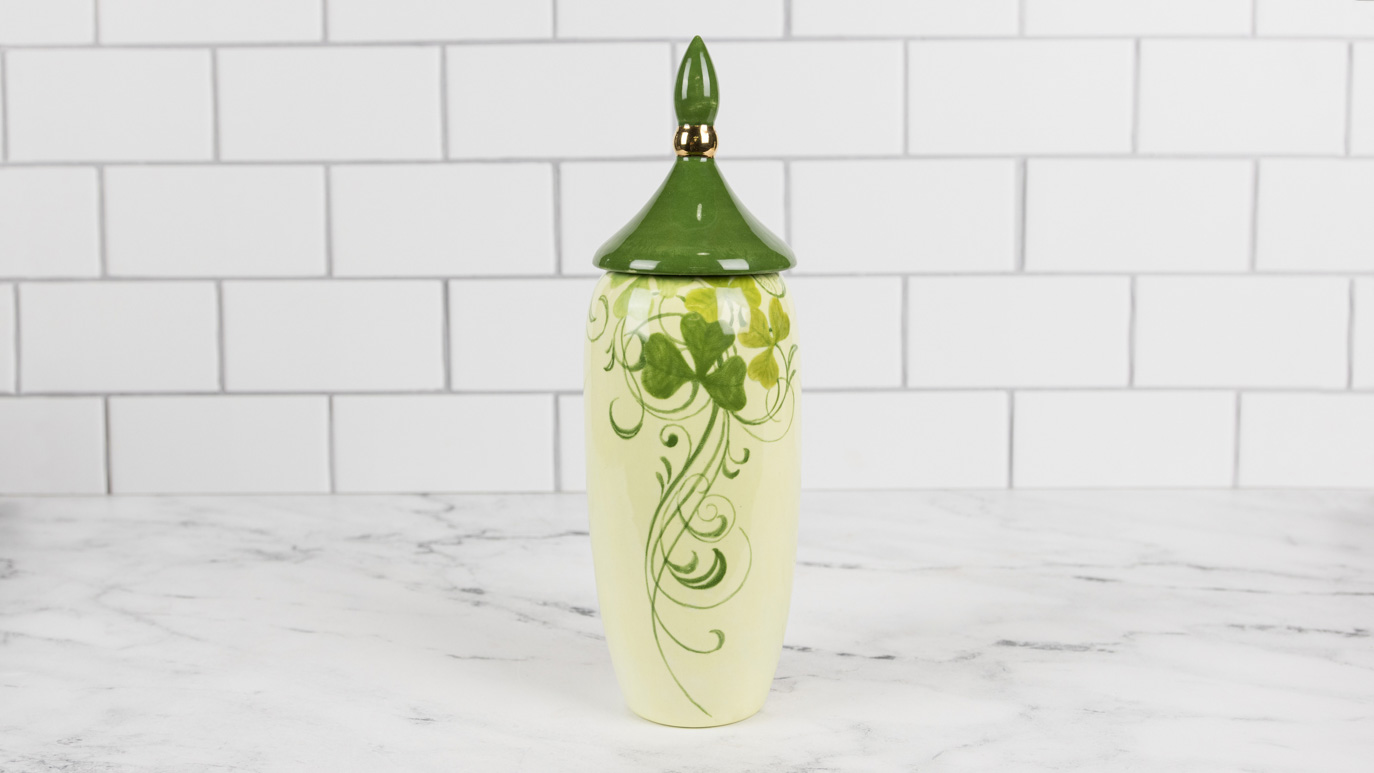
Shamrock Vase

Designer: William Pulse

Share

Instructions

  1. Use the X-Acto Knife to cut off the neck to the to the leather hard greenware vase. The opening should be about 2 ½” in diameter to accommodate the lid. Check to make sure the lid fits loosely. Let dry.
  2. Clean the vase using a Clean Up Tool to remove the seams and neck of the vase. Use the Green Grit Cloth to sand the seam lines further. Use a dampened Synthetic Sponge to remove any dust from the ware. Check the inside of the vase for debris.
  3. Fire the vase and lid to Shelf Cone 03-04.
  4. Use a dampened Synthetic Sponge to wipe down the ware and check the inside for any debris.
  5. In a Plastic Cup thin some FN-053 Mint with water to a melted ice cream consistency. Pour the thinned glaze into the vase. While working quickly, rotate the vase to completely cover the inside of the vase. Pour out excess glaze and invert to dry. Repeat this for the lid as well.
  6. Apply 3 coats of FN-053 Mint to the outside of the vase and lid using CB-604 Soft Fan. Let dry.
  7. Trace the design onto the ware using AC-230 Clay Carbon. The pattern may need to have darts cut along the edge to accommodate the shape of the ware. Use the Blue Masking Tape to keep the pattern in place while tracing.
  8. Fill in the top left shamrock with 2-3 coats of SC-78 Lime Light using CB-404 Pointed Round. To the right of that shamrock (middle top), fill it in with SC- 27 Sour Apple as before. Next shamrock to the far right is SC-52 Toad-ily Green. Center large shamrock is SC-26 Green Thumb.
  9. Detail the pattern with 1-2 coats of slightly thinned SC-8 Just Froggy using CB-110 Liner. Keep the lines as fine as possible. The lines should have a nice even flow to them.
  10. The veins in the shamrocks are done with thinned SC-8 Just Froggy as well. The large center shamrock is detailed with thicker SC-8 Just Froggy.
  11. To the lid, apply 2 coats of SC-8 Just Froggy to the top finial portion and lower section of the lid. Do not paint in the middle bead of the lid. This will allow you to more easily apply the Gold Luster later.
  12. Stilt and Fire the pieces to Shelf Cone 05-06.
  13. Place some OG801 Bright Gold Luster onto a tile to air thicken slightly before applying. Apply 1 even coat of OG801 Detail Gold Luster to the middle bead on the lid using OB-916G #6 Filbert Brush reserved for Gold Luster only.  Clean brush in OA901 Essence reserved for Gold Luster.
  14. Stilt and Fire the lid to Shelf Cone 018.

Supplies

Form

  • CD-910 Vase, large, Wet greenware
  • CD-1445A Small Finial Jar, Lid only, greenware

Colors

  • FN-053 Mint
  • SC-8 Just Froggy
  • SC-26 Green Thumb
  • SC-27 Sour Apple
  • SC-52 Toad-ily Green
  • SC-78 Lime Light
  • OG801 Bright Gold Luster
  • OA901 Essence


Decorating Accessories

  • CB-110 Liner
  • CB-404 Pointed Round
  • CB-604 Soft Fan
  • OB-916G #6 Filbert Brush (reserved for gold luster only)
  • AC-230 Clay Carbon

Miscellaneous Accessories

  • Water
  • Pencil
  • Scissors
  • Tile or Pallet
  • X-Acto Knife
  • Clean Up Tool
  • Green Grit Cloth/Pad
  • Synthetic Sponge
  • Plastic Cup
  • Blue Masking Tape
  • Pattern


Top