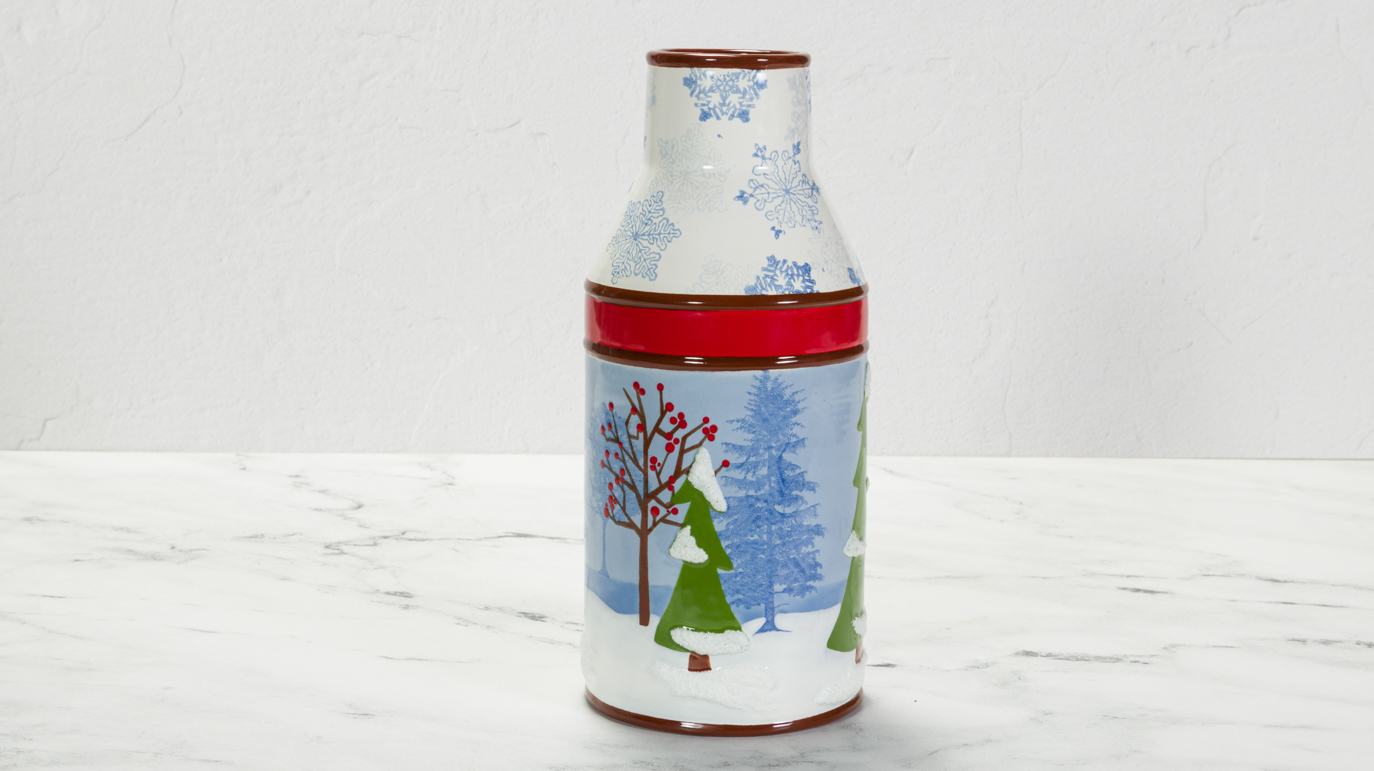
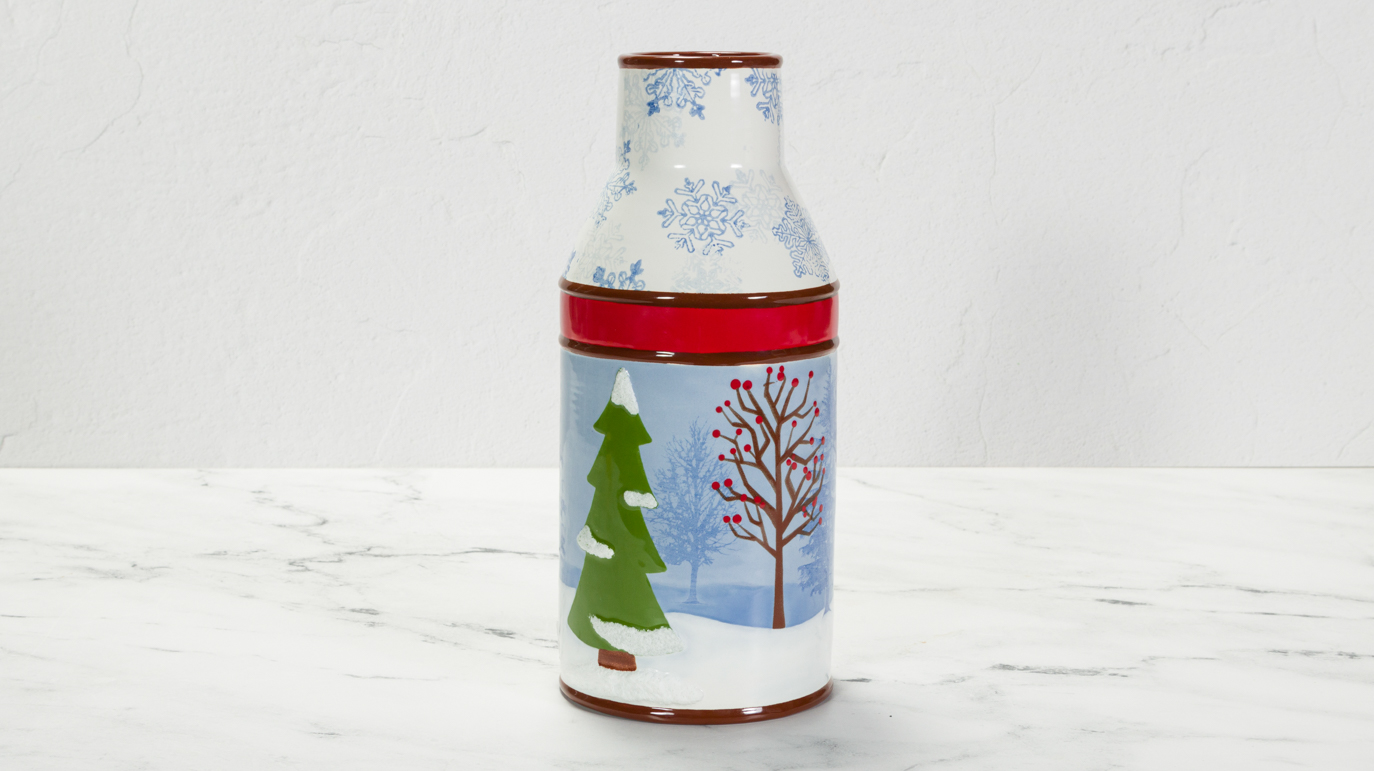
Winter Trees Milk Can

Designer: Carmen Allen

Share

Instructions

  1. Begin with properly fired cone 04 earthenware bisque. Moisten a clean sponge and wipe bisque to remove any dust.
  2. Pour about an ounce or two of glaze into a cup/palette and thin with water at an approximate ratio of 1 part water to 2 parts glaze. Roll this glaze mixture inside of the vase to coat. Drain and allow to dry upside down.
  3. Use a fan brush to apply 3 coats of SC-65 Peri-twinkle to the body section of the vase and 2 heavy coats of SC-16 Cotton Tail to the top section of the vase.
  4. Mix SC-76 Cara-bein Blue and AC-310 Silkscreen medium together using a palette knife until it is the consistency of peanut butter.
  5. Select the tree screens that you will be using, we used a pine tree and 2 different smaller trees. We applied the smallest tree higher up on the bottle to create depth in the design. Apply a slightly larger tree lower and leave the “closest” trees room to be hand painted lowest on the vase.
  6. Use your finger to press the product through the silkscreens. Apply a couple of the tree designs multiple times. If you move quickly, you can screen multiple transfers without washing the screen. If the transfer quality seems poor, you may need to thin the mixture more with glaze or rinse and dry the screen before making additional transfers.
  7. Transfer the hand painted tree designs using the AC-230 Clay Carbon paper or draw them on lightly with a pencil. When using the transfer paper, be sure that the background glaze is completely dry and use a pen for the best transfer quality. The transfer paper is one sided so check before transferring!
  8. Use a script liner to apply 2 coats of CN182 Bright Kiwi to the pine trees and use a mini liner to apply 2 coats of CN232 Bright Briarwood to the berry trees and the bases of the pine trees.
  9. Use a script liner to apply 3 coats of SC-30 Blue Dawn to create the background landscape and apply 2 heavy coats of SC-16 Cotton Tail to create the foreground landscape.
  10. Use the back end of a brush to dip and dot CN074 Really Red to add berries to the foreground trees.
  11. Use a Sponge-on-a-Stick to apply SC-65 Peri-twinkle to the ST-102 Snow Stamp. Be sure to dab extra glaze off of the sponge and apply the glaze to a stamp on a flat surface. We applied 1 large snowflake at a time for precise placement.
  12. Repeat previous step using SC-76 Cara-bein Blue.
  13. Use a script liner to apply 2 coats of CN074 Really Red to the band in the center of the vase and the inside of the neck.
  14. Apply masking tape along the edges of the brims and apply 2 coats of CN232 Bright Briarwood. Allow to set until tacky and remove the tape.
  15. Use a script Liner to apply 1 heavy coat of SY546 Snow to the trees and around the bases.
  16. Allow to dry completely.
  17. Stilt and fire to cone 06.

Supplies

Form

  • MB-1527 Milk Can Vase

Colors

Mayco

  • SC-16 Cotton Tail
  • SC-30 Blue Dawn
  • SC-65 Peri-twinkle
  • SC-76 Cara-bein Blue
  • S2101 Crystal Clear Brushing

Duncan

  • CN074 Really Red
  • CN182 Bright Kiwi
  • CN232 Bright Briarwood
  • SY546 Snow

Decorating Accessories

  • AC-230 Clay Carbon Paper
  • AC-310 Silkscreen Medium
  • ST-102 Snow Stamp
  • DSS-0110 Botanical – Trees
  • RB-144 #4 Soft Fan
  • CB-106 #6 Script Liner
  • CB-110 #10/0 Mini Liner

Miscellaneous Accessories

  • Palette Knife
  • Masking Tape
  • Sponge-on -a-Stick
Top