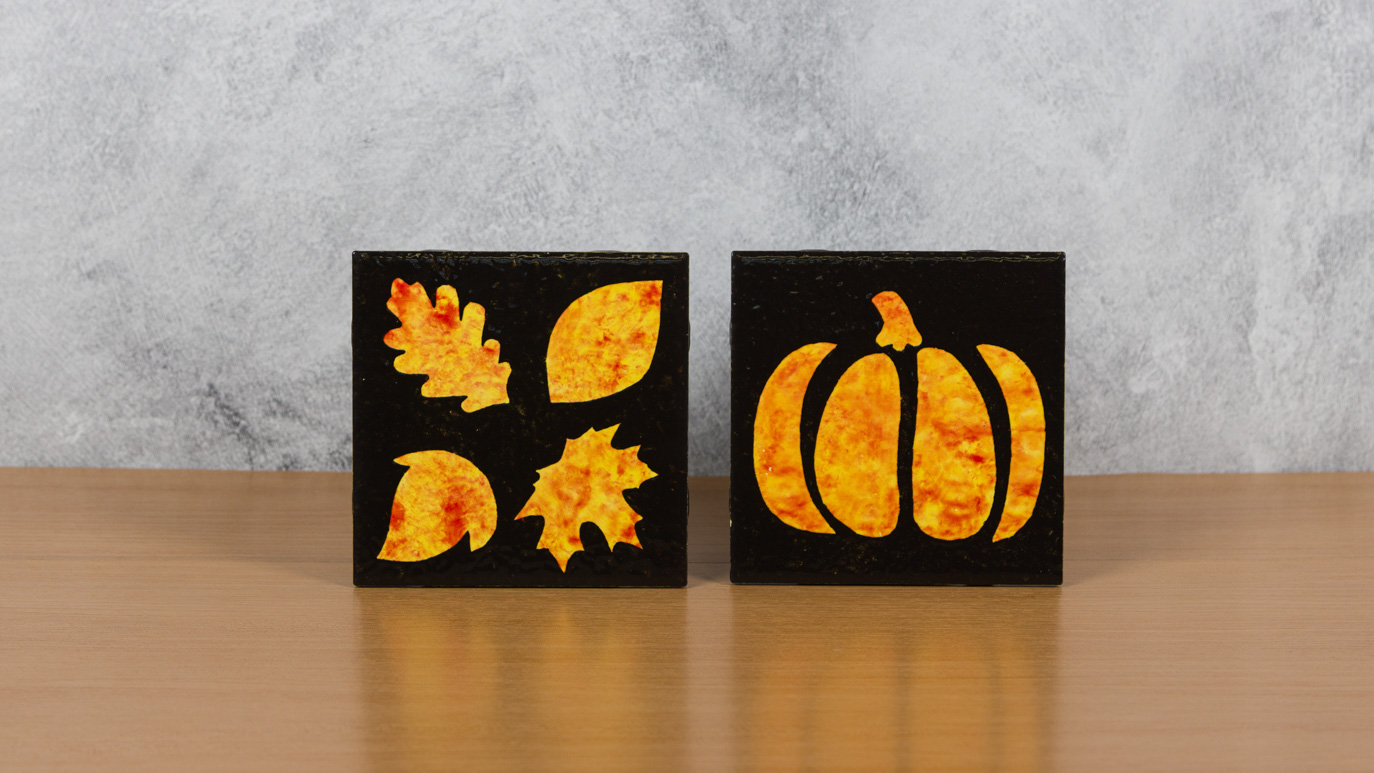
Begin with properly fired shelf cone 04 bisque. Moisten a clean sponge and wipe bisque to remove any dust.
Cut out the pattern on the outer edge of each section of the pumpkin and the outer edge of each leaf. You can also use your own design.
Place some SC-6 Sunkissed and SC-74 Hot Tamale on a palette.
Take a piece of Plastic Wrap and pull the ends of the Plastic Wrap corner to corner to create a puff like pouncer. You will need to this only once for the project, but is used for all the colors.
Pick up some of SC-6 Sunkissed with the Plastic Wrap, pounce the SC-6 Sunkissed on to the tile moving across the tile till there is no bisque showing. While the Sunkissed is still wet, pick up some SC-74 Hot Tamale on the pouncer then dab onto the tile evenly creating a blend of the two colors.
While the color is still wet (this is a must) place the pattern pieces onto the tile lightly pressing them down.
Take a piece of paper towel and lay on top of the tile them press to make the pattern stick to the color and absorb any excess color.
Place some SC-15 Tuxedo onto the palette. Using the same piece of Plastic Wrap, pounce the SC-15 Tuxedo over the top and sides of the tile. This will create a hammered look to the final glaze finish.
Before the glaze dries, carefully remove the paper pattern. Allow to dry!