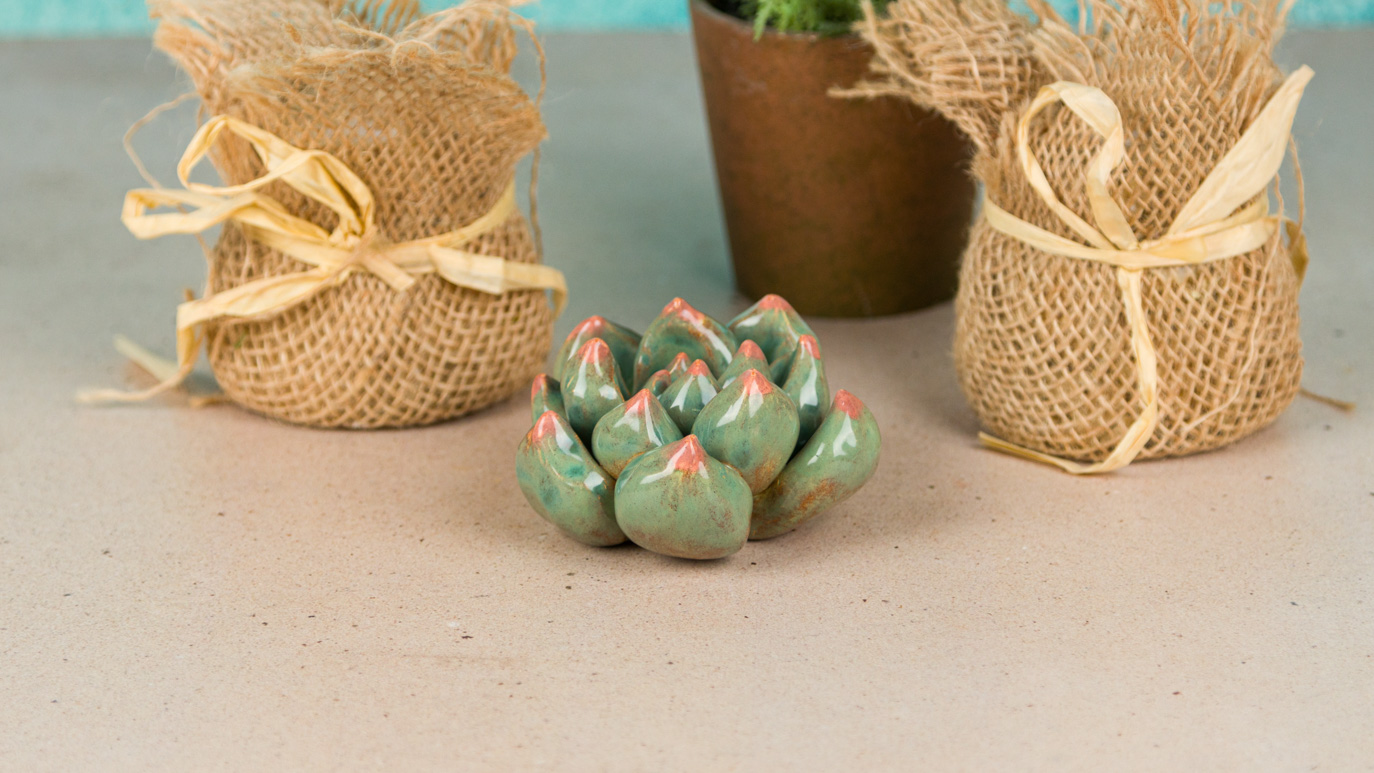
Roll a variety of clay balls from 3/4ths of the clay. Each ball should be about half an inch to one inch in diameter.
Pinch or roll one side of each ball into a cone shape to create clay teardrop shapes.
Press your thumb into the thick part of the tear drop and drag out to the tip to create an indent and slight bend in the teardrop shape.
Repeat step 4 on all your balls of clay.
For the base of the succulent, roll the remaining 1/4th of clay into a ball and press flat.
Scratch and attach the largest of the indented teardrop shapes to the outside of your base circle.
Smooth the clay from each attached teardrop into the base clay.
After your outside ring of teardrops have been attached, begin with the next row repeating steps 7 and 8.
Continue working your way around the base circle, attaching the next smallest teardrop until you hit the center of the base, attaching your smallest piece there. 11. Allow the clay to fully dry. 12. Bisque fire to cone 04.
Begin with a properly bisque fired clay piece. 2. Clean with a damp sponge if needed.
Using a fan brush, apply three coats of EL 131 to the whole piece, allowing each coat to dry in between the next.
Use a detail liner brush to help poke glaze down in the tight to reach places in the succulent.
Drag a damp sponge across the top of the succulent, wiping the glaze off the tips of the “leaves” as you go.
Using a script liner brush, apply three coats of EL127 to the wiped off tips of the succulent, allowing your colors to overlap.