Research culinary treats that are typically cut into slices. (Ex. Cheese, pie, cake, etc…) Specifically, what that food looks like once it’s cut away from the larger piece.
Cut a rectangle of cardstock or cardboard 12”x 4”
Fold at the halfway point (6”).
Decide how thick or thin you want your slice to be by how wide the angle is after folding, and measure between the two end pieces (ours is 3”).
Cut a rectangle from cardstock that is your endpiece measurement by your width (ours is 3”x4”).
Roll out a slab of clay about ¼” thick.
Compress the slab with a plastic card.
Lay your rectangle patterns on the slab and trace.
Remove the pattern and cut out the pieces with a toothpick.
Take your 12” long rectangle of clay and fold in half to form a V.
Slip and score the two end pieces to the smaller rectangle.
Take two thin coils and press into the corners to reinforce the structure.
Take the triangle of walls and set on top of the remainder of the clay slab.
Trace the outside edge of the walls around the triangle shape two different times and cut. One triangle will be the base, the other the lid.
Slip and score the base to the bottom of the walls.
Reinforce with coils
To make a lid, run coils along the face of the last triangle, inside where the walls will sit when it’s flipped over. Double check to make sure the lid coils will fit inside the box.
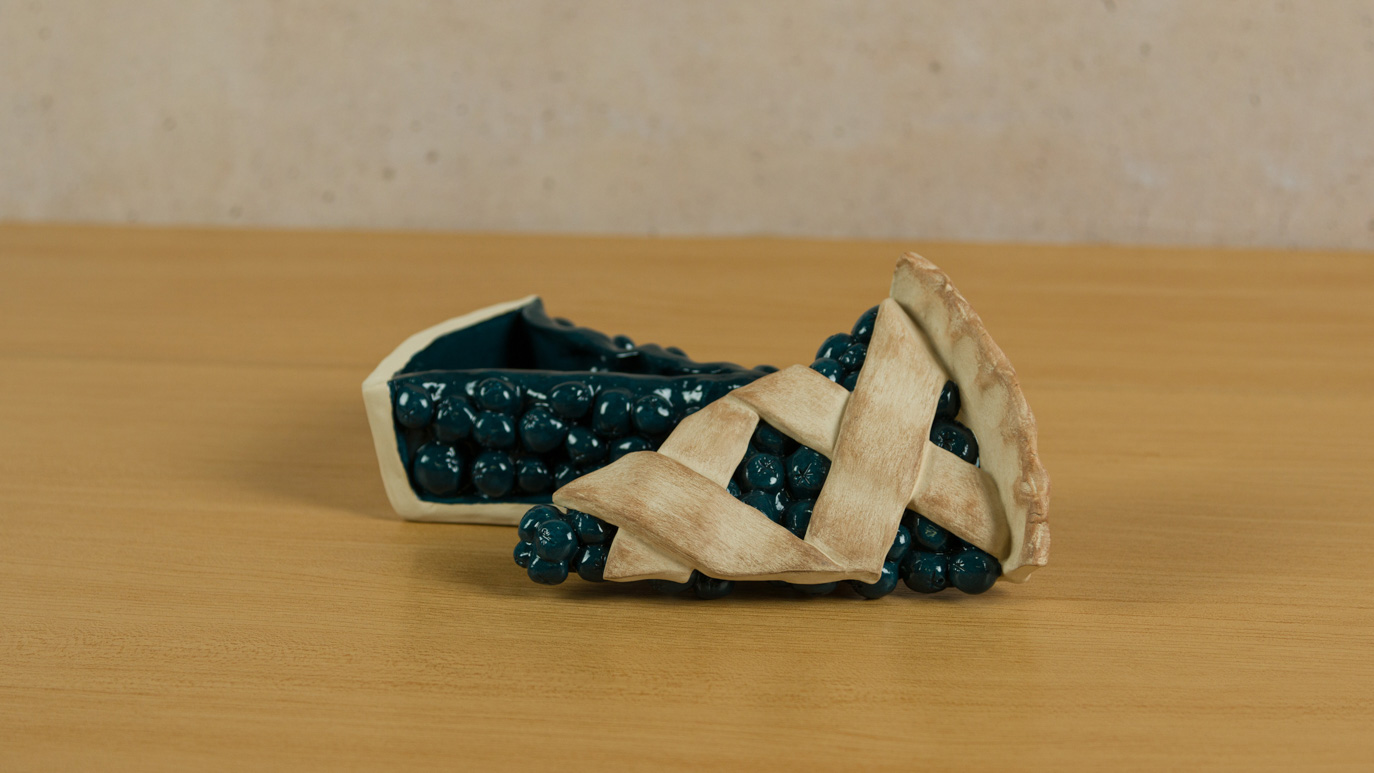
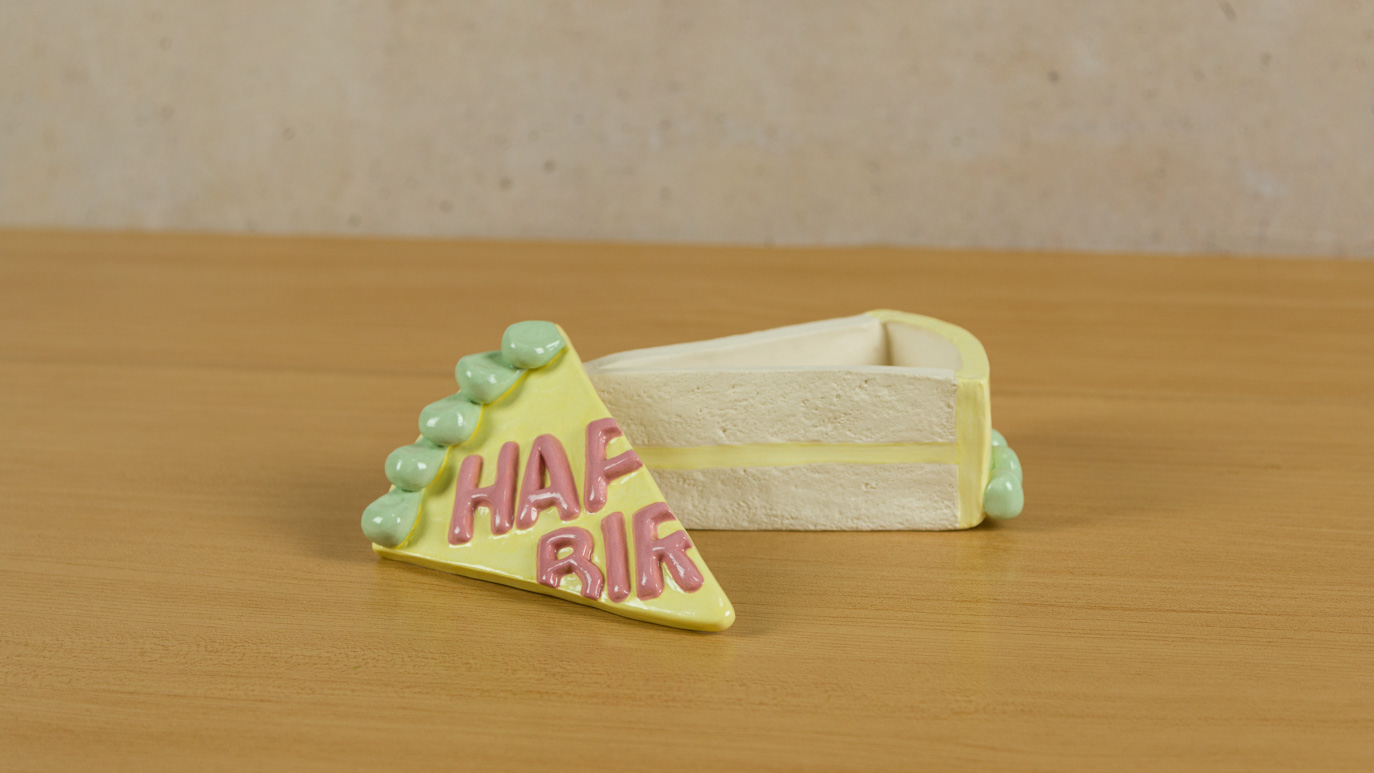
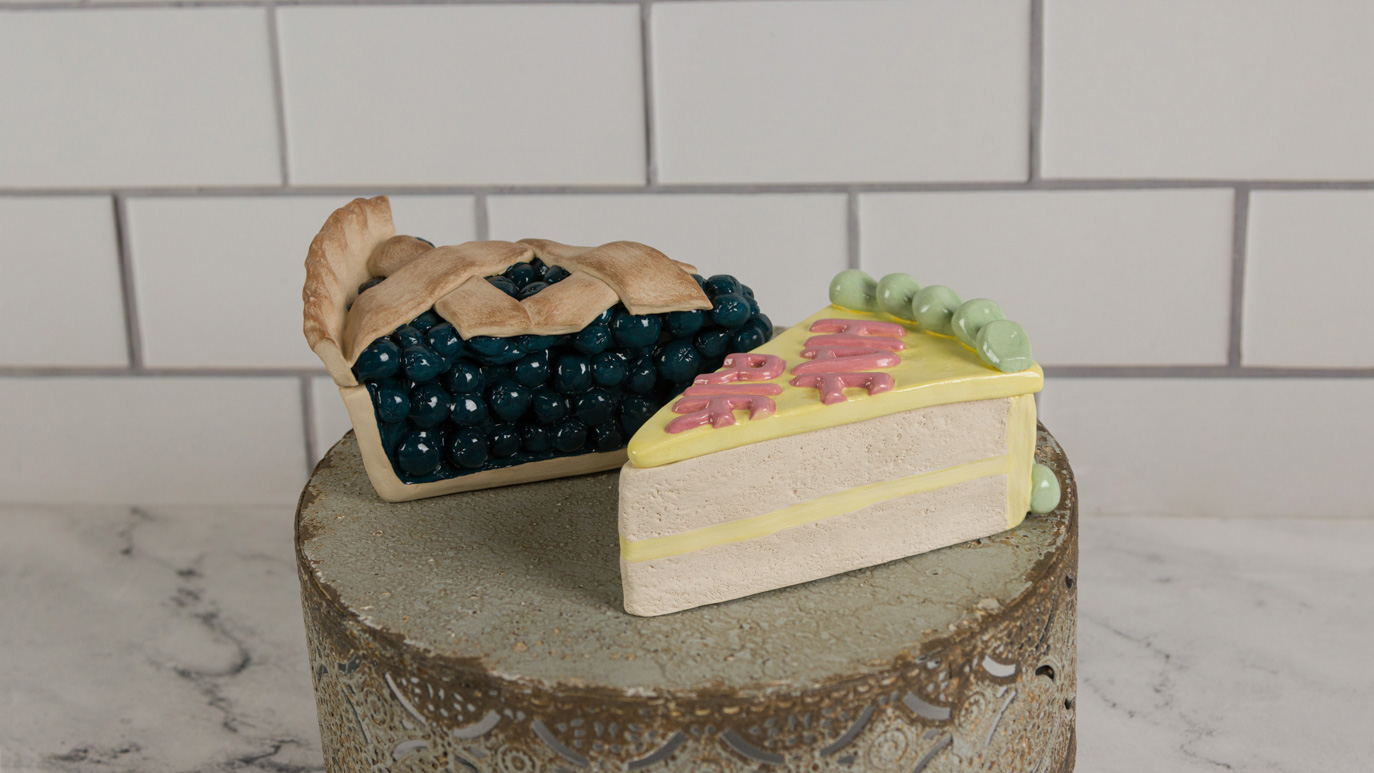
Using coil building, carving, and sculptural effects, add the details that will make your treat look realistic.
Pay attention to the textures on things like cake, crust, fillings, icing, etc…
Use Mayco’s Fundamentals Underglaze directly on greenware to color your piece.
Bisque fire to shelf cone 04.
Clear glaze any areas that need to be shiny. Add any other lowfire glazes you’d like to use during this step.